Yearly Archives: 2009

Chana masala without those super-pricy spice packets

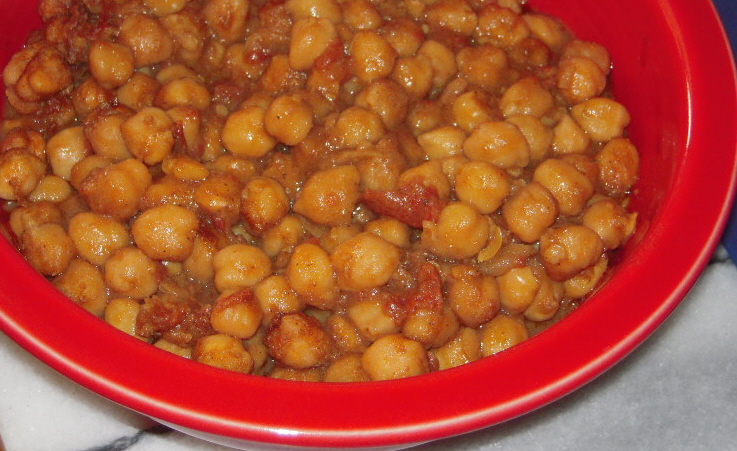
Chana masala

Chana masala

There is no reason you need to rely on those spice and spice paste packets enrobed in colorful little cardboard sleeves that have flooded the market in recent years when making Indian dishes.  These packets, produced by American companies mainly for American cooks, are often good for only one meal – and won’t even give you that, if you have a large family.  Most of the ones I have tried (and there are at least three companies that I know of) are perfectly fine in terms of results – no complaints there.  The problem is the price, which ranges from outrageous to high for what you are really getting.

If you don’t want to be bothered by mixing your own spices, or with making curry pastes, buy these items in Asian/Indian markets in quantity once you have the technique down.  There are blends produced and used in India but also packed for export, many of which have instructions in English, though asking the storekeeper for what you want is your best bet, since many shops sell spice mix in bulk.

One brand I like for chana masala is MDH, which is sold in boxes of 100 grams (3.5 ounces), which gives you enough for five batches (or three, for larger families).  Some regular supermarkets in the Bay Area carry this for about $3, which is handy.  It’s much cheaper in Indian groceries, though.  This stuff makes an excellent chana masala!
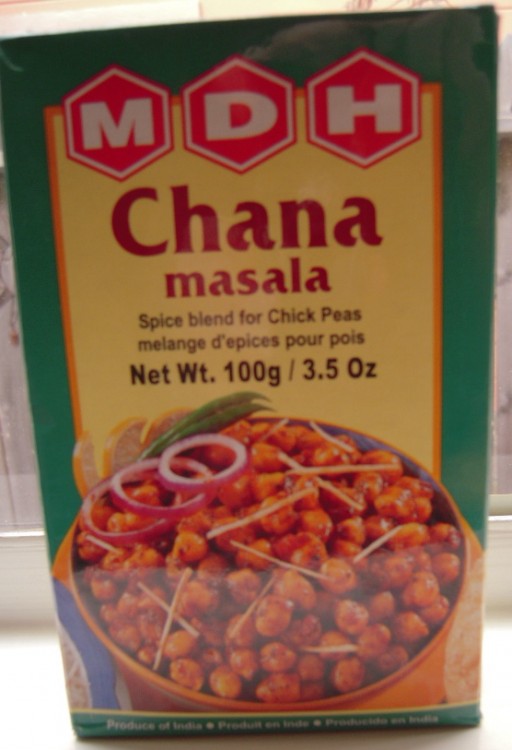
MDH spice blend for chana masala

If you want the recipe from the box, here it is:

MDH’s Chana Masala

“Soak 200g [a tad more than 7 ounces] chick peas overnight with extra water.  Strain.  In a large pan heat 50g cooking oil.  Fry 120g [1 3/4 ounces] chopped red onions till golden brown.  Add two chopped tomatoes (120g) [4 1/4 ounces]and stir.  Add 20g [a bit less than 3/4 ounce] chana masala, 1 tspn. salt, and chick peas.  Stir for 5 minutes then add 800ml [27 ounces] fresh water.  Mix [in] 1/2 tspn. baking soda.  Bring to boil & cover.  Simmer for 40 min on low heat.  Alternately pressure cook for 20 min. with 400ml [just under 14 ounces] water and 1/2 tspn. baking soda.  Read cooking instructions on chick peas pack also.”

My notes:
1)  The stovetop method may need way more cooking time than 40 minutes
2)  You must soak your own chick peas!  Do not do this with canned chick peas!
3)  Do not omit the baking soda because you think it’s odd!
4)  I have no idea what the last sentence means; I ignore it

Eisbein

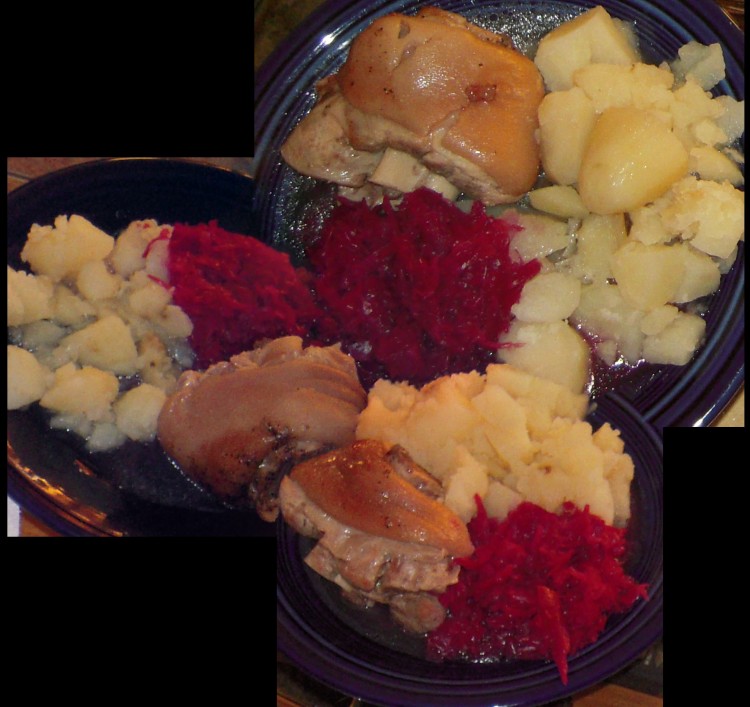
A panorama of Eisbein

Being no stranger to all edible parts of an animal and coming from German farm stock via my maternal grandmother, I like to make Eisbein (pork hocks) once every couple of years.

There are many recipes for this traditional German dish – called Schweinehaxe in Bavaria, BTW.  I’ve had them braised (which is how my family does it), roasted, and first boiled and then roasted.  If you roast them you’ll get a crispy skin, which yields a more visually-pleasing result, but I don’t care much about that.  I only care about what I want to have on that day – what kind of texture I crave.  Speaking of texture, Eisbein is not for everyone because you are dealing with lots of skin, fat and connective tissue.  Saturated fat content aside, if you never developed an affinity for these textures, then stay away.  If you are the kind of person who cuts every tiny piece of fat and gristle off a steak, stay away.  If your squeamishness is limited to wobbly skin, then find a good recipe that involves roasting.  On the flip-side, if you love Shanghai-style dishes that involve pork belly, you should like this dish, though it has a more limited flavor profile.  If you like oxtails, then no problem.

Family-style Eisbein

8 1-lb fresh pork hocks (these can come in sizes from small to humongous; clearly you’ll need to decide how many you need, but they make great leftovers, and I like to use a heavy-guage dutch oven, so I use enough hocks to prevent them from swimming in too much liquid )
1 gallon cold water (approximately – you need to cover the hocks to brine them)
3 T. kosher salt
1 t. black pepper
2 T. white vinegar
2 bay leaves
Water to cover

1)  Place the 1 gallon of water in a tall plastic container with 2 T. of the salt to create a brine; add hocks and cover
2)  Place in refrigerator and allow to brine overnight
3)  Drain hocks and place in dutch oven with remaining salt, pepper, vinegar and bay leaves
4)  Add water so that hocks are 4/5 covered
5)  Bring to boil and them simmer for about two hours – checking every now and then to see how they are doing, and to turn them over, if needed, without losing the skin, which may stick to the pot!  If you have 1-lb hocks, they should be done.  Pierce with a sharp knife; you’ll want them nice and tender but not mushy.  Large hocks will need to continue to simmer.
6)  Remove (carefully) with tongs and serve

Traditionally, this is served with boiled potatoes and sauerkraut*, but I had red cabbage on hand the day I made the ones in the photo, and this works well, too.

*Sauerkraut cannot be served right out of the can or jar!  If you want to make it the traditional way, then you need to rinse it well several times and cook it down with some peeled, grated potatoes.  Grate them right into the sauerkraut — you want the potato water, as well.  Use one average-sized potato for each quart of kraut and about a cup of water.  Cook it down until it’s a little gummy (which means the potatoes have cooked and released their starch).  Note that “real” sauerkraut is fermented using salt, and is the one German cooks still use.  Vinegar, used to quick-brine most commercially-produced sauerkraut in the US, results in an undesirable flavor and must be gotten rid of to the extent possible.

Final note:  If you wish to be frugal, mix unused cooking juices with a little white vinegar, pour into a plastic container over diced hock leftovers mixed with chopped pickles (you can even add some diced egg), via a cheese cloth-lined strainer, cool, cover and then place in fridge.  Next day, peel off the fat and you’ll have some nice headcheese.  This is why I don’t want an overabundance of cooking liquid, which would dilute the gelatin from the hocks.

Citrus in containers

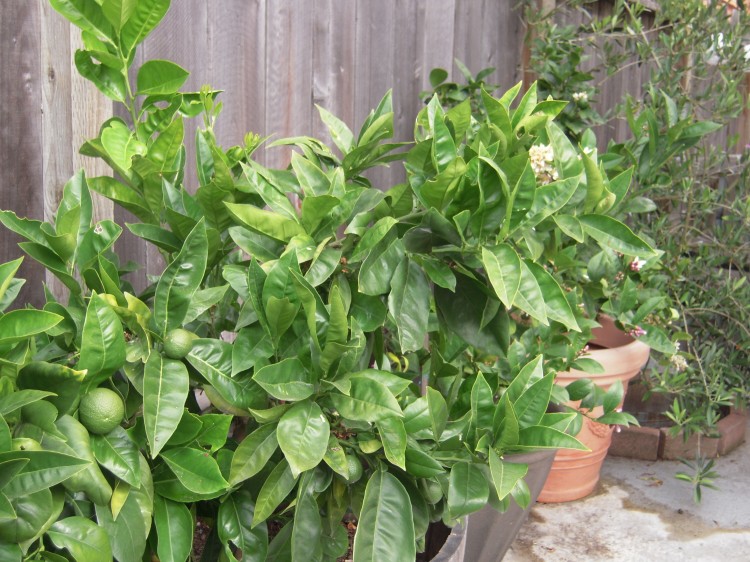
citrus trees in my backyard in large containers

Today I busied myself with citrus upkeep.  I have three orange trees – one semi-dwarf and one standard planted in my side yard, and one dwarf in a container; two dwarf lime trees in containers; two dwarf lemon trees, one in a container and one in the ground; and one dwarf calamansi in the ground.

My backyard is a skinny, L-shaped affair with no grass, courtesy of this being a corner lot and the stupidity of former owners, respectively.  Given the lack of actual ground to plant things in, I have an extensive container garden.  Containers offer a number of challenges, but for citrus trees these are minimal, provided you have the right kind of container with the proper drainage and you keep on top of things, namely fertilizer, pruning and the correct amount of water.  Use of the right soil from the get-go helps.  I employ a good potting soil with some peat moss and sand added.  Using half cactus mix with potting soil has also worked for me.  You want a soil that is a bit lighter than potting soil and one that will hold moisture but not be overly wet or muddy after deep watering.  Be sure you use a container that is wide enough and deep enough for the roots.  You can plant a dwarf tree in a half-wine barrel and it will never outgrow it, and you can keep a semi-dwarf and even standard tree in them for a few years, if you need to, but I don’t like moving these guys unless I have to.  I moved my Eureka lemon tree from a pot at my old place to the side yard of my current house in early 2007, and it only recovered in the last few months with quite a bit of TLC.

Drainage is key.  Make sure you provide a bed of several inches of pea gravel, decent drainage holes that you cover with mesh before you put the gravel in (this keeps small pests out and soil in) and situate the tree according to the directions provided; many require some root exposure and a watering trough around the tree.

Citrus trees should be fed a diet that includes nitrogen and phosphorus.  Personally, I do not apply as much citrus fertilizer as manufacturers recommend to ensure that my trees are not getting more nitrogen than is good for them (it would adversely affect the pH) and apply chelated iron when I see signs of iron deficiency, such as yellowing leaves.  I fertilize every two months or so, year-round.  Basically you need to look at your trees on a regular basis to gauge what you should be doing.  Bottom line is that the pH of your soil should be between 6 and 8, with numerous agricultural sources indicating an optimal range of 5.5 – 6.5.  If you are having problems with your trees the first thing you should do is check the pH!

In terms of pruning, if you do nothing else, make sure you remove suckers growing below the graftline on dwarf varieties.  If you have dead branches, trim those off.  You should not have many of them, but I had plenty on the lemon tree that I moved.  You are also advised to train dwarf trees to produce better and larger fruit by selecting main growing branches and cutting back others.  I generally do not do this unless the tree is unbalanced, because it’s a trade-off:  I would rather have all the branches with their associated leaves serving as protection from the intense sunlight they are exposed to here.  While sunlight is great for citrus, it can be a problem with young, spindly trees.

My trees produce very well, and I keep them in clusters for pollination.  They are rarely attacked by bugs or disease, and if I have a little problem I take a clipping to my local nursery.  My most challenging trees have been a dwarf Meyer lemon and the calamansi.  The Meyer lemon is not looking as good as my other trees, but it is the newest and may still be recovering.  The calamansi bears a tremendous number of fruit, but they are not as large as I think they should be, and is always suffering from iron deficiency.

I will add one more tree – a kaffir lime; I will then be in good shape.

An easy way to serve buttered corn on the cob

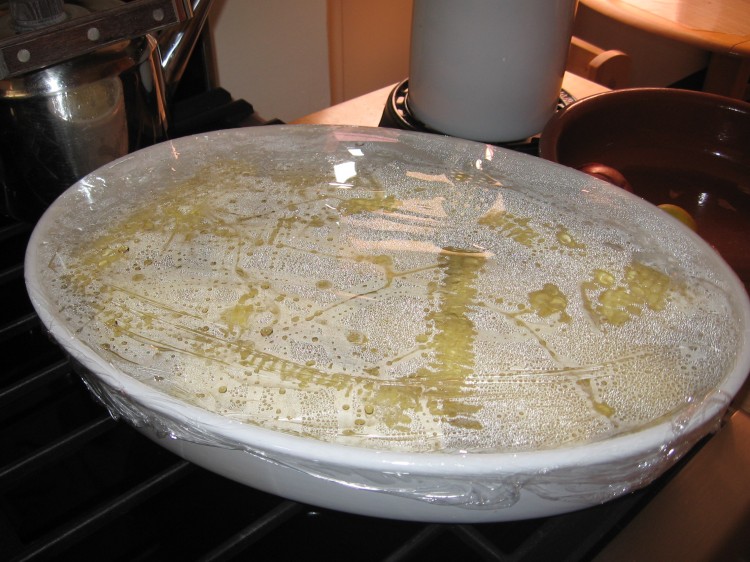
Buttered cobs of corn ready to serve

This may fall under the category of obvious, but I have eaten so many ears of corn at cook-outs the past few years where the butter was served on the side in pats, that I thought I’d give out a couple of tips:

1)  If you want to serve the butter on the side, place an entire stick of butter on a small plate and tell people to set their corn on top of the butter and rotate it until they have the coverage they desire.  Serve the corn with those little forks that get stuck in each end, which will help in the process.  No rolling once a cob has been gnawed, to prevent illness.

2)  Warm a large, deep casserole and toss in whatever quantity of salted butter (or unsalted butter plus a little salt) seems about right.  I use one stick for 8 – 10 ears.  When your corn is finished cooking, place in the casserole in a single layer with the butter and cover well with two layers of plastic wrap.  You want the top of the wrapped container to resemble a drum.  Shake the corn back and forth every few minutes to distribute the butter, which will melt from the heat of the receptacle and the corn, and serve within 20 – 30 minutes.

Pizza at Arinell in Berkeley

Pizza at Arinell in Berkeley CA

Matthew and I had a couple slices of pizza at the only decent New York City-style place in the area, as far as I’m concerned, Arinell (2109 Shattuck Avenue, Berkeley).  They make thin crust Neapolitan pizza topped with simple, high-quality ingredients.  There is a nice zesty sauce and real mozzarella cheese – and not too much of each, allowing the slice to remain rigid when you fold it over part way.  The crust has good flavor, too.  The sum of the parts equals a real East Coast experience when you take that first bite.

Some days they are off a bit, but when they get it right, it is REALLY right.  They sell slices and whole pies.  I cannot speak for any of the toppings, because I don’t bother with those, nor with the Sicilian pizza.

My final gripe is that they got rid of their lunch special.  Now, two plain slices and a drink will set you back over $6.00.  They need to be reminded that this is a good time to offer specials.