Monthly Archives: September 2010

Quick Pickles

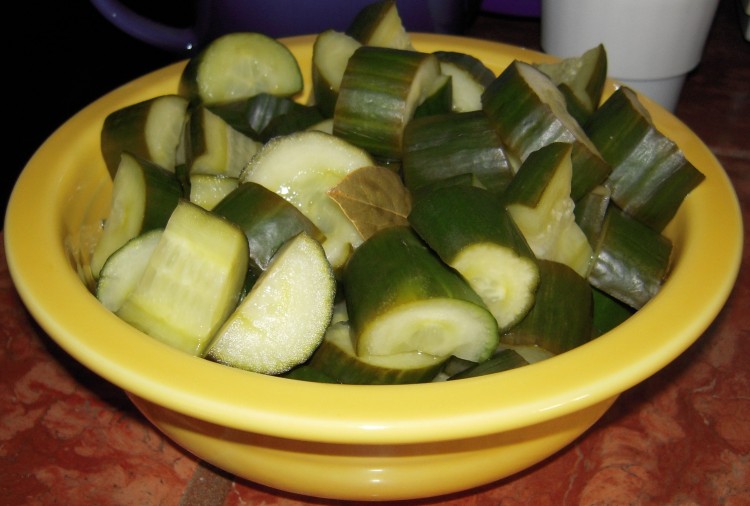
Yellow bowl of quick pickles made from English cukes

I’m sharing this simple little tip for making quick pickles because it’s been as hot as hell here in the Bay Area the last few days and I’m resorting to cool foods to help out.

This always happens.  Much of the US is cruising into fall by this time, with soups, jackets, flaming foliage and pumpkin chais running rampant.  We sit here with a string of 95 degree days.  Hate that.  I don’t care how cool the summer has been overall.  I can’t deal with extreme heat.  The resident akita-chow, Berry, has been miserable, too.

These pickle-like creatures can be made in the morning and served in the evening, and are helpful when you want something to serve with a sandwich or a curry.

Futz with the recipe as you like.  If you want them like Vietnamese cucumber salad (i.e., sweet/sour), use more sugar and only a bit of salt.

Quick Cuke Pickles

1 English cucumber, cut into large chunks – as in the photo (do not peel)
1 cup white vinegar
1 cup water
1/2 cup sugar
2 tablespoons Kosher salt
2 bay leaves
1 teaspoon crushed red pepper (optional)

1).  Place the cuke chunks in a glass or earthenware bowl.
2).  Combine remaining items in a small saucepan and bring to a rolling boil.
3).  Pour liquid over cukes.
4).  Cover with plastic wrap and allow to remain on kitchen counter for 2 hours.
5).  Transfer to fridge and allow to cool for several hours.
6).  Drain and serve.

Roasted Corn with Hazelnut Vinaigrette

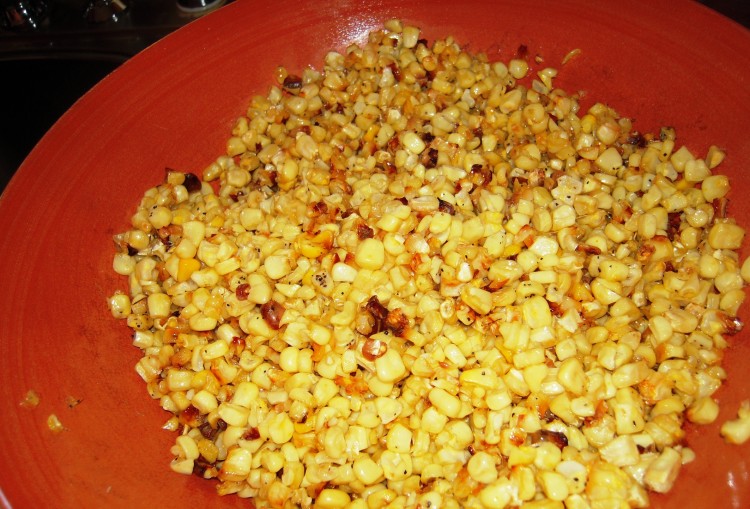
Roasted corn in an earthenware bowl

There were mountains of white corn at Berkeley Bowl West the other day, so I picked up six ears.  I love that they provide receptacles near the corn for shucking then and there.  This helps me keep my green recycling pail from being a third full after one meal.

We’re a little tired of plain old corn on the cob (though we’ll be missing it like mad in about three months), so I thought I’d shear the ears, roast the kernels, and make some kind of side dish.

There is nothing like fresh corn right off the cob.  I have friends who have never taken corn off an ear – and these are food people.  Come on!  It’s easy and really worth it.

They have gizmos now that de-corn an ear in one fell swoop, but a sharp knife works fine.  I like to use my boning knife or smaller chef’s knife, and I cut about 1/2 inch off the thinner end of the cob to create a flat base.  I stand the corn on this base and then cut from the top down, hugging the ear with the side of the knife fairly tightly so I get full kernels.

Make sure you use a sharp knife.  If you feel unsure of yourself, then do this:  Buy a small scrap of untreated plywood – something like 5″ X 5″ – sand and wash it well.  Hammer a brand new, washed and dried, nail through the center of the board.  You want a thick nail that will give you about 3″ to work with once it’s all the way through the wood.  You can then jam the thicker end of each cob down onto the nail as a means of stability.  Gluing some flat silicone “feet” onto the bottom is also a good idea.  Ask for these at your hardware store.   For this recipe, just stand the thing in a sheet pan and allow the corn to fall into the pan as you cut.

Another option is using a bundt pan.  Stick the smaller end of the cob (don’t trim it) into the hole in the middle.  When you shear the ear, the kernels will fall into the pan.  I don’t use this method because I wind up cutting the bundt pan.

Note that my recipe calls for 6 ears of corn, which will crowd your sheet pan – which should technically be a half sheet pan, or half the size of a professional sheet pan.  A full sheet pan will not fit into most home ovens, but a half sheet pan is perfect, and you should have several of these on hand as they are serious workhorses.

Anyhoo, I crowd the sheet pan because I don’t want to dry out the corn.  Some of it will brown, but some of it will just cook from the heat of the corn crowding it.  You want this.  I don’t salt the corn until it’s out of the oven to prevent toughness.

Basic Roasted Corn Kernels
  Makes plenty – a half sheet pan will be full

6 ears’ worth of corn, white or yellow
1/3 cup olive oil

Version A – plain buttered
Sea salt
Black pepper
3 Tablespoons unsalted butter (take it out of fridge when you start corn)
Plastic wrap

Version B – with hazelnut vinaigrette
Sea salt
3 tablespoons roasted hazelnut or walnut oil
1/4 cup fresh orange juice (from sweet oranges – not too tart)
1 teaspoon white vinegar
1/2 teaspoon onion powder
1/4 teaspoon ground white pepper
Plastic wrap

1).  Place corn on sheet pan.
2).  Add oil, mix with hands, and spread out evenly in pan.
3).  Roast in 400 deg. F. convection oven until you see some browning action.
4).  Turn/mix corn with spatula and spread out evenly.
5).  Allow to roast for another 10 minutes or so.
6).  Remove from pan and place in large, heavy bowl.
7).  Go to version A or B.

Version A:  Season corn with sea salt and pepper.  Bury butter in the corn.  Cover with plastic wrap and allow to sit until butter melts – a few minutes.  Remove plastic, mix in butter, and serve ASAP.

Version B:  Season corn with a little sea salt and set aside.  Make a vinaigrette out of remaining ingredients (plus a couple cranks of sea salt) by whisking.  Mix vinaigrette into corn.  Cover with plastic wrap and allow to sit out on counter for 30 mins before serving.  Note that the corn will be very lightly dressed, so if you want more of the dressing just double the vinaigrette recipe.

Indian-style Sloppy Joes

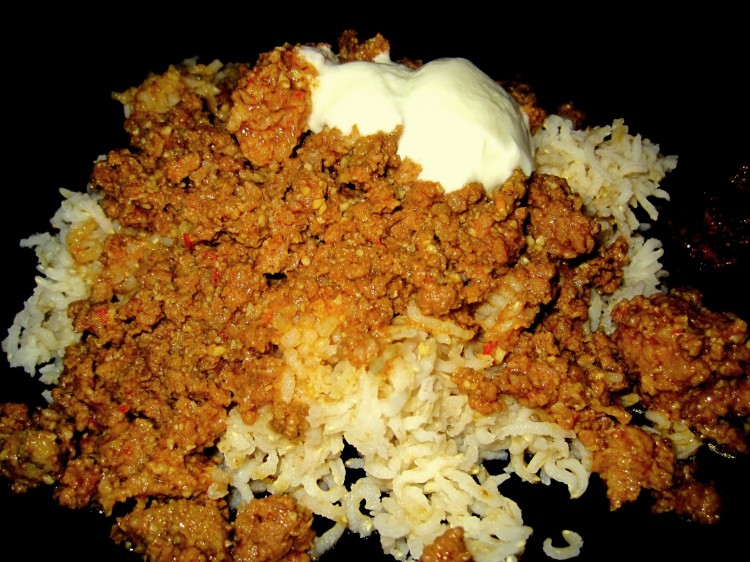
"Butter" ground meat over rice - AKA Indian sloppy joes

“Butter” ground meat over rice – AKA Indian sloppy joes

Here’s an odd recipe I concocted one afternoon when I had ground beef and pork on hand and not a whole lot else.

I thought about sloppy joes.  My Mom, who’s German, would not often make something so “American,” but she would surprise us now and then with sloppy joes, made from scratch, which I took too.

I wanted something less tomatoey and more spicy, though.

My kitchen is generally well-stocked with spices and spice mixes, so I looked around to see what could be had for the ground beast.  Enter butter chicken masala spice mix from MDH.  I like their products.  They’re imported from India and much more reasonably priced than versions produced in the US for American cooks.  Buy them in Indian markets, such as Vik’s in Berkeley.  They’re perfect when you don’t have time to mix your own blends and can’t deal with a grinder, though you’ll want to check the ingredient list to see if any doctoring is called for.  In the case of this mix, you must add a little fenugreek.  I haven’t a clue why MDH does not include fenugreek in its butter chicken spices, since it’s integral to the dish, but there you go.

Note that butter chicken and chicken tikka masala are not the same, though my guess is that the chicken tikka masala spices would be fine in this dish, too.  Take a look at whatever you have on hand and make sure it’s balanced.  For example, don’t use something really heavy on the star anise, unless you want it that way.  You want a little heat, too, so if the mix has no dried red chili powder, add a bit.  Cayenne works fine.  Sniff the spice mix for balance.

The best ground meat for this is lamb, but you can use a combo of beef and pork, which works very well.  Ground chicken and turkey are too lean and will result in a dry dish.

You can serve this over rice or on buns with a dollop of really good, plain yogurt.

If you can make this a day in advance, that would be excellent, because it’ll taste better and you can easily remove remaining fat that will have solidified in the fridge.

Make enough for two meals.

Indian-style Sloppy Joes
   Serves 8, or two meals for 4

3 pounds ground meat (lamb is great, pork and beef (90% lean) mix is good, poultry – no)
1 large onion, chopped so finely that it’s almost pureed (in food processor)
1/4 cup cashews, ground into a fine paste with 1/4 cup water (food processor)
2 – 3 tablespoons butter chicken spice mix (if spice mix is missing fenugreek add a pinch; ditto ground red chili pepper)
1 extra large tomato, coarsely pureed
1/2 – 1 cup chicken stock or water
Rice or buns
Really good, plain yogurt

1).  In heavy-gauge Dutch oven or other vessel, fry meat until it’s a bit browned.  Usually will not need oil for this because your ground meat should have sufficient fat.
2).  Remove meat with a slotted spoon to a bowl; cover with foil and set aside.
3).  Remove all but a couple tablespoons of the rendered fat from the cooking pot and place pot over low flame.
4).  Add the onion and brown slowly, stirring often.  This will take a good 15 minutes.  Keep the flame low.  You want to caramelize the onion a bit, but first the liquids have to cook off.  Be patient and don’t burn the onion!!!
5).  Add the cashew paste and fry the whole mass for a moment or two, turning the flame up to medium.
6).  Add the spices and fry this mass for a moment or two.
7).  Add the tomatoes and fry the mixture for a couple of minutes.
8).  Add the ground meat and combine well.
9).  Add stock or water so that there is barely a quarter-inch of liquid above the meat.
10).  Stir and bring to a simmer.
11).  Cover and simmer over very low flame for about 20 minutes, adding a bit of stock or water now and then, but only if needed.
12).  Remove cover, stir, and allow to simmer for another few minutes until most of the liquids have cooked off.
13).  Skim visible fat (it’ll no doubt be bright red from the spices…)
14).  Serve over rice or on a bun with a little yogurt on top.

Project Food Blog – voting now open!

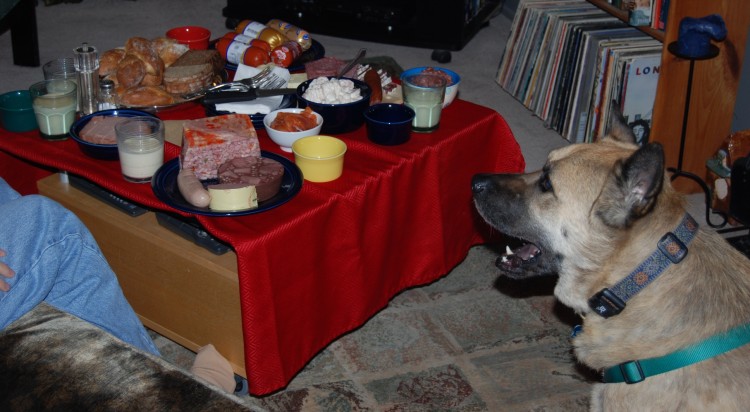
Christmas eve table with dog looking happy

My Christmas Eve Table and my Dog, Berry

Voting is now open for entry #1 (Ready, Set, Blog!) – part of the ongoing FoodBuzz Project Food Blog competition.

Please vote for me if you like my post, which is here:  http://www.foodbuzz.com/project_food_blog/challenges/1/view/347

I’ll be voting today, myself, and I wish my fellow bloggers luck!

First PFB post – Akitachow and I

My family - the ones I love to cook for!

My family – the people I love to cook for

It’s terrible to start a FoodBuzz competition post telling people you feel like a sell-out for being a FoodBuzz Featured Publisher in the first place.  I know that.  I cringe every time that “above the fold” advertisement on my site stares me in the face and accuses me of shamelessness.

Now I find myself whoring in a FoodBuzz food blogger contest.

Like Anthony Bourdain feeling de-legitimized by moving from “serious working chef” to “TV personality,” so it is for a blogger to move from “pure blogger” to one who allows processed, prepackaged food to be plugged on her site.  Oh, God.

It’s hypocrisy, I know.

I need to “get over it,” as my 23-year-old son tells me as he laughs his ass off at my “non-problem.”  “Who cares?  All the food bloggers are doing it and you won’t get as much exposure if you don’t,” he says.

Well, I’m older than the average blogger.  Although I’m reasonably hip, I went numb when Dylan started shilling for Victoria’s Secret.  I’m just now getting over James Taylor and Hallmark.  If Neil Young ever appeared in an ad, you’d have to revive me.

I’m having trouble believing that an artist who shills is still respected as an artist.

I’m coming to terms with how all of that works in the food world, having only recently hopped on the FoodBuzz and Foodie Blogroll trains after years of blogging.

All that said, I do believe my blog and and I should be recognized.  The inherent transiency of something like a “Next Food Blog Star”aside, there are some important points to be made about what my blog and I are about and from whence we came:

1).  Not a flash in the pan.  I started blogging in February of 2006 to serve as a resource to cooks of all levels.  I had finished cooking school and wanted to create a site that would offer tips, recipes, restaurant reviews and irreverent writing.  I started blogging when it wasn’t as cool or prevalent as it is now.

2).  Almost all my recipes are original, with only a small handful being adapted or from someone else.  I put lots of work into what I cook and lots of thought into the blog.

3).  I have a dog theme, and that takes some nerve.  I have an akita-chow mix, and it allows me a play on words in the blog title.

4).  Chops.  Let’s go back, way back.  As an early grade-schooler, I fantasized about the appetizing counter in Waldbaum’s while I should have been listening to something about Sandra in Nebraska harvesting wheat on her parents’ farm.  Instead, I thought deeply about how the radish roses atop the chopped liver might have been formed, and how the cross-hatching on the lox spread came about.  Things only got worse.  Let’s just say I was a kid who knew a disturbing amount about fondue pots and assorted hors d’oeuvres.  Perhaps all that time with my Mother and Grandmother at the Horn & Hardart restaurant in Flushing, Queens, in the 1960’s was to blame.  They worked there, and I happily hung out in the kitchen trying to get to the bottom of the cup custard recipe.
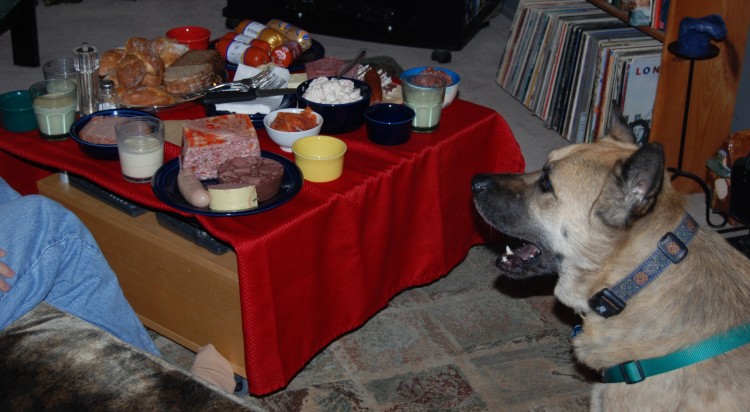
Even Berry, the akita-chow, looks amazed by our Christmas Eve spread. Christmas Eve is my favorite day of the year, and I track down traditional German goodies to serve

Even Berry, the akita-chow, looks amazed by our Christmas Eve spread. Christmas Eve is my favorite day of the year, and I track down traditional German goodies to serve

5).  I was a good girl, went to college and developed a business career.  Flash-forward to 2003.  I’m 41 years old with a 16-year-old son and a husband of 18 years – working food activities in on evenings and weekends and taking days off to cook – and feeling pretty miserable about my career choice because I wanted to go to cooking school and become a food writer.  My long-suffering family told me to quit my job, go to cooking school and write about food.  I did.  I graduated in 2005 with a culinary degree and time spent as a food writing intern at the San Francisco Chronicle.  Since then I’ve been blogging and writing about food.

6).  I’ll continue to develop my site so it promotes cooking both by “feel” and “method.” The former takes practice and requires lots of experimentation, but it’s far better in the long run to cook from a place inside yourself rather than always from a printed recipe.  The latter would allow a person to translate skills (methods) learned for one recipe to others.  I try to get these things across now, but I want to do more.

7).  I love reading about food in various formats, and do so to keep myself current with trends at all levels, to improve my knowledge base, and to connect with my fellow food bloggers/writers.  In terms of bloggers, I’m interested in perspective as much as information.  I also like being amused by bloggers who are not afraid to let their freak flags fly.  I also read historical works, like old cookbooks, as I am particularly interested in food in historical context.

8).  Cooking is about comfort, hospitality, pleasing others, teaching technique, providing ideas, and so on.  It’s not about one-upsmanship.  No serious food blogger cares about outdoing other food bloggers.  I’ve been blogging for a very long time without being “The Next Big Thing” and I’ll be here when the hype is a distant memory, like all that quiche and all those sun dried tomatoes.  So will the rest of the serious food bloggers.

While many can simply say they’re passionate, nothing says “passion” like having your income drop 75% while working harder than you ever have – and feeling 400% more pleased about your life.