Monthly Archives: February 2011

Easy Chocolate-covered Strawberries for Valentine’s Day

Chocolate-covered strawberries ready to be served

Chocolate-covered strawberries ready to be served

I always make chocolate-covered strawberries for my family on Valentine’s Day.  My husband loves them, and they make my son feel better if he’s between girlfriends.

You can temper chocolate the traditional way, AKA the long way, but try the method described below.  It’s much easier.

If you want to be a little fancy, get your hands on some long-stemmed strawberries. Trader Joe’s has them for $6.99 per pound.  A little high, I know, but think of the occasion — it’s love, man!

You’ll need:

1# long-stemmed strawberries, gently washed and absolutely dry.  Trim the very end of each stem at an angle, and trim off brown leaves, too.

Silicone baking mat laid out on a cutting board or flat counter.

Glass, heat-resistant, 2-cup measuring cup, like Pyrex, with 1 cup good dark chocolate fèves (like coins) or pearls.

I use Valrhona Manjari (64% cacao), which I buy in a large bag at Spun Sugar in Berkeley. If you don’t want to buy fèves or pearls, get block chocolate and cut it yourself.

Another 1/4 cup chocolate.  You are looking for 1/4 the quantity of your original 1 cup to seed, or add to, your melted chocolate to bring the temperature down.

For this method, whatever quantity you start with, you’ll need another 1/4 of that to seed.

White nonpareils.  If you bake for the holidays, those shaker decoration sets often have them, especially Hanukkah versions.

A microwave.

A small wooden spoon.

A candy thermometer would be nice so you can check the temperature of the tempered chocolate, but you should be OK as long as you do not overheat your chocolate at the start.

The process:

1).  Melt chocolate at 20 second intervals at full power, stirring after each interval, until it is melted and shiny.  Do not, whatever you do, overcook it!!!

2).  Mix in your seeding chocolate little by little, stirring fairly vigorously.  This pulls down the temperature of your melted chocolate and allows the final product to set firmly and have a nice, shiny look.  Your tempered chocolate should be at a working temperature of about 89 deg. F.

3).  Dip each strawberry into the chocolate, largest first, and coat to about the 2/3 point and transfer to the silicone mat.  You should realize now why I told you to use a measuring cup.  It gives you height and you need less chocolate to do the job.  The thick glass also holds the heat nicely.  You may need to swirl the last few to coat, but that’s OK.  Work quickly so your chocolate does not set before you’re done.

4).  Sprinkle the top of the chocolate coating with a few nonpareils.  Just a few, and be careful, ‘cuz they travel and your wife/husband/partner won’t want to be picking them up for the next week.

5).  Allow to set about 45 minutes and then carefully peel the silicone away from under each strawberry (slowly — and don’t pull them up by their stems!) and move them to a nice serving dish.

6).  Eat soon, and do not put in fridge unless you must.  Chocolate does not like the fridge — you have been warned.
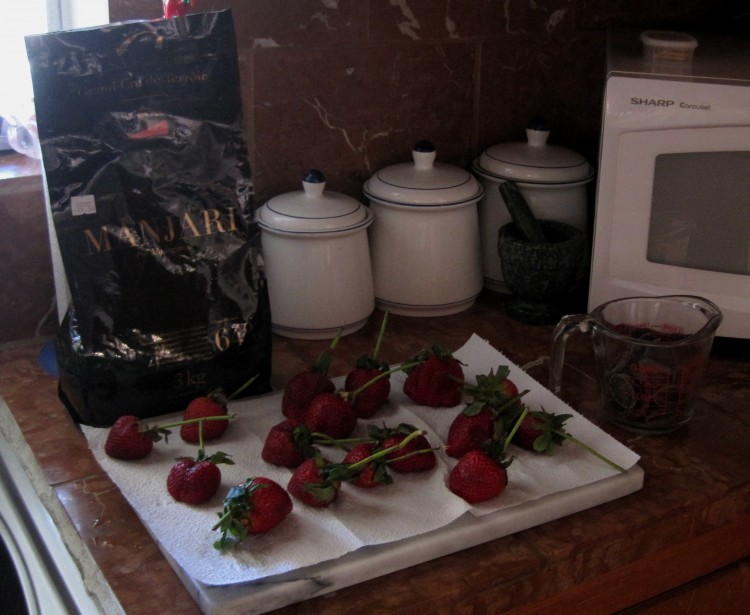
Terrible photo of set-up for chocolate-covered strawberries
Terrible photo of set-up for chocolate-covered strawberries

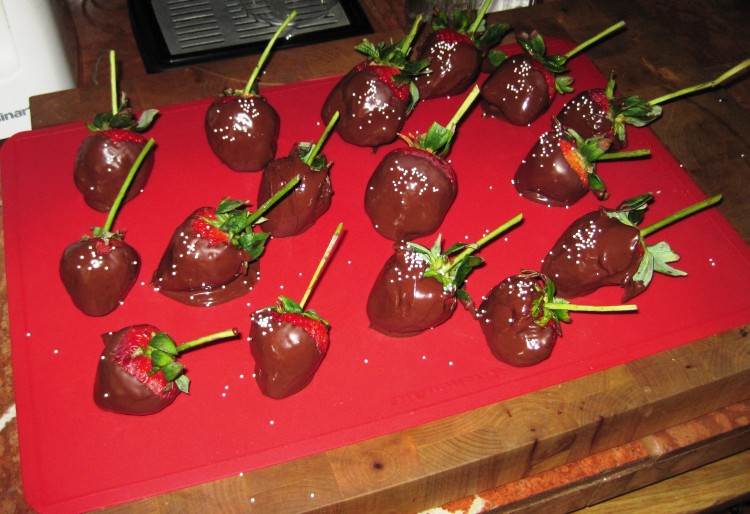
Strawberries coated with chocolate and nonpareils on silicone mat

Strawberries coated with chocolate and nonpareils on silicone mat
Make a cheese souffle at home

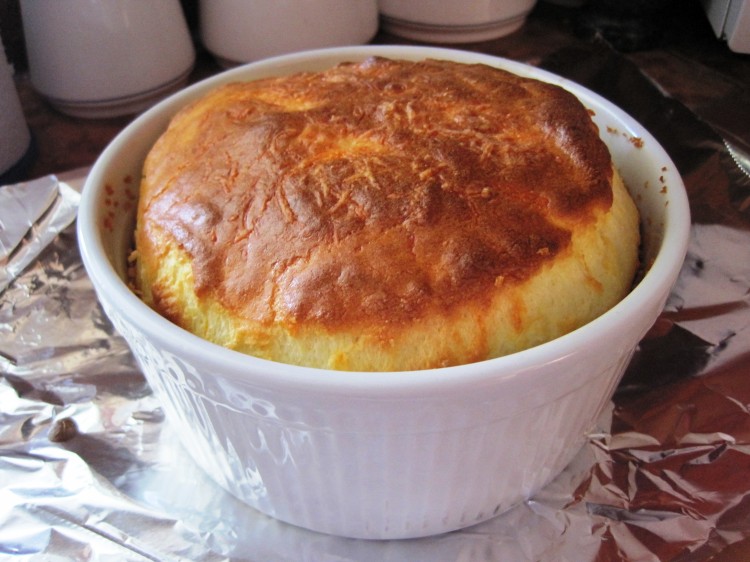
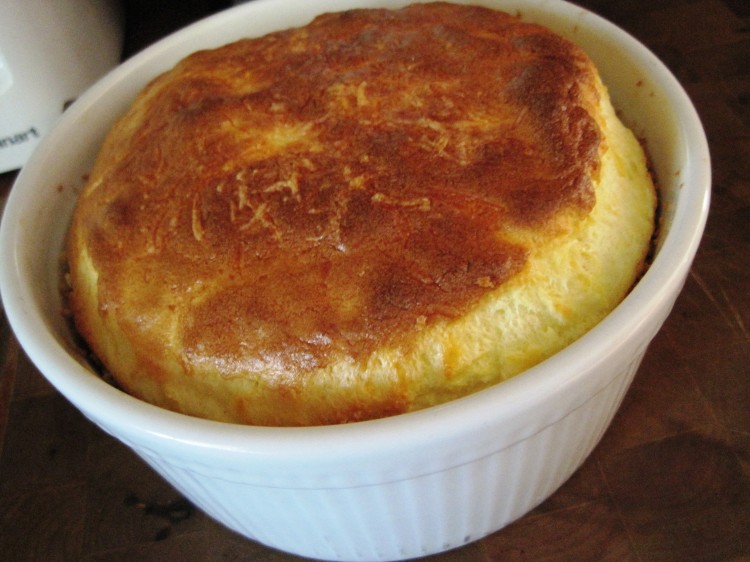
Cheese souffle just out of the oven

Cheese souffle just out of the oven

Cheese souffle is the kind of thing many home cooks are afraid to make because they think it’s difficult.  It’s really not.  You need to practice once or twice in terms of technique, which is the part you need to pay attention to since there are not all that many ingredients in a basic cheese souffle — the one I suggest, since it’s wonderful and doesn’t need to be loaded up with all manner of nonsense.

This will serve 4 with some bread and maybe sliced heirloom tomatoes, though my family could probably polish two of these off in nothing flat.

Use good cheese and organic whole milk and eggs.  This recipe is simple and relies on quality ingredients.  If you use crappy, mass-produced cheese product you won’t wind up with a deeply-flavored, rich, complex souffle.

This is a good dish if you want to show off, though I stopped doing that about 20 years ago.  I wound up bombing when I tried to show off and, since I’m no longer trying to lure a boyfriend into my web, there’s no real need.  I figure my family and friends know the deal with me and it’s all good, fallen souffles, broken oyster stews and all.

Cheese Souffle
   Serves 4

6-cup souffle dish, or other casserole, with high, smooth interior
Whisk
High-heat spatula
Stand mixer or balloon whisk and large, copper-lined mixing bowl

2-1/2 tablespoons butter
3 tablespoons AP flour
1 cup whole milk
Pinch nutmeg
Pinch white pepper
Pinch salt
4 egg yolks
5 egg whites
3/4 teaspoon salt
3/4 cup shredded cheese (Gruyere, Cheddar, a mix, whatever you like)

For prepping souffle dish:
1 tablespoon soft butter
1/2 cup panko (course breadcrumbs)

1).  Prep souffle dish by buttering the inside, being careful to catch the whole surface.
2).  Toss in panko, and turn dish this way and that, so the panko sticks to the butter and there is panko on the entire surface.  This will allow the souffle to climb up the side of the dish.  Set aside.
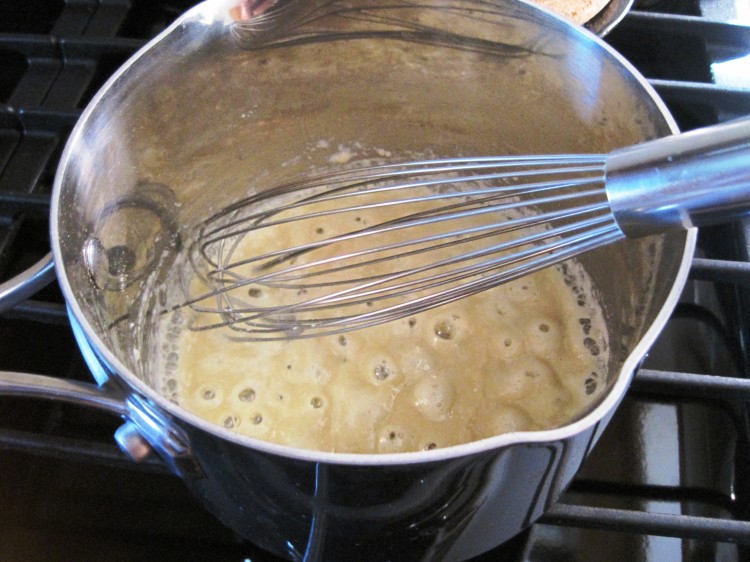
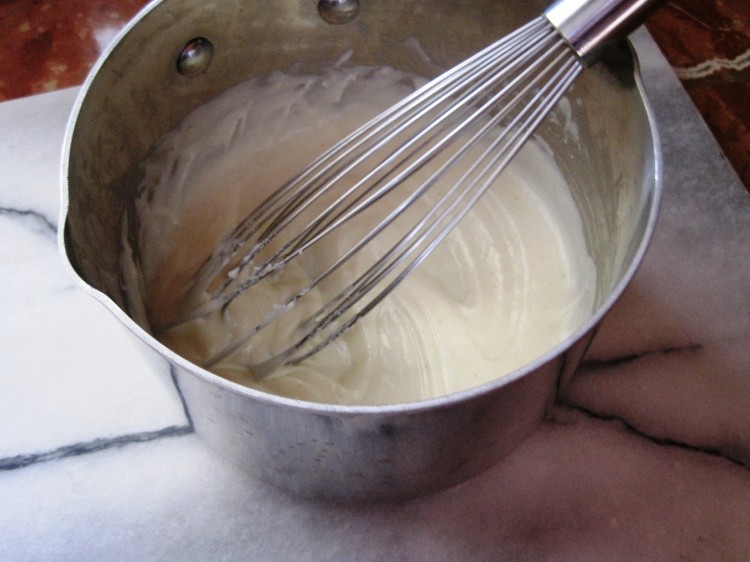
3).  Make a thick bechamel sauce, like so:  microwave the milk for 1 minute and set aside; melt the butter in a saute pan and add the flour; combine with spatula and stir over low heat for a minute — stirring constantly.  You don’t want any color, which should result in a roux blanc, or white roux.  Whisk in all of the milk quickly; add the seasoning pinches; cook over low heat, stirring constantly, for a minute or so.  When you have a thick white sauce, which is what a bechamel is, take it off the heat.  Note:  if you use cold milk you’ll get lumps.  You have been warned.
4).  Separate the egg whites from the yolks by hand, so you don’t lose half the whites — which you will if you use the shells.  Make sure you have absolutely no yolk in your whites!  You should have one little bowl of 5 whites and one with 4 intact yolks. Wrap up the extra yolk for some other use.
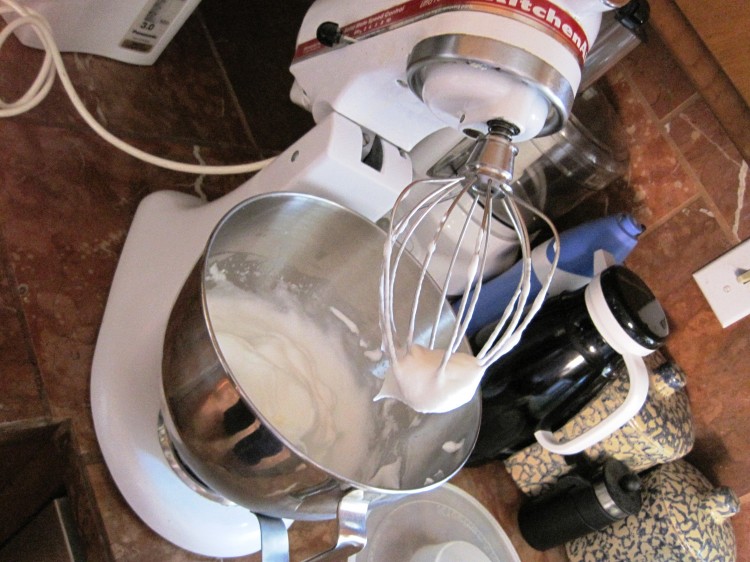
5).  Place the whites and the salt into your mixing bowl and whip at high speed until you have serious peaks.  At this point you should pre-heat your oven to 400 deg. F.
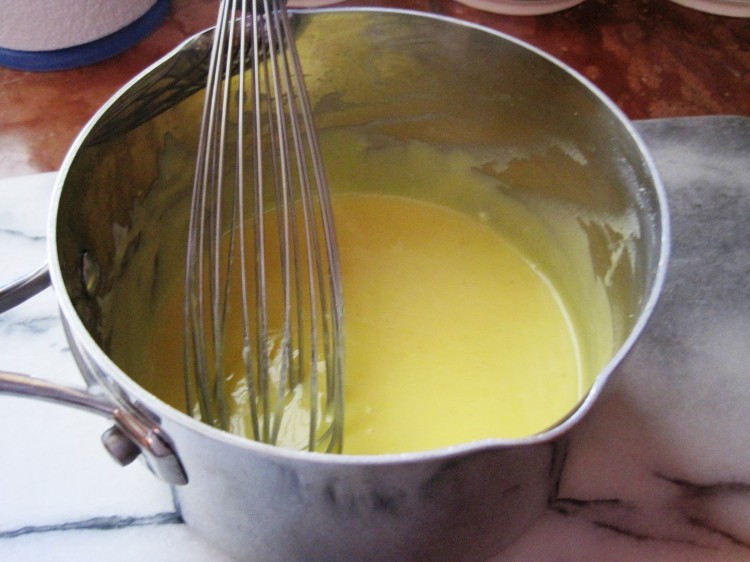
6).  Whisk the egg yolks into your white sauce.
7).  With your spatula, cut out a nice chunk of the egg whites and gently whisk it into your now-yellow sauce to lighten it up.
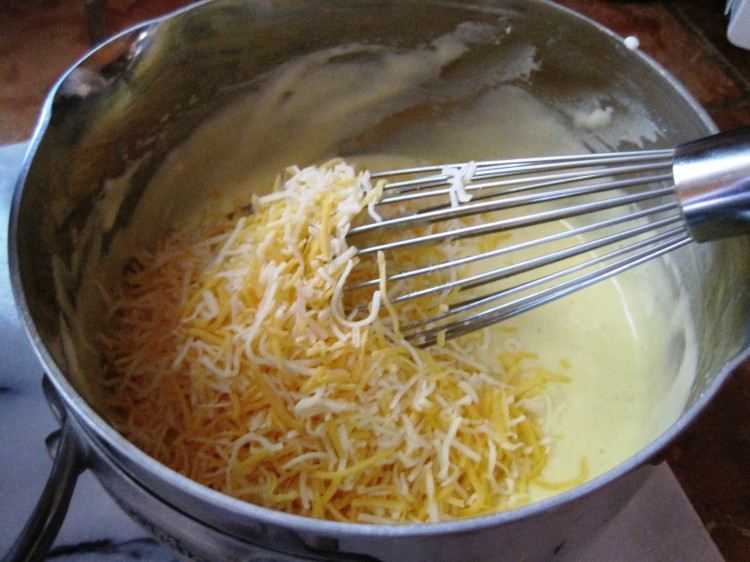
8).  Fold the cheese into the sauce with your spatula.
9).  Fold the rest of the egg white into your sauce — carefully.  It’s OK to transfer the sauce to the mixing bowl with the whites, assuming you used a small saucepan for the white sauce.
10).  Place batter into prepped souffle dish using spatula, but don’t disturb the sides.
11).  Place on center rack of oven and turn it down to 375 deg. F.
12).  Cook for 30 minutes and then test with a skewer, which should come out relatively clean.  You need to work quickly.  If too soft for your taste, put back in the oven for 5 minutes.
13).  Separate the top with a fork and spoon and serve ASAP, as it will deflate in only a few moments!

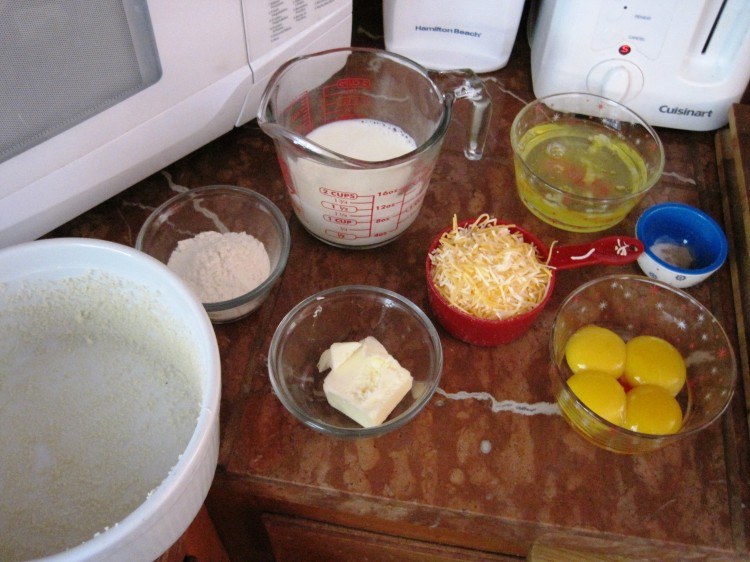
Ingredients for cheese souffle

Ingredients for cheese souffle

Making roux blanc for cheese souffle

Making roux blanc for cheese souffle

Bechamel for cheese souffle done

Bechamel for cheese souffle done

Bechamel with egg yolks whisked in

Bechamel with egg yolks whisked in

Whipped egg whites and salt - testing for peaks

Whipped egg whites and salt – testing for peaks

Sauce lightened with some whipped egg white and now adding the cheese

Sauce lightened with some whipped egg white and now adding the cheese (I used a spatula to mix the cheese in – not the whisk shown)

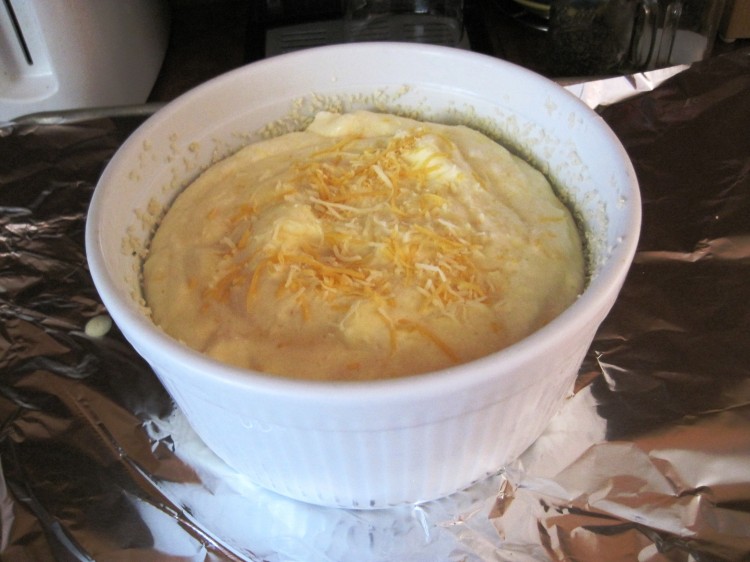
Cheese souffle ready for the oven (I sprinkled a little extra cheese on the top)

Cheese souffle ready for the oven (I sprinkled a little extra cheese on the top)

Cheese souffle is done

Cheese souffle is done