Author Archives: Renate Valencia

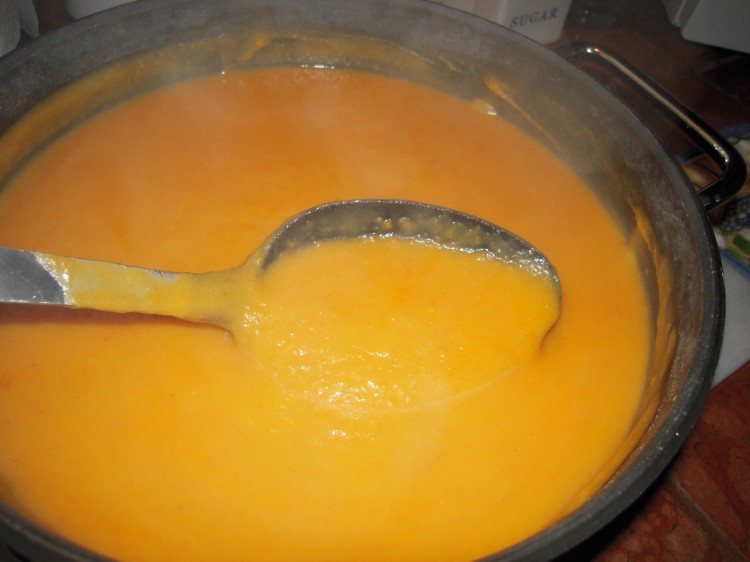
West African Peanut Soup

West African Peanut Soup

West African Peanut Soup

I’ve said it many times and it’s worth repeating:  you can judge a cook by their soups and roast chicken, because they’re all about soul, and you can’t fake that.

My Mother puts down some serious soup.  She learned from my Grandmother, who had to stretch ingredients during hard times and coax flavor from small amounts, if any, of meat.

There is nothing more satisfying to my Mom – who had very little to eat for several years as a child in Dresden, particularly proteins and fats  – than having unlimited access to whole chickens, short ribs, bacon, marrow bones and the like.  As a result, her soups are rich and savory, and I don’t think I ever saw one that was not chock full of meat.  Even her split pea and bean soups are loaded with smoked ham hocks.

Since the heavy and hearty soup universe is covered by my Mother, who cooks Mondays for all of us, I tend toward quicker, lighter soups that don’t quality as a full meal.  I recently had an African peanut soup that was amazing, so I came up with a variant to serve to the boys, and they loved it.  It’s quick, easy, and frugal, so I hope you’ll give it a try.

The only pesky thing is that you’ll need an immersion (aka hand/stick) blender.  You could certainly use a regular blender, but it’d be a pain as you’d have to work in batches.  Invest the $20-odd in an immersion blender.

West African Peanut Soup

2 pounds sweet potatoes, peeled and cubed
1 pound Russet potatoes, peeled and cubed
10 ounces decent carrots, peeled, medium dice
1 large shallot, minced
1 quart chicken stock
2 cups water
1 tsp Kosher salt
1 tsp white pepper
1/2 – 1 tsp cayenne pepper
1/2 cup smooth peanut butter (make it a heaping half-cup)
Garnish of your choosing.  Suggestions: chopped peanuts; a little crumbled Gorgonzola; browned sage butter; caramelized orange peel

1).  Put everything except peanut butter in large, heavy-gauge, pot and bring to a boil.
2).  Reduce heat, bring to low simmer and allow to cook for 40 mins.
3).  Turn off flame and puree (safely and carefully!) until veggies are broken up but not smooth.
4).  Add peanut butter and puree until as smooth as you like, but certainly until peanut butter is well incorporated.
5).  Adjust seasonings.
6).  Ladle into serving bowls and garnish.

North Beach Pizza Tour with GraceAnn Walden

If you’re looking for an interesting outing that involves food and fun, check out GraceAnn Walden’s North Beach Pizza tour.  Have friends visiting San Francisco?  This would be an excellent activity for them.  GraceAnn Walden’s tours – and there are several of them – are a Bay Area institution and people rave about them.

* * *

North Beach Pizza Lovers’ tour with food writer GraceAnn Walden

This is the only tour that gives participants the full North Beach experience, including Italian history, food knowledge and a spectacular repast at Tony’s Pizza Napoletana. We dine on salad, green beans with garlic, meatballs and 3 kinds of pizza. We’re celebrating 20 years of fun & food!

We go behind the scenes in a focaccia bakery, a chocolatier and a professional kitchen, and visit a butcher, shrine and ceramic store. Of course, we visit Sts. Peter & Paul church.

We meet across from Sts. Peter & Paul church
There are two Parking lots at Filbert and Columbus.
There are about 8 blocks walking, in total, with many stops. We go rain or shine, but not in monsoons.
The tour runs from 10 a.m. to 3:30 p.m. including lunch -$80.
Private tours weekdays for 10 or more; on Saturdays 14 participants.

3/6, 3/13, 3/20 and 3/27 – with more dates in April

On regularly scheduled tours, you must give us at least 72 hours notice to receive a refund.

 Reservations are a must. Send your check and cell phone number to:

G.A. Walden
P.O. Box 475877
San Francisco, CA  94147
CELL (415) 302-5898
gaw@sbcglobal.net

Ribs for Super Bowl weekend

rib service 2010

I don’t care about the Super Bowl but I care about ribs.

Ribs tend to be on sale now, so it’s a good time to pick them up.  I found spare ribs (cut from the bottom portion of the ribs and breast bone) for less than $2 a pound the other day, but you had to buy two large, whole racks.  OK, not really a problem for four people who might look for leftovers at night.  I know baby backs (cut from the top of the ribs) are all the rage, but I prefer the more succulent spare ribs, with their layer of meat below where the bacon (belly) was removed.

This morning I found myself with two racks, each about 6 1/2 pounds, and decided to slow-roast them whole, mopped with a thin, Eastern Carolina-type sauce.  I’m sure purists in that area would frown upon all the things I add to the cider vinegar, but I remain true to their “no tomato products” rule, at least.  These ribs have a little zip but are mild.  They’re good for people who don’t want the seasoning to overpower the taste of the pork.  I also give you here my famous (at least in this house!) tamarind cabbage slaw.  This slaw goes well with these ribs because it echoes a couple of the same ingredients.  Note that it’s a dry slaw.

Spare Ribs with Piquant Seasoning
Makes two large racks
Make sauce the day before, if possible

For ribs:
2 whole racks spare ribs
Kosher salt

For the sauce:
Make extra if you want some to serve with the ribs
1 1/4 cup apple cider vinegar
3/4 cup water
Juice of 1 large orange + pulp
3 tbsp. tamarind concentrate or syrup (UNSWEETENED) (buy in Asian markets)
1 tbsp. Dijon mustard
1 tbsp. chocolate syrup
1 tsp. Sriracha sauce (buy in Asian markets, or use Tabasco)
1/2 tsp. instant coffee
3 tbsp. raw or light brown sugar
1/2 tsp. onion powder
1/4 tsp. garlic powder
1/4 tsp. ground thyme
1/4 tsp. ground rosemary
1 tsp. Kosher salt
1 tsp. freshly ground black pepper

1).  Make sauce by combining all sauce ingredients well in medium saucepan and boiling, uncovered, for 10 minutes.
2).  Allow sauce to cool to room temperature.  If made the day before, allow it to come to room temperature.
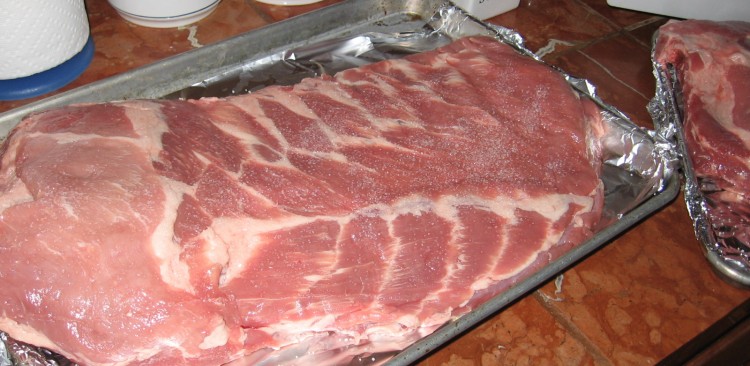
3).  Prepare ribs.  For each:  dry off,  remove the membrane from rib side, sprinkle with salt on both sides and set on foil-covered sheet pan.  Let sit while you prep the oven.
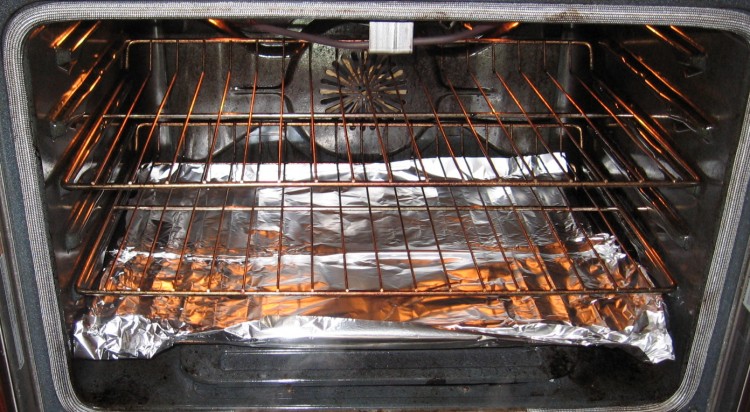
4).  Prepare the oven.  Set your oven racks so one is two from the top and the other is two below that.  You want to avoid the top slot as well as the bottom, if your slabs overlap the sheets pans.  If they do, line the bottom oven rack with foil.
5).  Taking 1/3 of the cooled sauce, mop it over both sides of the ribs, leaving the meaty side up.
6).  Allow ribs to sit on counter until they come close to room temperature, but no more than 45 minutes.
7).  Preheat oven to 350 deg. F. and put ribs in.
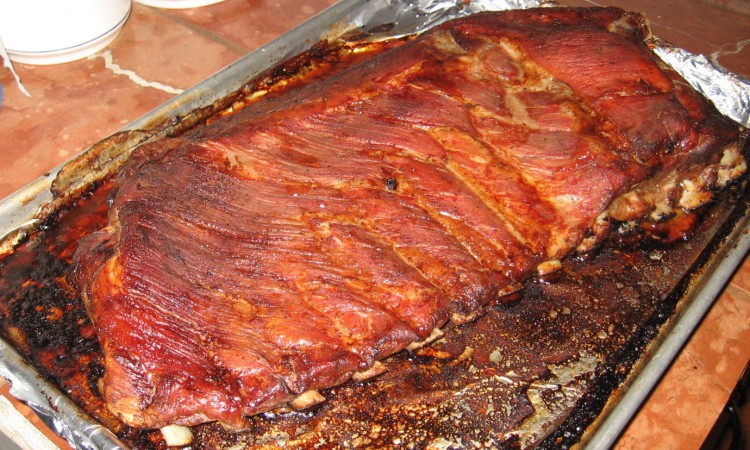
8).  Mop both sides of ribs with sauce every 45 minutes or so.  For the last mopping, move the ribs to racks set into your sheet pans (not a must, but the ribs will be dryer if you do this), making sure that the meaty side is up when you’re done.  If you run out of sauce for the last mopping, use pan juices.  My racks took a total of 3 hours, but your cooking time may vary.  They’re done when the thickest part comes easily off the bones.  Use good food safety practices here.  I used a pastry brush and washed it with soap after each mopping.
9).  Allow to rest for 15 minutes before serving.  Cut individual ribs evenly between the bones, or create little racks.

Note:  If you have the time and space, prep and mop ribs the night before with 1/3 of the sauce.  Wrap tightly in layers of plastic and refrigerate overnight.  Forgo the first mopping when you make the recipe; just let them sit for 45 minutes on the counter before you put them in the oven.

Tamarind Cabbage Slaw

2 pounds shredded cabbage (a little carrot in there is fine)
1/2 cup good mayonnaise
Just under 1/2 cup tamarind concentrate or syrup (UNSWEETENED) (buy in Asian markets)
2 tbsp. apple cider vinegar
1 tsp. ground white pepper
1 tsp. Kosher salt

1).  Whisk all except cabbage in large bowl.
2).  Fold cabbage in with spatula.
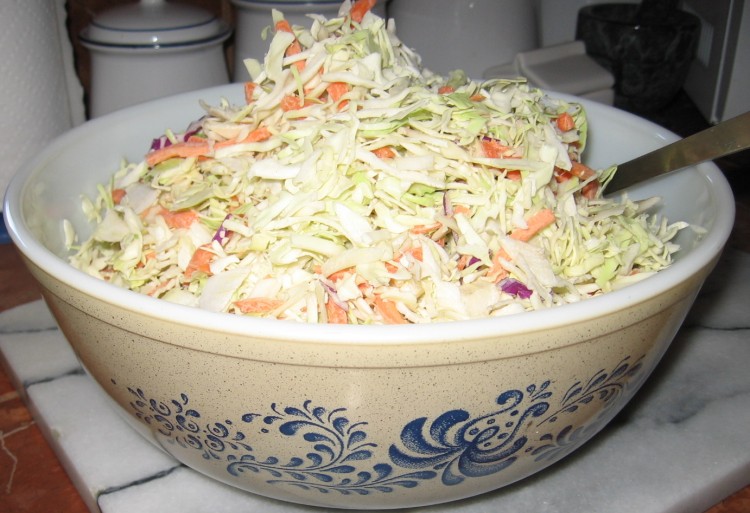
3).  Leave on counter for 30 minutes, mixing every 10 mins. or so.  It will seem really, really dry until the cabbage gives off some liquid and deflates.
4).  Cover and move to fridge until ready to serve, and mix right before serving.

If your ribs overlap your pans, set this up

If your ribs overlap your pans, set this up

Rack of spare ribs set up on sheet pan

Rack of spare ribs set up on sheet pan

Ribs done and fully rested

Ribs done and fully rested

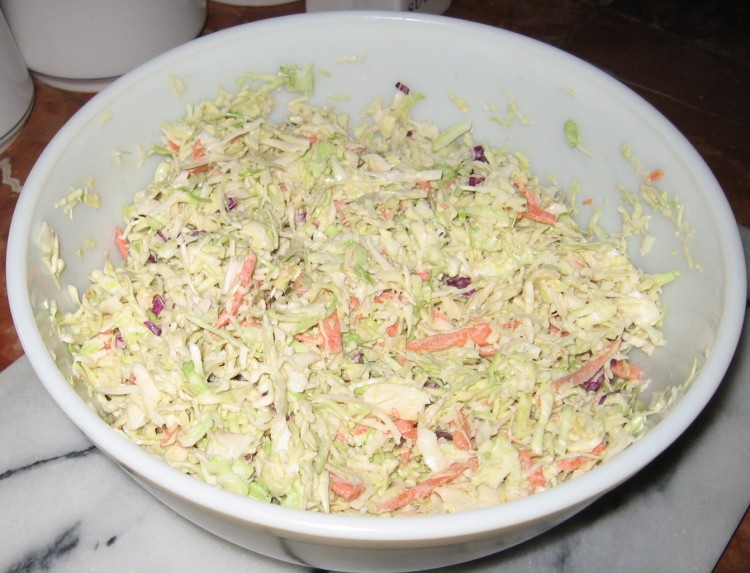
Tamarind cabbage slaw when first put together

Tamarind cabbage slaw when first put together

Tamarind slaw 30 minutes later

Tamarind cabbage slaw 30 minutes later

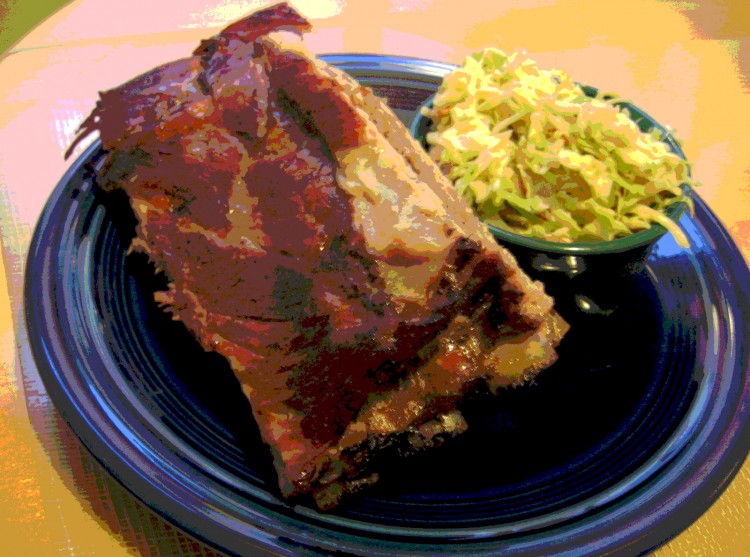
Ribs and slaw serving suggestion

Ribs and slaw serving suggestion

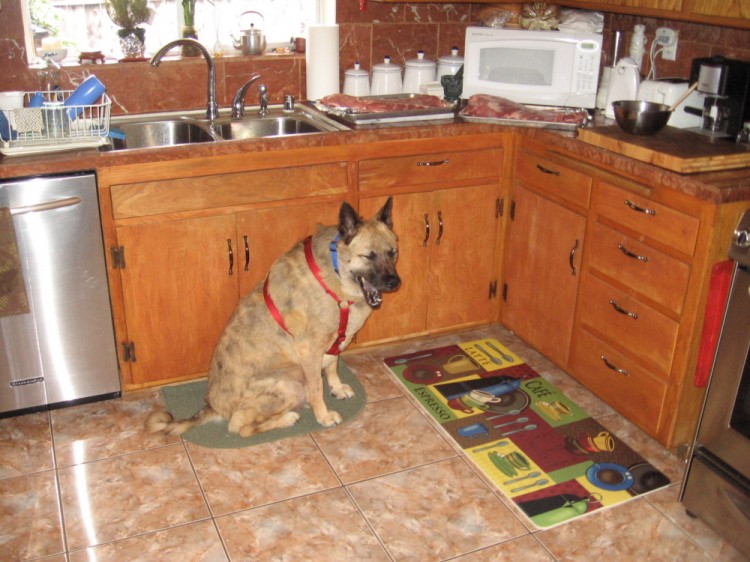
Berry bored waiting for something to happen with the ribs

Berry bored waiting for something to happen with the ribs

Garlic bread

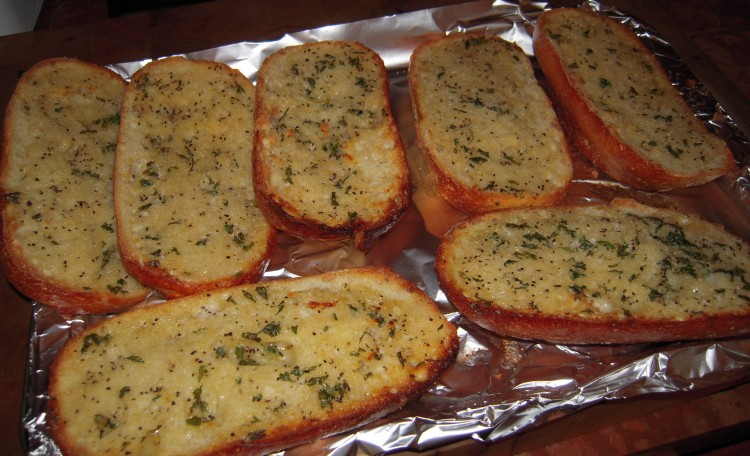
Buttery & really garlicky garlic bread

Buttery & really garlicky garlic bread

My son, Matthew, loves garlic bread.  I developed this recipe to make up for the fact that most oven-ready loaves from the supermarket don’t have much zing.  Even many restaurant versions don’t have enough garlic and can be dry.

He likes it with a little life left and plenty garlicky, so I don’t toast the bread before adding the spread and use both fresh and powdered garlic.

Give it a try – making adjustments to your liking.

Buttery & Really Garlicky Garlic Bread
Makes 8 pieces

4 long sourdough rolls (i.e., Acme; La Brea Bakery from Costco; nothing texturally skimpy)
1/2 cup good olive oil
1/4 cup melted butter, unsalted
2 tablespoons dried parsley (you can use fresh, if you like)
2 teaspoons garlic powder (NOT garlic salt!)
3 tablespoons pulverized* garlic
1 teaspoon Kosher salt
Freshly ground black pepper

1).  Slice rolls lengthwise and set aside
2).  Whisk together all ingrediants except pepper
3).  Apply spread to rolls liberally with pastry brush, allowing some to soak into crevasses
4).  Place rolls on sheet pan and set on middle rack of oven
5).  Set oven to broil, checking often to make sure tops do not burn, until rolls are to your liking.  You can use very high heat and convection rather than “broil,” if you prefer
6).  When done, grind a little black pepper on top and serve right away

* use a mortar & pestle -or- chop finely, add a little salt and smash/press down on your board with the side of a chef’s knife and grind into paste

You can use a food processor or blender for the spread, but do stir the parsley into the spread by hand.