Author Archives: Renate Valencia

Citrus in containers

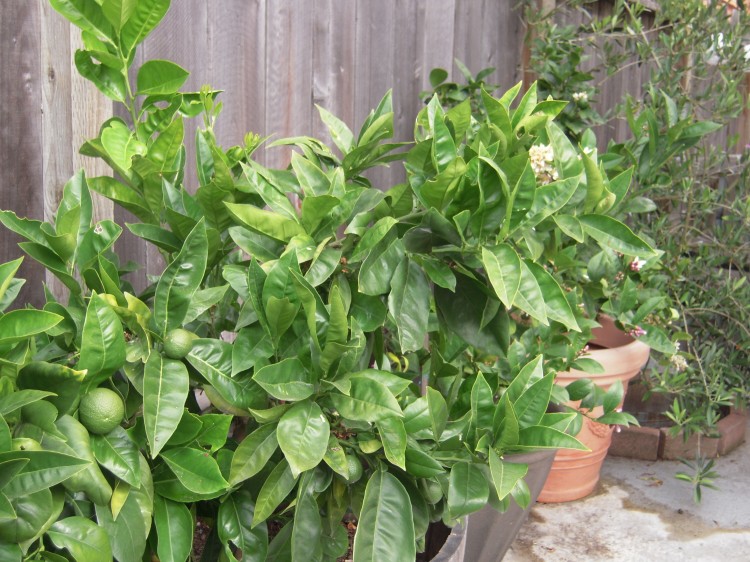
citrus trees in my backyard in large containers

Today I busied myself with citrus upkeep.  I have three orange trees – one semi-dwarf and one standard planted in my side yard, and one dwarf in a container; two dwarf lime trees in containers; two dwarf lemon trees, one in a container and one in the ground; and one dwarf calamansi in the ground.

My backyard is a skinny, L-shaped affair with no grass, courtesy of this being a corner lot and the stupidity of former owners, respectively.  Given the lack of actual ground to plant things in, I have an extensive container garden.  Containers offer a number of challenges, but for citrus trees these are minimal, provided you have the right kind of container with the proper drainage and you keep on top of things, namely fertilizer, pruning and the correct amount of water.  Use of the right soil from the get-go helps.  I employ a good potting soil with some peat moss and sand added.  Using half cactus mix with potting soil has also worked for me.  You want a soil that is a bit lighter than potting soil and one that will hold moisture but not be overly wet or muddy after deep watering.  Be sure you use a container that is wide enough and deep enough for the roots.  You can plant a dwarf tree in a half-wine barrel and it will never outgrow it, and you can keep a semi-dwarf and even standard tree in them for a few years, if you need to, but I don’t like moving these guys unless I have to.  I moved my Eureka lemon tree from a pot at my old place to the side yard of my current house in early 2007, and it only recovered in the last few months with quite a bit of TLC.

Drainage is key.  Make sure you provide a bed of several inches of pea gravel, decent drainage holes that you cover with mesh before you put the gravel in (this keeps small pests out and soil in) and situate the tree according to the directions provided; many require some root exposure and a watering trough around the tree.

Citrus trees should be fed a diet that includes nitrogen and phosphorus.  Personally, I do not apply as much citrus fertilizer as manufacturers recommend to ensure that my trees are not getting more nitrogen than is good for them (it would adversely affect the pH) and apply chelated iron when I see signs of iron deficiency, such as yellowing leaves.  I fertilize every two months or so, year-round.  Basically you need to look at your trees on a regular basis to gauge what you should be doing.  Bottom line is that the pH of your soil should be between 6 and 8, with numerous agricultural sources indicating an optimal range of 5.5 – 6.5.  If you are having problems with your trees the first thing you should do is check the pH!

In terms of pruning, if you do nothing else, make sure you remove suckers growing below the graftline on dwarf varieties.  If you have dead branches, trim those off.  You should not have many of them, but I had plenty on the lemon tree that I moved.  You are also advised to train dwarf trees to produce better and larger fruit by selecting main growing branches and cutting back others.  I generally do not do this unless the tree is unbalanced, because it’s a trade-off:  I would rather have all the branches with their associated leaves serving as protection from the intense sunlight they are exposed to here.  While sunlight is great for citrus, it can be a problem with young, spindly trees.

My trees produce very well, and I keep them in clusters for pollination.  They are rarely attacked by bugs or disease, and if I have a little problem I take a clipping to my local nursery.  My most challenging trees have been a dwarf Meyer lemon and the calamansi.  The Meyer lemon is not looking as good as my other trees, but it is the newest and may still be recovering.  The calamansi bears a tremendous number of fruit, but they are not as large as I think they should be, and is always suffering from iron deficiency.

I will add one more tree – a kaffir lime; I will then be in good shape.

An easy way to serve buttered corn on the cob

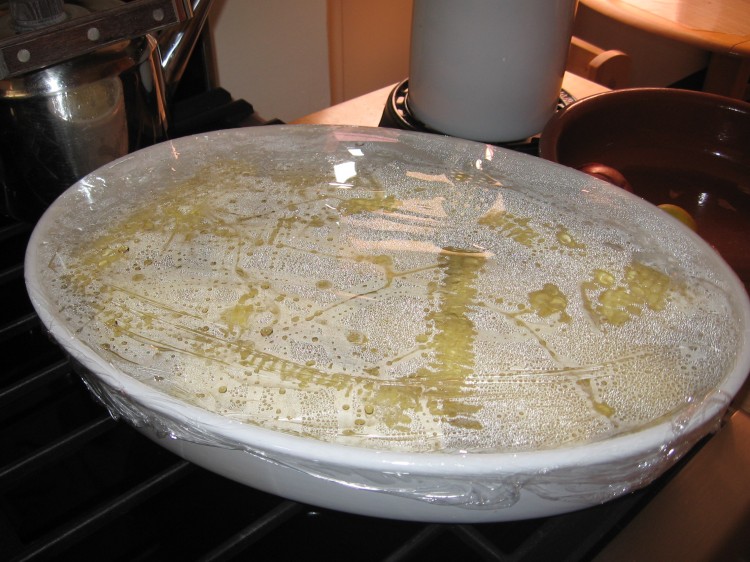
Buttered cobs of corn ready to serve

This may fall under the category of obvious, but I have eaten so many ears of corn at cook-outs the past few years where the butter was served on the side in pats, that I thought I’d give out a couple of tips:

1)  If you want to serve the butter on the side, place an entire stick of butter on a small plate and tell people to set their corn on top of the butter and rotate it until they have the coverage they desire.  Serve the corn with those little forks that get stuck in each end, which will help in the process.  No rolling once a cob has been gnawed, to prevent illness.

2)  Warm a large, deep casserole and toss in whatever quantity of salted butter (or unsalted butter plus a little salt) seems about right.  I use one stick for 8 – 10 ears.  When your corn is finished cooking, place in the casserole in a single layer with the butter and cover well with two layers of plastic wrap.  You want the top of the wrapped container to resemble a drum.  Shake the corn back and forth every few minutes to distribute the butter, which will melt from the heat of the receptacle and the corn, and serve within 20 – 30 minutes.

Pizza at Arinell in Berkeley

Pizza at Arinell in Berkeley CA

Matthew and I had a couple slices of pizza at the only decent New York City-style place in the area, as far as I’m concerned, Arinell (2109 Shattuck Avenue, Berkeley).  They make thin crust Neapolitan pizza topped with simple, high-quality ingredients.  There is a nice zesty sauce and real mozzarella cheese – and not too much of each, allowing the slice to remain rigid when you fold it over part way.  The crust has good flavor, too.  The sum of the parts equals a real East Coast experience when you take that first bite.

Some days they are off a bit, but when they get it right, it is REALLY right.  They sell slices and whole pies.  I cannot speak for any of the toppings, because I don’t bother with those, nor with the Sicilian pizza.

My final gripe is that they got rid of their lunch special.  Now, two plain slices and a drink will set you back over $6.00.  They need to be reminded that this is a good time to offer specials.

Tried a couple cheeses

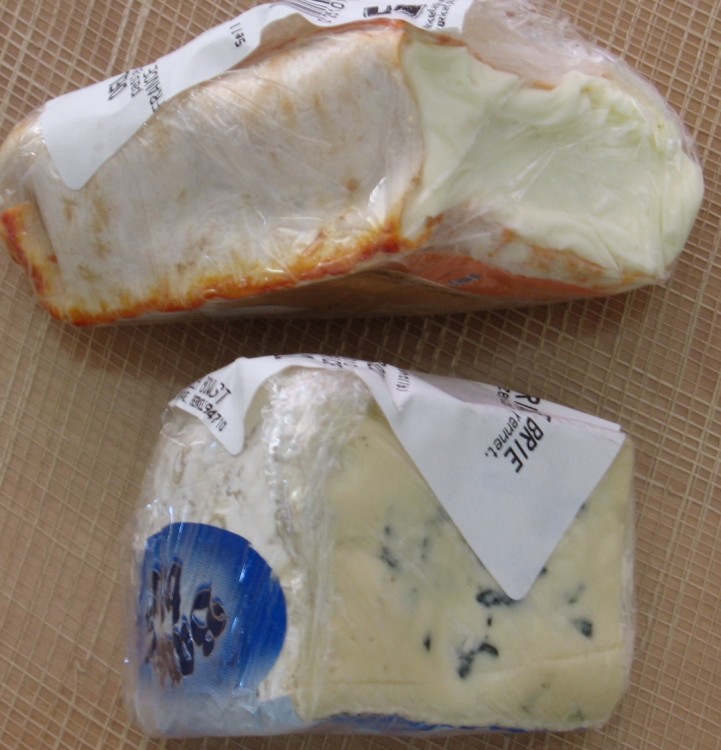
Bavarian Blue and Delice D’Argental

Although I buy most of my cheese at Costco (my Costco has an amazing selection of cheeses) and Trader Joe’s, where the prices are low and you can buy small amounts, which you cannot do at Costco, I’ll pick up cheese that calls out to me from places like The Cheese Board or Berkeley Bowl, and just grin and bear the cost in the name of doing right by local non-chain merchants.

Berkeley Bowl West has a nice cheese counter, so I purchased a piece of Bavarian Blue (marked “Bavarian Blue Brie” on the store label) for my mother, and a small cut of Brebirousse D’Argental, because it looked creamy and runny and had a nice funky smell through the plastic.  It also had an orange rind.

Bavarian Blue is mild and creamy, being made with cow’s milk with added cream.  It’s not nearly as rich as triple-creams like Castello or Cambozola, nor strong like Stilton, so it’s good for people who want a hit of blue cheese flavor in a soft texture.

I have not had Brebirousse D’Argental before.  This is a washed rind sheep’s milk cheese from the Lyon region of France that ripens soft and runny.  Even though it’s made from pasteurized milk, which can render cheese somewhat limp in the character department, it retains flavor that is on the musty side of funky, though  it is not what I would call “sheepy” at all.  It has a little tang, and eats like a cheese with more fat content.  Brebirousse D’Argental has a 50% fat content, while a triple cream, like Saint Andre, is 75% butterfat.

There is nothing like having a little good cheese with bread, fruit and wine for dinner.  I still see too many Americans buying crappy cheese.  Just eat less of it but buy a higher-quality product and it won’t cost you mush more.

Note that if you want to purchase cheese in large quantity from Costco – which is something on the order of two pounds, depending upon the cheese – it’s not a problem to keep it fresh for some time, particularly hard cheeses, provided you follow these rules:

1)  Cut what you need from a larger piece and put the remainder in the fridge ASAP
2)  Use fresh plastic wrap EACH TIME you rewrap the cheese
3)  When you wrap/rewrap the cheese, CATER wrap it, meaning use several layers by just winding it around the product a few times; this will keep it from drying out and will prevent your cheese from smelling like the meatballs you have on the next shelf

Some may think this use of wrap is wasteful, but it makes a big difference.  It is a must for soft, runny cheeses, which have a shorter shelf-life than hard cheese, and it keeps things sanitary and pleasing.  Although most resources say that soft cheeses, like brie, will last about two weeks, I’ve been able to do much better than that by caring for them as outlined above, and by using the vegetable bin.

Hard cheese can last for months.

Quick smoke-flavored salmon

If you want to get a little smoke flavor into your fresh salmon before grilling or sauteing, you can do it with Lapsang Souchong tea.  Lapsang Souchong is a black tea from China’s Fijian province that is dried over burning pine.  No kidding, this stuff is so strong that your entire cupboard will smell like a BBQ pit if you don’t store it in an airtight container.  I hate drinking it, but employ it as a vehicle for imparting smoke flavor to various proteins all the time.

You can do this two ways:  make a strong tea and then brush it on, or use the whole, dried, leaves, which is what I do.

tea-cured salmon side

For a side of salmon, just lay it out and sprinkle a handful of the dried tea on the flesh, along with some Kosher salt.  Then roll it up, thin end first, and wrap tightly in plastic.  Toss in a plastic bag or put on a plate and store in fridge for a couple of hours.  Note that the longer you leave it, the stronger the smoked flavor will be.  My advice is to start with a two-hour “cure” first (or one hour, if the fillet is thin) and see how you like it.  Unroll and remove the tea and excess salt.  Prepare as you like, but it’s best grilled outdoors or on a grill pan indoors.

Quick-cured tea salon in a bag