Author Archives: Renate Valencia

Open Letter to Costco II

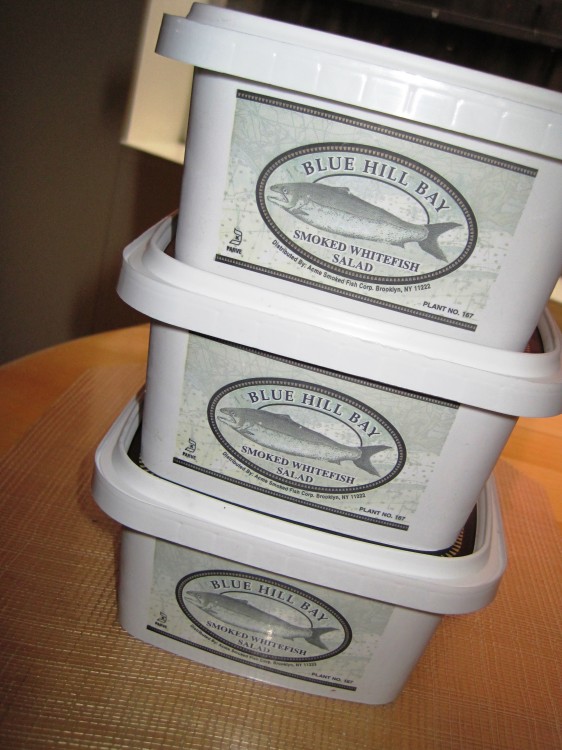
Acme smoked whitefish salad at Costco—sold under the Blue Hill Bay label. $8.95 for a 2-pund tub!!

Acme smoked whitefish salad at Costco—sold under the Blue Hill Bay label. ~$9 for a 2-pund tub!!

26 March 2011

Costco Wholesale Corporation
Attn:  Customer Service
P. O. Box 34331
Seattle, WA 98124

Re: My letter of 5 December 2010 concerning a lack of Acme Fish Corporation’s smoked whitefish products at your Richmond, California, store

Dear Costco:

It’s me again, your biggest fan.

I want to take this opportunity to thank you for carrying Acme Fish Corporation’s smoked whitefish salad, sold under their Blue Hill Bay label, for Passover this year.  This product is an important part of our celebration, so we really appreciate it.

With best wishes for a wonderful holiday,
The Akitachow household

PS:  Thanks also for the other Kosher products I found in the store, and for the extra-nice selection of cheeses I’ve been seeing

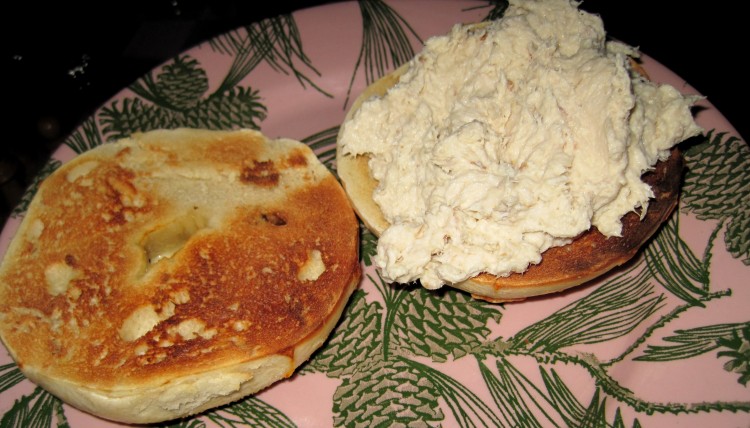
Acme's smoked whitefish salad on a bagel

Acme’s smoked whitefish salad on a bagel

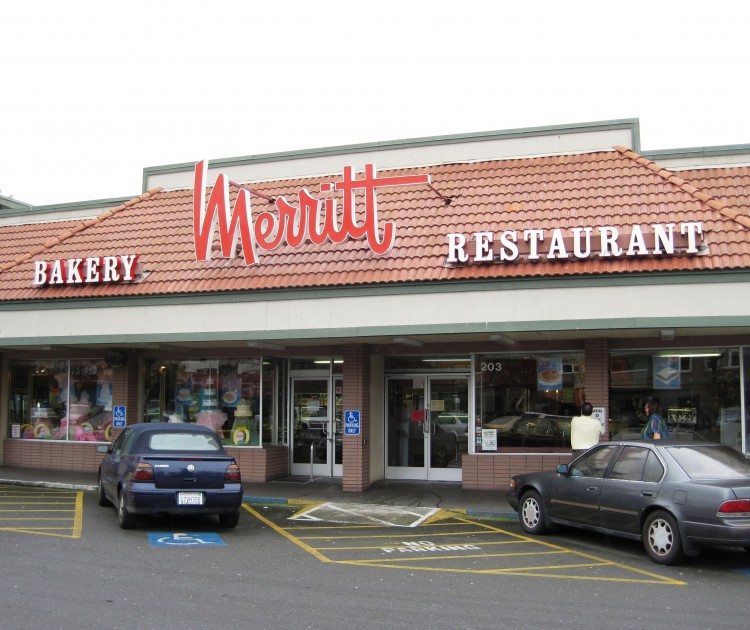
Merritt Restaurant & Bakery in Oakland—not so good at first try

Merrit Restaurant & Bakery in Oakland

Merrit Restaurant & Bakery in Oakland

A little over a week ago Matthew, my son, Paul, my friend, and I went to Merritt Restaurant & Bakery in Oakland.  I’d always wanted to go there, but I don’t like to drive, and driving anywhere near Lake Merritt or on 880 represents the most challenging kind of driving there is, so it was not going to happen unless someone provided transport.  Happily, Paul took care of that for us.

Anyone who knows me knows I miss diners.  Of all the things I miss about the East Coast, diners top the list.

Merritt is a diner in that there are booths and a long, plasticized menu, but I found the food to be average, at best, and tremendously overpriced.  I was also annoyed that they had a one-stall women’s room.  It drives me nuts when restaurants that pack ’em in are too cheap to provide multi-stall restrooms and would rather their customers wait on line to use the facilities.  They clearly know how to charge here, so they might want to invest in a little convenience for patrons.  Cost of doing business, as far as I’m concerned.

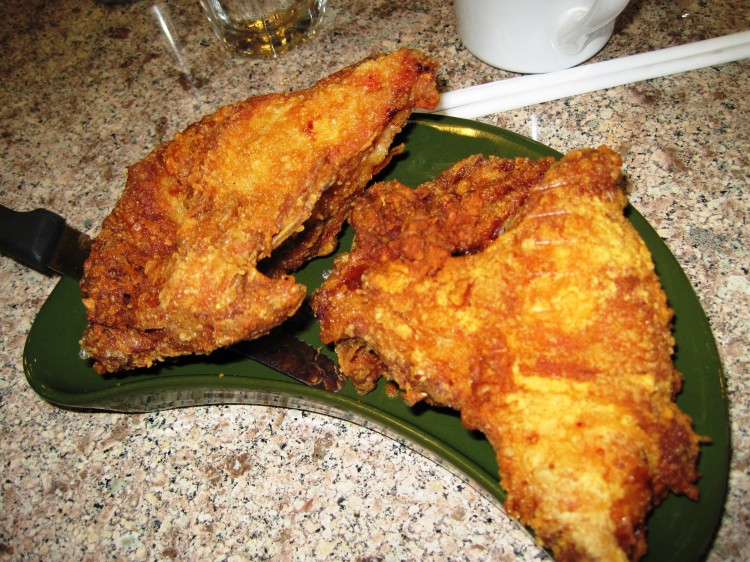
Fried chicken breasts at Merritt Restaurant & Bakery

Fried chicken breasts at Merritt Restaurant & Bakery in Oakland (a little blurry—sorry!)

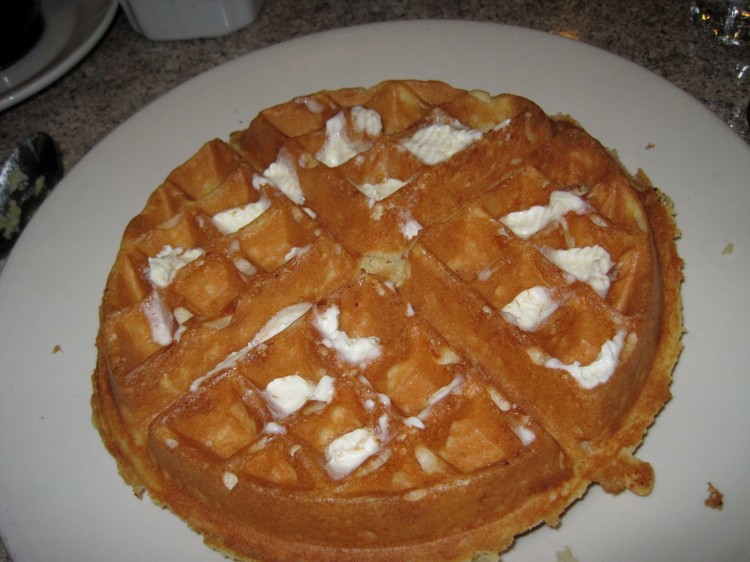
I ordered the waffle and 1 breast of fried chicken ($8.95), and added an extra breast ($2.95).  The large waffle was good. Nothing to write home about, but fine as far as waffles go.  The breasts were overcooked and dry.  While the flavor and crust of their “famous” fried chicken was excellent, these pieces should have been taken out of the fryer sooner.  There were no off-flavors, so the fryer fat was clean.

Paul duplicated my order and said his chicken was “a little dry.”  He liked his waffle.

Waffle at Merritt Restaurant & Bakery

Waffle at Merritt Restaurant & Bakery

The side of cornbread we split tasted like chicken base or Kitchen Bouquet—something along those lines. Savory in an unnatural kind of way, if you know what I mean.  I’m not sure how much this was, because we were not charged for it, but most likely something on the order of $3.

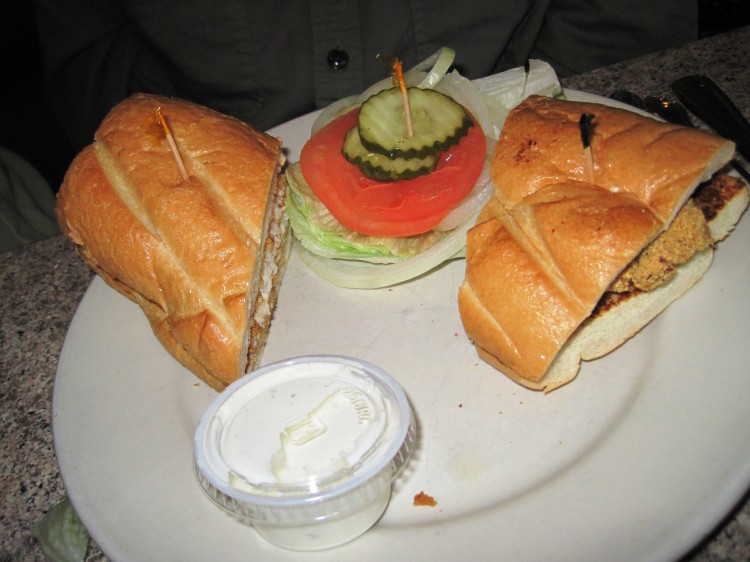
Fisherman Sandwich at Merritt Restaurant & Bakery in Oakland

Fisherman Sandwich at Merritt Restaurant & Bakery in Oakland

Matthew’s Fisherman Sandwich ($11.50) was supposed to be sole, but they said they were using tilapia.  Matt said “OK,” figuring that, in the spirit of generosity that is at the heart of most diners—at this point we thought we were dealing with a real diner—and the fact that they were substituting a cheaper fish, he would get a nice sandwich.  Not so.  It was a lame affair lost on the plate.  There was so little fish it wasn’t able to retain much heat during its trip from kitchen to table.  Never again.

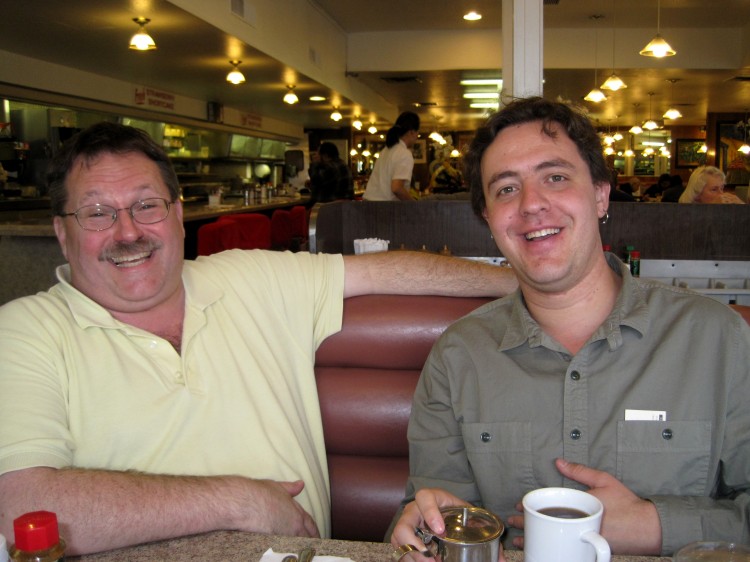
Paul & Matt at Merritt Restaurant & Bakery in Oakland

Paul & Matt at Merritt Restaurant & Bakery in Oakland

The iceberg side salad served with the sandwich was fine.

With one coffee ($2.25) and two iced teas ($2.50 each), the bill, without tip and without the side of stuffing, was $43.95.  Please.

We should have gone to Nibs.

Cafe Leila in Berkeley

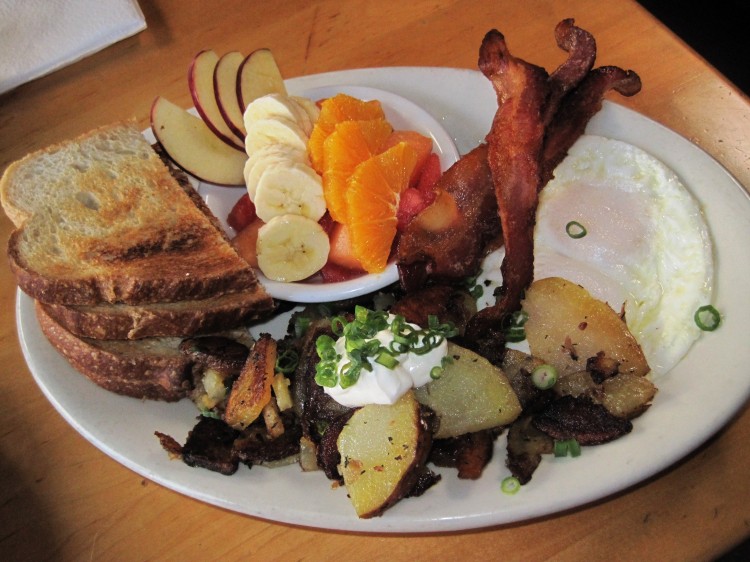
"Alex in the Morning" breakfast combo at Cafe Leila in Berkeley

“Alex in the Morning” breakfast combo at Cafe Leila in Berkeley. You also get coffee and a small OJ.

Alex in the morning?  Yes, Please!

So proclaimed my Mother the other day when I took her out for ‘fast at one of my favorite places:  Cafe Leila (1724 San Pablo Ave, Berkeley).

This is a funky, loft-type, industrial space (’twas a plumbing business for some 80 years) with a lovely and large outdoor dining area in the back complete with fountain and really nice landscaping. Since you can get to the back without going through the establishment, feel free to bring your friendly dog and hang out with him as you have your meal—or just “coffee and.” It’s a great place to sit, think, and take in the surroundings as you sip a hot beverage. You don’t have to be doing something every second of your life.

The full and varied menu has a Mediterranean twist, and you’ll find everything from eggs to wraps. They feature live jazz in the evening, and run a very friendly shop.

Mutti (that’s Mommy in German) selected Alex in the Morning ($9.95), which includes two eggs, home fries, bacon, fruit, a small freshly-squeezed orange juice and organic coffee. The bacon had some substance to it, and the fruit, in the form of a composed fruit salad with banana, orange and apple slices over melon chunks, was fresh as can be.  Nice.  The home fries had onion and were very savory.  I wish other places would use onion in their home fries.

The only problem I have is that they use Noah’s Bagels which, in my opinion, are little more than low-quality, round, flat, monolithic, cellulose-like rolls with a hole. A bagel needs to be boiled before being baked in order to have that chewy texture, which is one of the hallmarks of a good bagel. Why can’t they buy bagels from Berkeley Bagels, or even Manhattan Bagel?

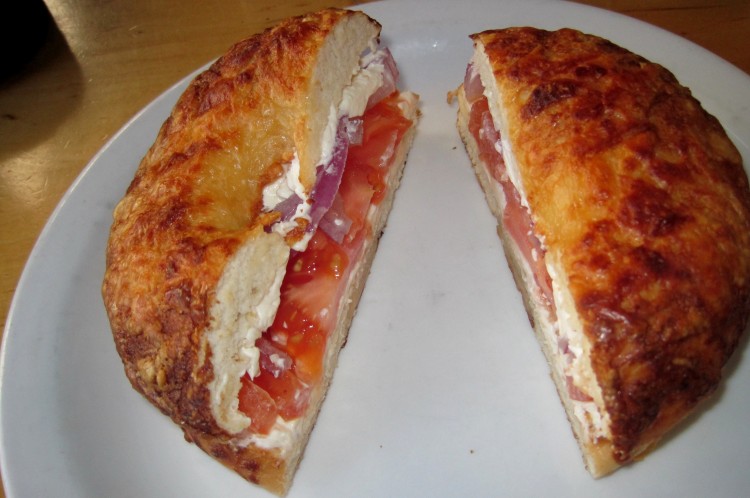
The reason I’m kvetching about the bagels is that one of my favorite breakfasts is a bagel with cream cheese, sliced red onion and sliced tomato.  They suggested I take the asiago, which I did—toasted, which is the only way to deal with a subprime bagel, in my opinion.

It turned out fine. If you’ve never had a bagel this way, I highly recommend it.

Toasted asiago bagel with cream cheese, onion and tomato at Cafe Leila in Berkeley

Toasted asiago bagel with cream cheese, onion and tomato at Cafe Leila in Berkeley

There’s a little parking lot on the side for those with four wheels.

If you have an oddball work schedule like I do, take advantage of Cafe Leila early in the day during the week to optimize your back garden experience.

Easy Chocolate-covered Strawberries for Valentine’s Day

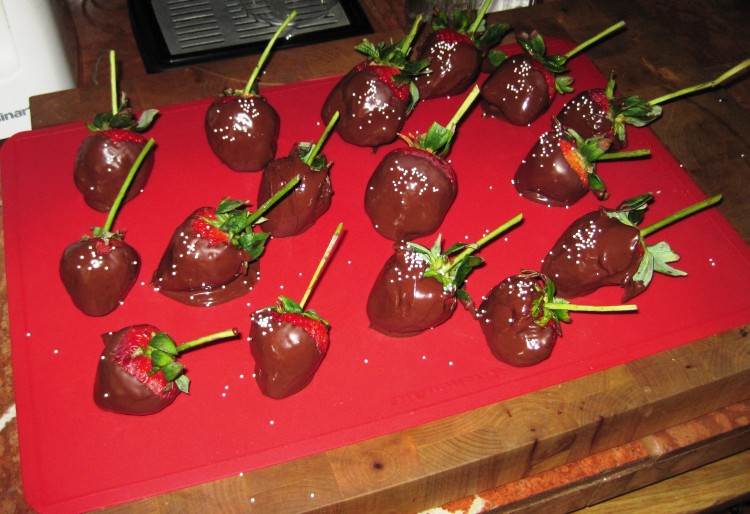
Chocolate-covered strawberries ready to be served

Chocolate-covered strawberries ready to be served

I always make chocolate-covered strawberries for my family on Valentine’s Day.  My husband loves them, and they make my son feel better if he’s between girlfriends.

You can temper chocolate the traditional way, AKA the long way, but try the method described below.  It’s much easier.

If you want to be a little fancy, get your hands on some long-stemmed strawberries. Trader Joe’s has them for $6.99 per pound.  A little high, I know, but think of the occasion — it’s love, man!

You’ll need:

1# long-stemmed strawberries, gently washed and absolutely dry.  Trim the very end of each stem at an angle, and trim off brown leaves, too.

Silicone baking mat laid out on a cutting board or flat counter.

Glass, heat-resistant, 2-cup measuring cup, like Pyrex, with 1 cup good dark chocolate fèves (like coins) or pearls.

I use Valrhona Manjari (64% cacao), which I buy in a large bag at Spun Sugar in Berkeley. If you don’t want to buy fèves or pearls, get block chocolate and cut it yourself.

Another 1/4 cup chocolate.  You are looking for 1/4 the quantity of your original 1 cup to seed, or add to, your melted chocolate to bring the temperature down.

For this method, whatever quantity you start with, you’ll need another 1/4 of that to seed.

White nonpareils.  If you bake for the holidays, those shaker decoration sets often have them, especially Hanukkah versions.

A microwave.

A small wooden spoon.

A candy thermometer would be nice so you can check the temperature of the tempered chocolate, but you should be OK as long as you do not overheat your chocolate at the start.

The process:

1).  Melt chocolate at 20 second intervals at full power, stirring after each interval, until it is melted and shiny.  Do not, whatever you do, overcook it!!!

2).  Mix in your seeding chocolate little by little, stirring fairly vigorously.  This pulls down the temperature of your melted chocolate and allows the final product to set firmly and have a nice, shiny look.  Your tempered chocolate should be at a working temperature of about 89 deg. F.

3).  Dip each strawberry into the chocolate, largest first, and coat to about the 2/3 point and transfer to the silicone mat.  You should realize now why I told you to use a measuring cup.  It gives you height and you need less chocolate to do the job.  The thick glass also holds the heat nicely.  You may need to swirl the last few to coat, but that’s OK.  Work quickly so your chocolate does not set before you’re done.

4).  Sprinkle the top of the chocolate coating with a few nonpareils.  Just a few, and be careful, ‘cuz they travel and your wife/husband/partner won’t want to be picking them up for the next week.

5).  Allow to set about 45 minutes and then carefully peel the silicone away from under each strawberry (slowly — and don’t pull them up by their stems!) and move them to a nice serving dish.

6).  Eat soon, and do not put in fridge unless you must.  Chocolate does not like the fridge — you have been warned.
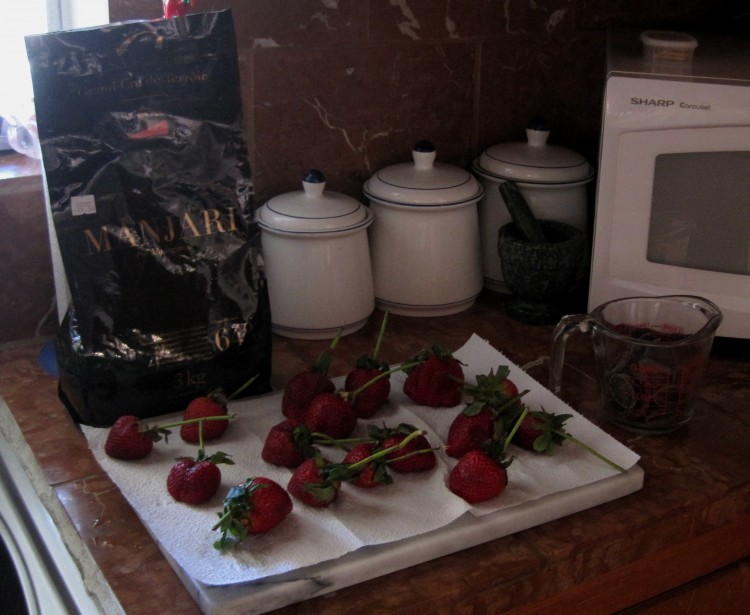
Terrible photo of set-up for chocolate-covered strawberries
Terrible photo of set-up for chocolate-covered strawberries

Strawberries coated with chocolate and nonpareils on silicone mat
Strawberries coated with chocolate and nonpareils on silicone mat

Make a cheese souffle at home

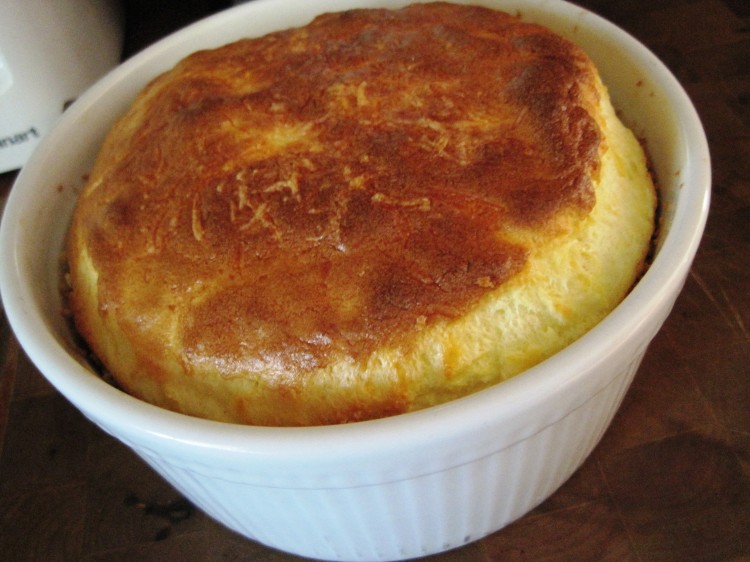
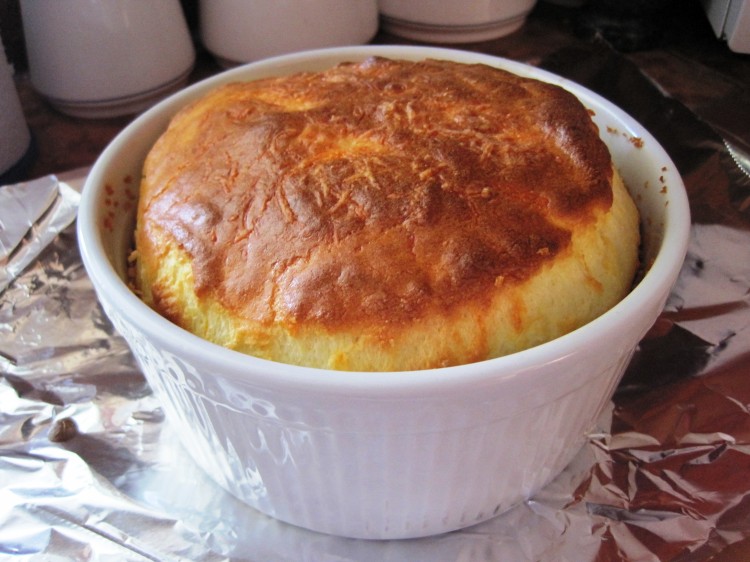
Cheese souffle just out of the oven

Cheese souffle just out of the oven

Cheese souffle is the kind of thing many home cooks are afraid to make because they think it’s difficult.  It’s really not.  You need to practice once or twice in terms of technique, which is the part you need to pay attention to since there are not all that many ingredients in a basic cheese souffle — the one I suggest, since it’s wonderful and doesn’t need to be loaded up with all manner of nonsense.

This will serve 4 with some bread and maybe sliced heirloom tomatoes, though my family could probably polish two of these off in nothing flat.

Use good cheese and organic whole milk and eggs.  This recipe is simple and relies on quality ingredients.  If you use crappy, mass-produced cheese product you won’t wind up with a deeply-flavored, rich, complex souffle.

This is a good dish if you want to show off, though I stopped doing that about 20 years ago.  I wound up bombing when I tried to show off and, since I’m no longer trying to lure a boyfriend into my web, there’s no real need.  I figure my family and friends know the deal with me and it’s all good, fallen souffles, broken oyster stews and all.

Cheese Souffle
   Serves 4

6-cup souffle dish, or other casserole, with high, smooth interior
Whisk
High-heat spatula
Stand mixer or balloon whisk and large, copper-lined mixing bowl

2-1/2 tablespoons butter
3 tablespoons AP flour
1 cup whole milk
Pinch nutmeg
Pinch white pepper
Pinch salt
4 egg yolks
5 egg whites
3/4 teaspoon salt
3/4 cup shredded cheese (Gruyere, Cheddar, a mix, whatever you like)

For prepping souffle dish:
1 tablespoon soft butter
1/2 cup panko (course breadcrumbs)

1).  Prep souffle dish by buttering the inside, being careful to catch the whole surface.
2).  Toss in panko, and turn dish this way and that, so the panko sticks to the butter and there is panko on the entire surface.  This will allow the souffle to climb up the side of the dish.  Set aside.
3).  Make a thick bechamel sauce, like so:  microwave the milk for 1 minute and set aside; melt the butter in a saute pan and add the flour; combine with spatula and stir over low heat for a minute — stirring constantly.  You don’t want any color, which should result in a roux blanc, or white roux.  Whisk in all of the milk quickly; add the seasoning pinches; cook over low heat, stirring constantly, for a minute or so.  When you have a thick white sauce, which is what a bechamel is, take it off the heat.  Note:  if you use cold milk you’ll get lumps.  You have been warned.
4).  Separate the egg whites from the yolks by hand, so you don’t lose half the whites — which you will if you use the shells.  Make sure you have absolutely no yolk in your whites!  You should have one little bowl of 5 whites and one with 4 intact yolks. Wrap up the extra yolk for some other use.
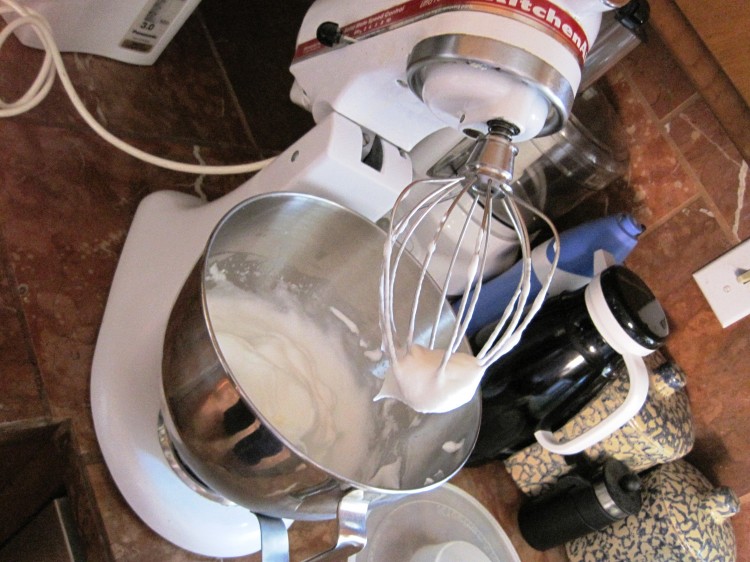
5).  Place the whites and the salt into your mixing bowl and whip at high speed until you have serious peaks.  At this point you should pre-heat your oven to 400 deg. F.
6).  Whisk the egg yolks into your white sauce.
7).  With your spatula, cut out a nice chunk of the egg whites and gently whisk it into your now-yellow sauce to lighten it up.
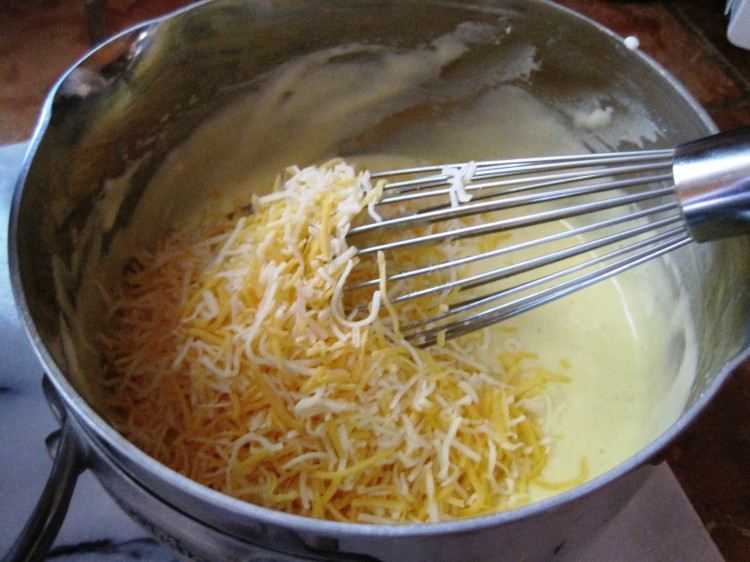
8).  Fold the cheese into the sauce with your spatula.
9).  Fold the rest of the egg white into your sauce — carefully.  It’s OK to transfer the sauce to the mixing bowl with the whites, assuming you used a small saucepan for the white sauce.
10).  Place batter into prepped souffle dish using spatula, but don’t disturb the sides.
11).  Place on center rack of oven and turn it down to 375 deg. F.
12).  Cook for 30 minutes and then test with a skewer, which should come out relatively clean.  You need to work quickly.  If too soft for your taste, put back in the oven for 5 minutes.
13).  Separate the top with a fork and spoon and serve ASAP, as it will deflate in only a few moments!

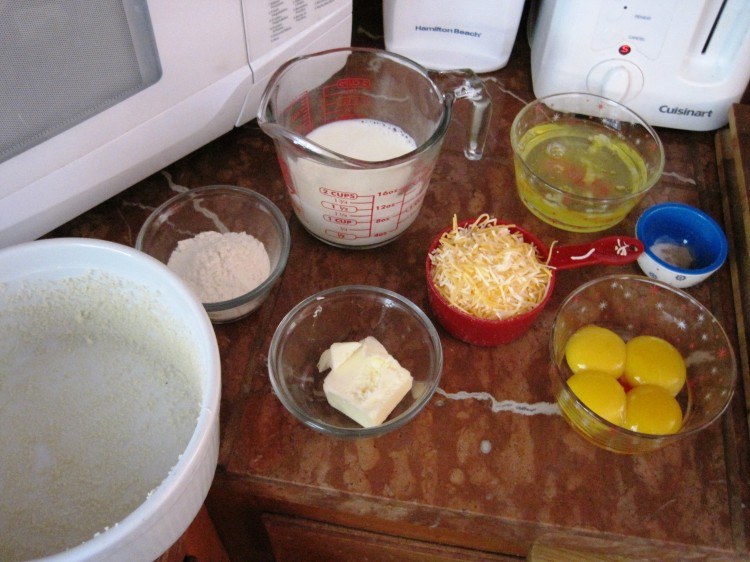
Ingredients for cheese souffle

Ingredients for cheese souffle

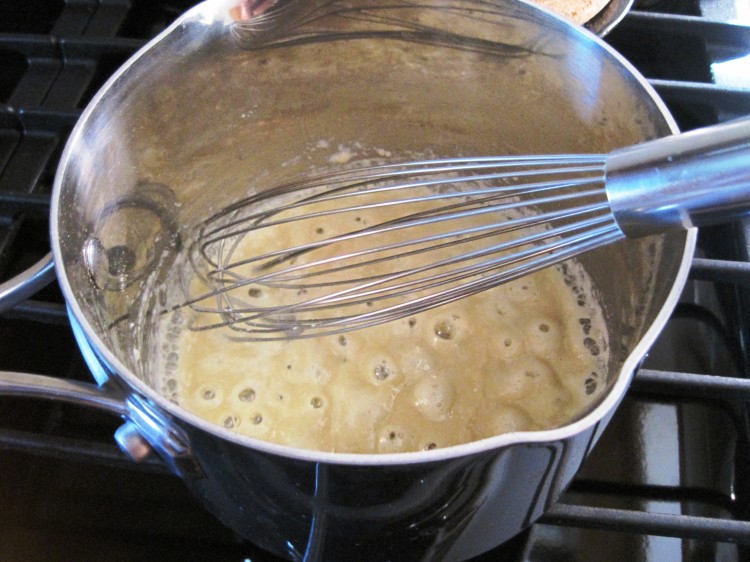
Making roux blanc for cheese souffle

Making roux blanc for cheese souffle

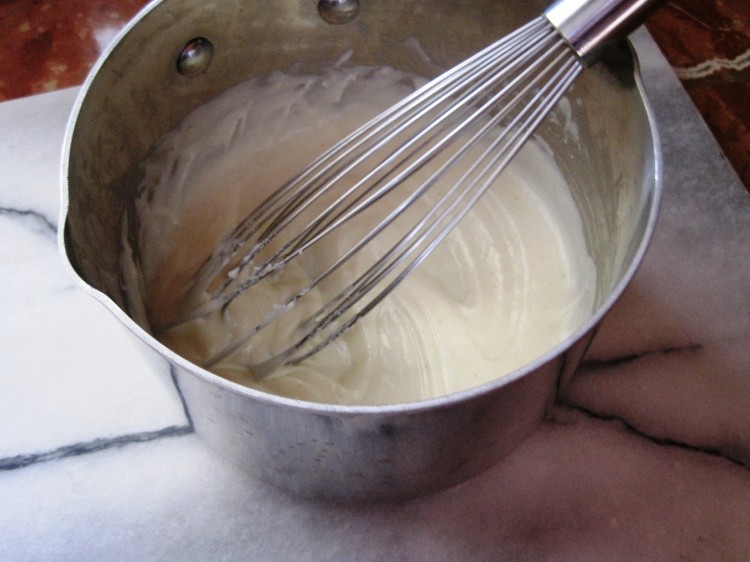
Bechamel for cheese souffle done

Bechamel for cheese souffle done

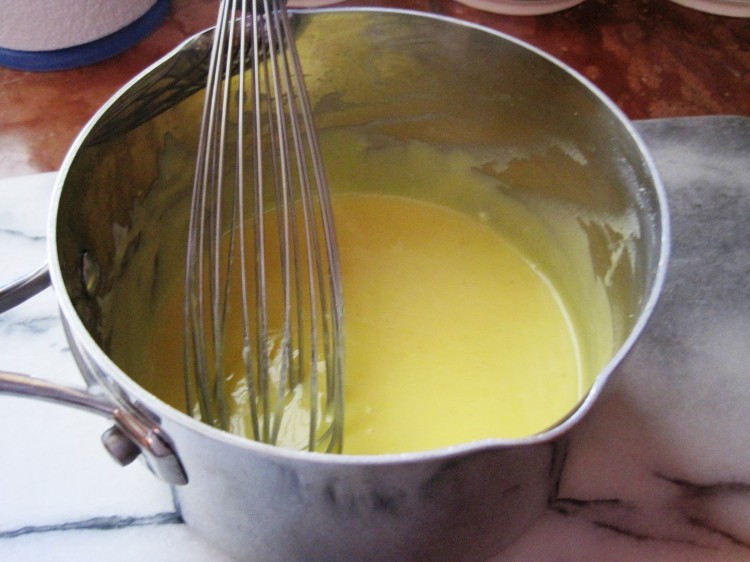
Bechamel with egg yolks whisked in

Bechamel with egg yolks whisked in

Whipped egg whites and salt - testing for peaks

Whipped egg whites and salt – testing for peaks

Sauce lightened with some whipped egg white and now adding the cheese

Sauce lightened with some whipped egg white and now adding the cheese (I used a spatula to mix the cheese in – not the whisk shown)

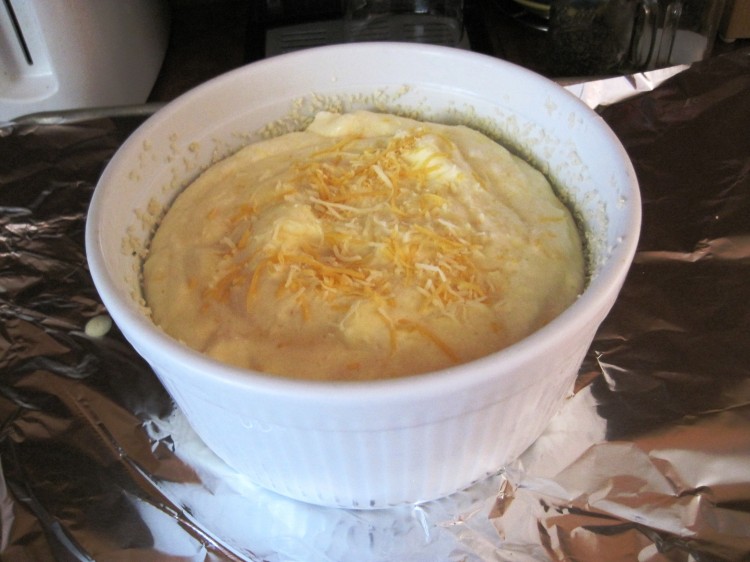
Cheese souffle ready for the oven (I sprinkled a little extra cheese on the top)

Cheese souffle ready for the oven (I sprinkled a little extra cheese on the top)

Cheese souffle is done

Cheese souffle is done