Category Archives: Markets

Make gravlax at home – it’s easy!

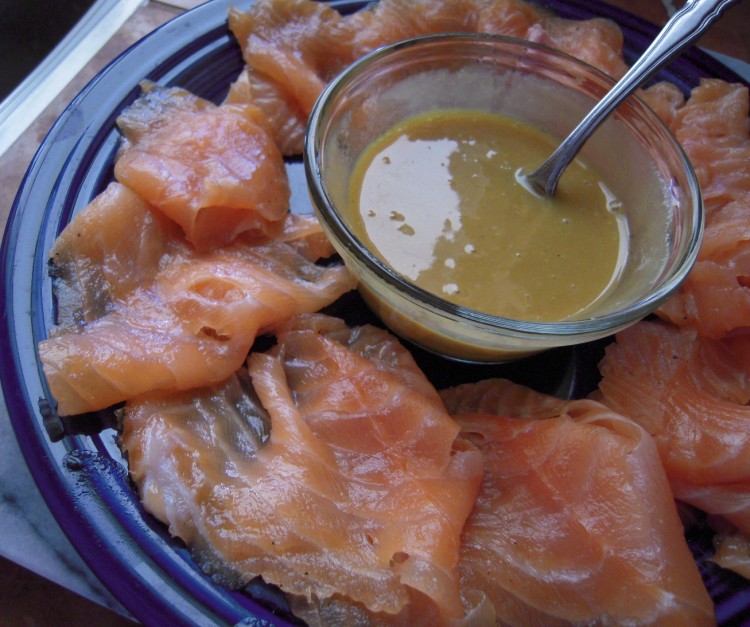
Plate of sliced gravlax

Although I enjoy cooking in all its forms, I do have my niche – as all cooks do.

What made me love garde manger, which means, loosely, “guard of the pantry,” and involves the cold kitchen, I’ll never really know, but my Northern European roots are probably to blame.  I was fed smoked and cured proteins pretty much from birth, and knew a high-quality aspic well before Kindergarten.

When you find yourself daydreaming about the cross-hatching and radish roses on the chopped liver at the appetizing counter at Waldbaum’s during 4th grade geography, you know you have issues.  When you’re planning Christmas Eve hors d’oeuvres and it involves a trip to Fortunoff for a fondue set when you haven’t yet reached your full height, well, I think you have to face facts.

If you’re not in the cooking trade, you may not know what “the cold kitchen” is.  It’s cures, molds, terrines, pates, galantines, confits, sausages, smoked meat and fish products, salads, decorative flourishes, ice and food sculptures and cold soups and sauces.  The part that inolves all the work with pork falls under charcuterie.

While chef de garde manger is now often referred to as an entry-level cooking position – it involves the salad station and small plate prep, requiring limited experience – a true garde manger is a highly-skilled chef in a specialty with gravitas.  This profession dates back to pre-revolutionary France and is considered seriously old-school.  In high-end kitchens, this is the position responsible for numerous classical dishes and presentations.

Garde manger has evolved over the years to accommodate changing tastes, eating patterns and lifestyles.  I think most cooking school graduates will make one chaud froid for every 10,000 sides of smoked salmon they produce during their careers – unless they’re banquet chefs!

While certain things that fall under this genre are best learned in a formal cooking class,  there are some that are quite easy to make at home – but most people don’t know that.

Today I want to pass along to you my simplified recipe for gravlax, aka gravad lax, which is dill-scented cured salmon served with a mustard sauce.  Often an appetizer, it’s great as a full summer meal served with crispbread, like Wasa, and a big salad.

Gravlax is akin to lox, which is cold-smoked, in its silky smoothness and rich mouthfeel.  It looks like lox and is sliced thinly in the same manner.  Gravlax is not exposed to any heat, however, rather just cured in a salt and sugar mix.

It’s expensive and not that easy to find.  If you want to have it out, go to Ikea.  Buy a whole package of their crispbread before you go into the cafeteria, then get several gravlax plates.  You can feed 3 or 4 people gravlax this way for under $20.  This is a serious bargain.  I tell you to get the package of crispbread in advance so you don’t have to pay the per-piece price for extra in the cafeteria – which, at something like 35 cents per piece, is the only insanely-priced item in the whole store!

No need to have it out, though.  You can make it at home a couple of days before you need it.

If you want to use my traditional gravlax method, look here, but I needed to find a way to minimize the amount of refrigerator real estate I used to prep this, having been downsized from a double-wide unit recently.  Long story involving a lemon of an LG that my appliance store, Galvin, took back after two years.  It looked nice, had a bottom freezer and French doors, but the ice maker was wreaking havoc.  In exchange, I got a GE with a side freezer.  The ice maker on this one is a problem, too.  Don’t even get me started with ice makers.  I never had one.  Never wanted one.  Was convinced to get one.  Had nothing but problems since then.  Ice is all over my freezer – again.  I get ice and frost on the floor when I pull out the ice bin.  Why?  It does not stop making ice.  Ever.

Back to the fish.

A few key pieces of information:

1).  Buy fatty salmon.  Your gravlax will not work with salmon that is lean.  You have been warned.  If you can’t get wild, fatty, king/chinook salmon, buy a sustainably farmed version – of some kind of fatty salmon.  Keta salmon, which is all over the Bay Area as I write this, is too lean.  Steelhead salmons – which are actually sea-faring rainbow trout, believe it or not (or, I should say, rainbow trout are salmon that never leave home) – have a medium fat content and are OK.

2).  Buy a boneless side of salmon with the skin.  Or a piece of a boneless side with the skin.  Ask your fishmonger if the pin bones have been removed.  If not, ask that they be removed.  If you need to remove them, look here.

3).  Buy good fish from a market like Monterey Fish – or Berkeley Bowl’s fish counter.  The fish will be fresh, and these people care about sustainability.  Do not buy crappy salmon from a supermarket in a package with all kinds of goo.  You know exactly what I mean.

4).  Work clean.  You should always do this, but take extra care when you cure or preserve something.

Honestly, gravlax alone  justifies my two years of culinary school given how often I make it.

Gravlax with Mustard-Dill Sauce

1 side of salmon with high (or at least medium) fat content with no pin bones (see above)
1 lemon (a fresh lemon!!!)
1 ounce plain vodka, gin or aquavit
1/2 cup Kosher salt
1/2 cup raw sugar
2 tablespoons ground black pepper
1 large bunch of dill, washed and absolutely dry.  It must be dry!!  Reserve a small piece of dill for sauce.
Aluminum foil
Paper towels
2 pastry brushes

1).  Make cure mix.  Whisk together salt, sugar and pepper.  Set aside.
2).  On counter, lay out a double thickness of foil that is about 6 inches longer than your side of salmon.
3).  Fold about 6 paper towels in half and create a bed that is about the size of the salmon.
4).  Lay side of salmon, skin side down, on the paper towel bed.
5).  Squeeze the lemon over the flesh, and then brush it onto the entire surface.
6).  Brush the booze onto the entire surface with the other brush.
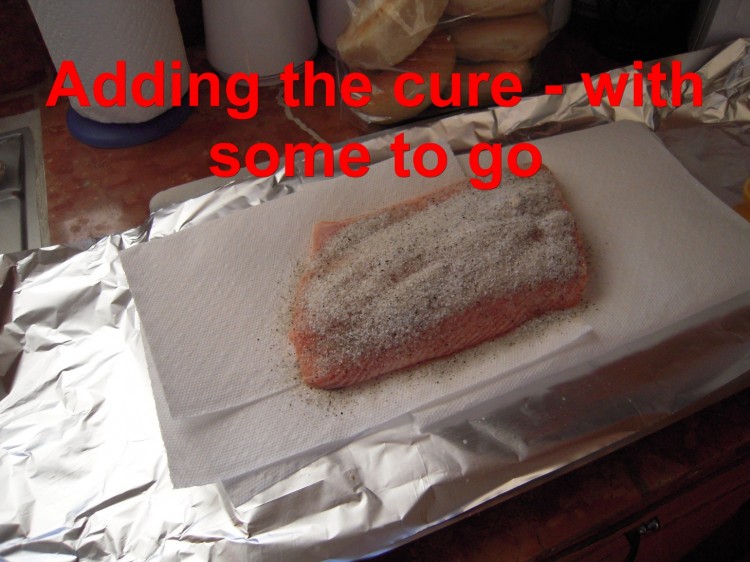
7).  Sprinkle the cure mix over the fish, making sure you cover the entire flesh, applying it more thickly to thicker parts.  Don’t touch or rub it in.  Use all the mix.
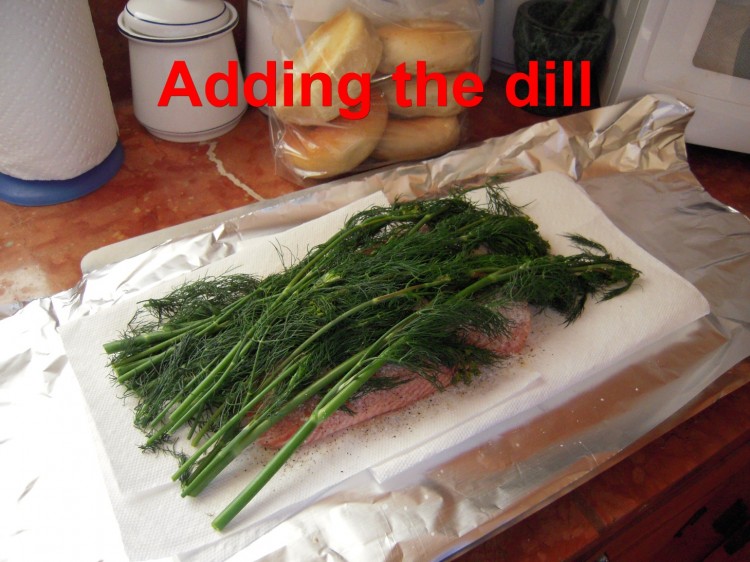
8).  Cut a couple of inches of stem off the dill and arrange the rest on top of the cure mix without disturbing it.
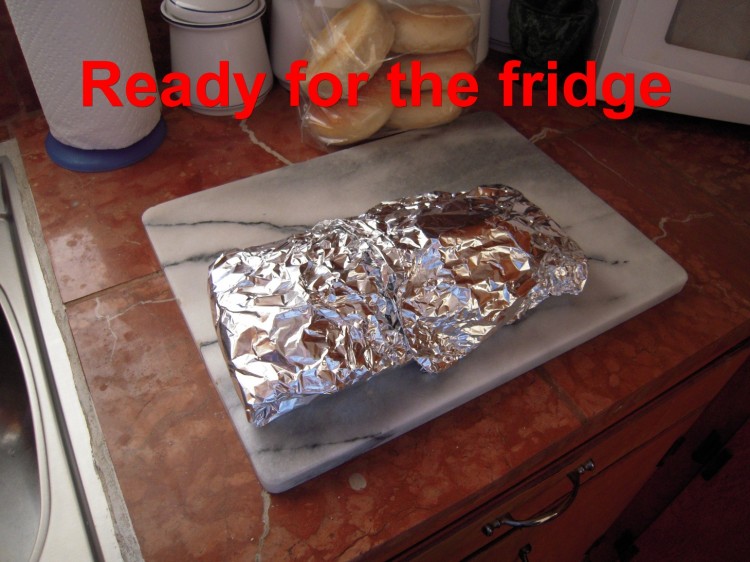
9).  Fold ends of foil over, then sides.  Cover the top with another large piece of foil.  You want to wind up with a rectangular foil-covered package.  Keep fish perfectly flat at all times and do not bend fish!!!
10).  Lay fish packet flat in back of fridge on a few paper towels or another piece of foil – just in case there is a little seepage.  Sometimes there is, sometimes there isn’t.
11).  Allow to cure for two days.  Three days is OK if you have a very thick fillet.
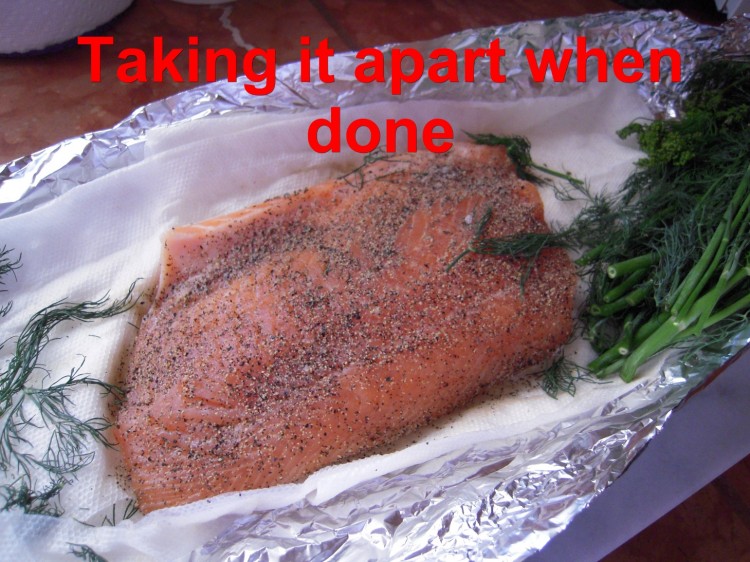
12).  Remove from fridge, open packet and move fillet to a cutting board that has a couple of paper towels on it.  Discard dill.  If cure does not come off easily, it’s OK to quickly rinse fish under cold water and then gently pat dry, bottom and top.
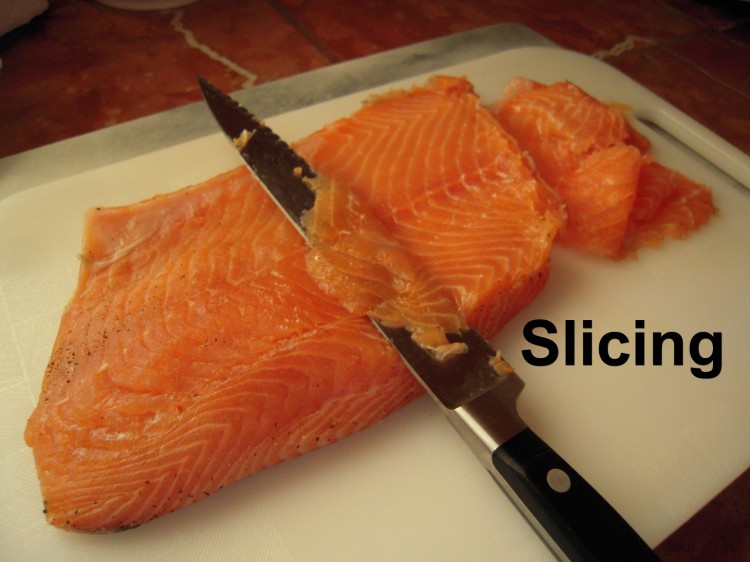
13.  Using a clean cutting board and a sharp, thin knife, cut long, thin slices, holding knife almost parallel to the fish.  See photo.  This takes some practice, but you’ll get the hang of it.  I use a serrated knife – even though a serrated knife is generally not the tool for this job, but it works very well because it’s so thin and holds a razor-sharp edge.  A slicer, if you have one, may be your best bet.  A good boning knife, too.  Depends upon you and the knife.
14.  Arrange slices in lovely circular pattern and serve with a cup of cold mustard-dill sauce in the center.

Mustard-Dill Sauce
Whisk 1/2 cup Dijon mustard, 1/2 cup good honey, a little chopped dill (remember that you were supposed to save a little?), and a couple dashes of sea salt and ground white pepper.  Allow to sit in fridge for a couple of hours so flavors meld.  Note that there’s no dill in the sauce in the photo because someone threw out my reserved dill.
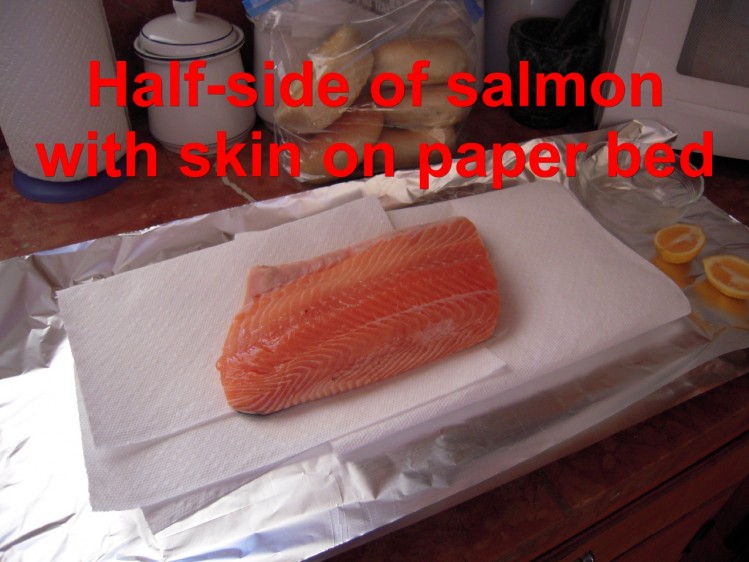
Piece of salmon ready to be made into gravlax

gravlax with cure sprinkled on

gravlax with cure and dill ready for fridge

Gravlax foil packet ready to go into fridge

slicing gravlax

On being green

I sometimes have to take good-natured ribbing from friends back home in NY about the culture in California, the SF Bay Area, and Berkeley and environs – in that order.

The stereotype of the “California yahoo” seems to increase in magnitude with that progression, reaching its apex smack-dab in Berkeley.

I’m asked regularly if I’ve replaced my roof with cow dung and am growing organic crops up there.

I’m told that we Californians talk out of both sides of our mouths, namely driving everywhere and then dumping on others for not buying organic.

Well, I may concede a bit about the driving.  When I lived in NYC I did not have a car.  Public transport is very good there, and having a car is of negative value in most areas.  I tell them I tried living here without a car for 5 years, but it was impossible given how spread out things are and how difficult it was to shop for food.  Supermarkets are not on every corner.

I further justify myself by pointing out that I bought a Honda Civic new in 1999, it has less than 50,000 miles on it, and continues to serve the needs of 4 people.

I suppose the bottom line is that I do what I can, and try to do more all the time.  I make choices based on information I may not have been cognizant of 10 years ago.  Now, the more I know, the more I want to learn.  Where food is concerned, I read labels and seek out information before I buy.  If that makes me a yahoo, then so be it.

I’m happy to say that many of us here in California and elsewhere are making incremental changes.

Some things are harder than others.  For example, until organic, grass-fed beef takes over a larger part of the market share and prices drop, I cannot afford to purchase it exclusively.  We don’t eat very much red meat, perhaps once a week, so I try to buy it 50% of the time.  Chicken – pretty much the same program; every other chicken I bring home is organic.  With pork, I buy Niman Ranch as often as possible.  Issues here are complicated, particularly with beef.  People in the US are accustomed to the flavor of grain fed beef – mostly in the form of feed lot beef – but are not knowledgeable about its production.  Many say they don’t care, but I bet they would if they saw things first-hand.

I made a full transition to organic eggs.  They taste much better and I feel good about not increasing demand for the crueler product.  I’m happy to say that a non-organic egg has not entered chez Renate for 5 years.  Even Costco now carries organic eggs in 18-egg packs.

I try to buy local, organic produce, whenever possible, and shop for fruits and veggies almost exclusively at farmer’s markets and stores that are careful about what they offer, like Berkeley Bowl.  This is a no-brainer.  If you don’t want synthetics in your fruit salad, then buy organic, or from local farms that use natural pesticides and fertilizers, even if they’re not certified as organic.  Ask!

There are some “green” things I started doing that actually save me money and make life easier.

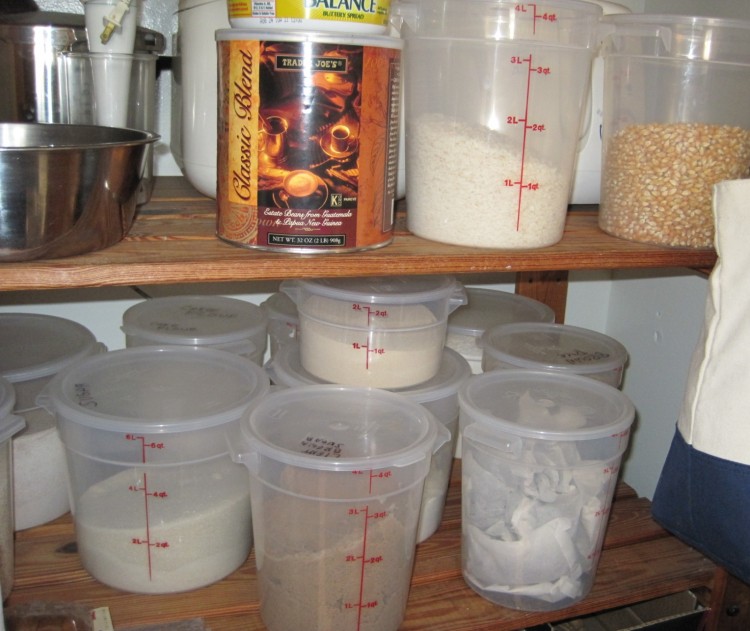
I buy in bulk and store in air-tight, food-grade, NSF approved, plastic containers.  You have no idea how much easier it is to work in the kitchen when you don’t have to futz with bags of flour and sugar.  Costco, Smart & Final and 99 Ranch serve me well.  I was even able to buy a two-pound package of Red Star active dry yeast at S&F for $5.49.  Hello!  Those little 3-packs can go for $2.50!  Not only will you save money, but there will be less packaging for the environment to have to contend with.  Here’s a photo of a portion of my pantry.  Popcorn, brown sugar, raw sugar, bread flour, AP flour, whole wheat four, brown Jasmine rice, iced tea bags, yeast – all there.

Food stored in plastic containers - bought in bulk

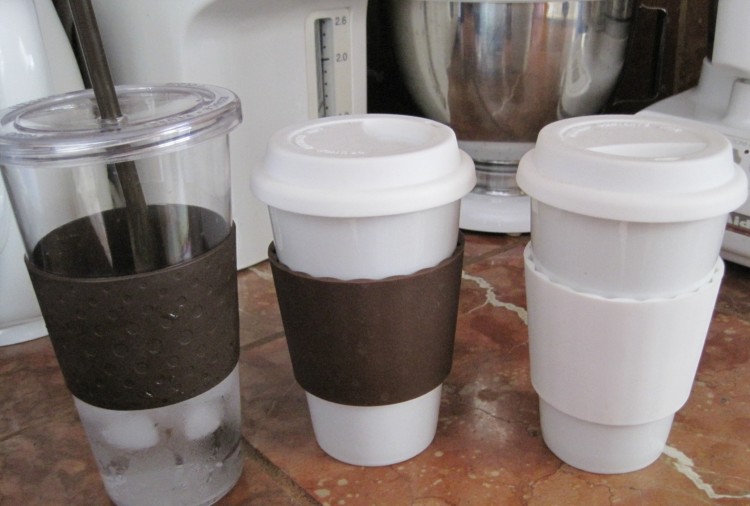
We also use hot and cold travel cups that look disposable.  The hot cups are porcelain with silicone tops and sleeves, and the cold cups are non-BPA plastic with a screw-on lids and plastic straws.  We take home-brewed coffee and iced tea out the door and save a small fortune without generating plastic trash from take-out iced lattes.  Sure, we buy coffee out sometimes, but as a treat.  The Eco-First cold drink cup is from Copco, and costs about $7.99.  The Eco Cup for hot beverages is from Decor Craft Inc., and sells for about $10.

enviro cups 5-10

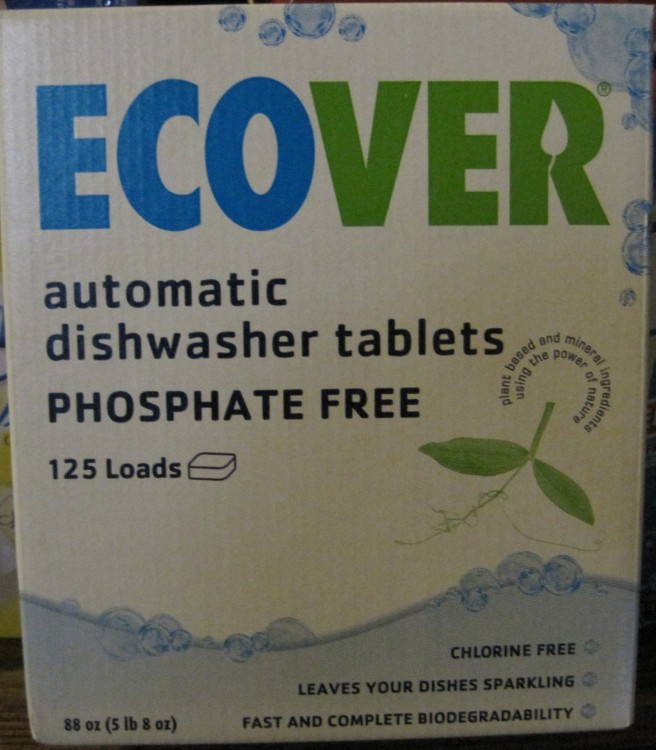
You might also want to start using some of the phosphate-free, enviro-friendly products for your dishwasher (and clothes washer, for that matter).  Not only are many of these fully biodegradable and biorenewable, they’ll help prevent suds-lock.  My Costco now even carries Ecover dish tablets, a product I love.

box of ecover dishwasher tabs

I also stay away from disposable wipes, and use one of the “green” spray cleaners and a cloth that resists bacteria, which I wash along with the rest of my laundry.  You can pick up a container of Costco’s version of a friendly cleaner, if you want the most bang for your buck.  It comes with a spray bottle and you can dilute it.  Just shy of 1 and 1/2 gallons, it’ll last forever.  If you’re a purist, and want little more than pure soap suspended in water, look for products at a place like Berkeley Bowl.  Sometimes you do want something like this, as I do for my stall shower, which my dog visits daily to lick water off the tile.

costco multipurpose enviro-friendly cleaner

I guess what I’m trying to say here is that we should all think about this stuff and do what we can.  Start with a few easy things and go from there.

Not destroying the environment, not running through every natural resource we have, and keeping harmful things away from and out of our bodies are always good, no matter what you think about global warming.

Savory Oatmeal for Dinner!

Does this look like a bowl of oatmeal? Well, it is!

Does this look like a bowl of oatmeal? Well, it is!

When I first came out with my savory oatmeal recipes, friends thought I was crazy.  Yeah – crazy like a fox.

The only reason people look at you like you have 35 heads when you serve oatmeal with ham and cheese is because it’s customary in the US to have it for breakfast – and to have it sweet.  Well, I don’t like it sweet.  And I don’t like it much plain.  Enter my plan to treat it like any other grain – which it is.

The one problem, if you can call it that, is the mushy texture.  No getting around that, but you can minimize it by using slow-cooking oats, and employing other ingredients that add some contrast.

The two recipes I came up with may be modified to your liking (and I encourage that!), but the oatmeal served with assorted toppings is best cooked only with chicken stock, and the version that includes cheese needs some milk and butter.  Makes sense, since the latter should turn out creamy.  You can use water in place of stock, of course, but it’ll be less savory.  Use a good, organic, low-salt stock if you don’t make your own.  A cheap, salty stock will taste terrible in this dish, so just…don’t.

Avocados are looking beautiful now at Berkeley Bowl, Whole Foods, Monterey Market and Raley’s, and I’ve even been able to get some decent tomatoes, so it’s a good time to try this frugal, healthy dish.  Just make sure to use high-quality, ripe fruit.  Don’t forget that avocados and tomatoes are both fruit!  Organic is best, if you can swing it.

I’ll give you the ham and cheese recipe, too, which you should try one rainy day.  It looks like you won’t have to wait until next winter for that, given the weather here in the Bay Area!

Don’t be put off.  My family loves this stuff.  My Mother-in-Law won’t eat it any other way, in fact.  You have to at least try it.

Oatmeal with Avocado, Tomato and Sea Salt
  
Serves at least 6 as a full meal

4 cups thick-cut oatmeal (not instant – the slowest cooking kind you can get)
2 quarts organic, low-salt, chicken stock
Pinch of salt
2 large, ripe, Hass avocados, cubed
2 large, ripe, good tomatoes, cubed
1/2 tsp. black pepper
Coarse sea salt

1)  Add oatmeal, pinch of salt, pepper and chicken stock to heavy guage dutch oven or similar vessel and stir to combine
2)  Bring to boil and then reduce to a simmer
3)  Cover and cook to desired consistency, stirring often, especially when the mass starts to thicken (I cook for 20 minutes when using the really thick oats)
4)  Spoon into deep serving bowls
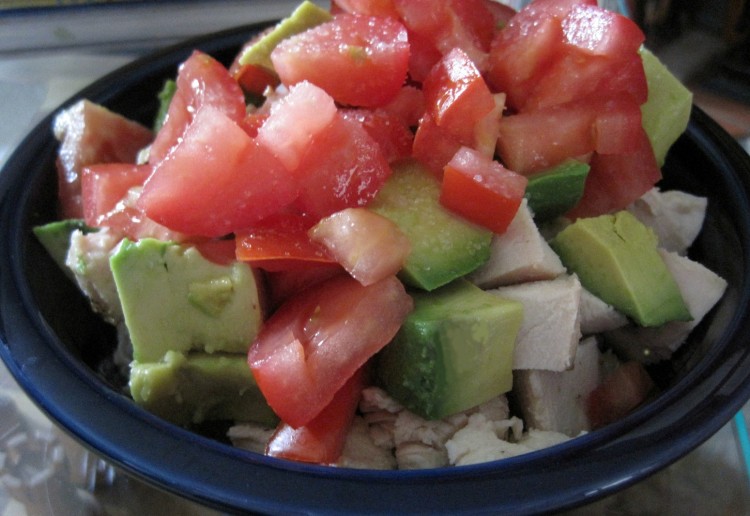
5)  Top with avocado, tomato and a couple cranks of sea salt

Note that I sometimes add cubed, leftover chicken breast before the avo and tomato, as in the photo, but this is optional.

Ham & Cheese Oatmeal
   Serves at least 6

4 cups thick-cut oatmeal (not instant – the slowest cooking kind you can get)
1 quart organic, low-salt, chicken stock
2 cups milk
2 cups water
2 cups finely cubed cooked ham
3 tablespoons butter
1/2 tsp. white pepper
1 1/2 – 2 cups aged (or extra sharp, at least) white Cheddar cheese in small cubes.  Use good, natural cheese!

1)  Add oatmeal and all liquids to heavy guage dutch oven or similar vessel and stir to combine
2)  Bring to boil and then reduce to a simmer
3)  Cover and cook to desired consistency, stirring often, especially when the mass starts to thicken (I cook for 20 minutes when using the really thick oats)
4)  Stir in pepper, butter and ham and allow to cook for another 30 seconds
5)  Remove from heat and stir in cheese, but do not mix it in too much because you want to wind up with pockets of melted cheese
6)  Cover and allow to sit for a couple of minutes
7)  Serve in deep bowls under a couple of over-easy eggs, if you want to be fancy about it

Warm Roasted Brussels Sprouts Salad

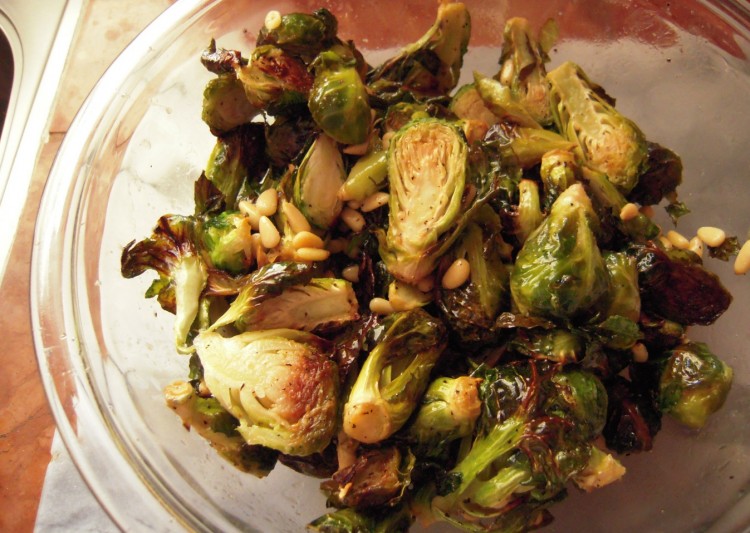
warm brussels sproats salad with pine nuts and nut oil

I love a warm salad during summer.  It can sit out on the counter while your meat or tofu grills and be the better for it.

I make these salads a little luxurious, too, by breaking out my pricey specialty oils, like walnut and hazelnut.  Sticking to fresh produce and a simple preparation allows the flavor of the oil to shine.

One salad I’ve honed combines Brussels sprouts, pine nuts and a vinaigrette made with orange juice, hazelnut oil and a little onion powder.  Onion powder is one of those oddball things that adds complexity and prevents blandness, especially with concoctions containing citrus juice.  Don’t substitute raw onions -they won’t work the same way.

Now, not everyone likes Brussels sprouts, so feel free to substitute green beans.  If you like these cabbage creatures, however, you’ll love the way this salad provides a little sweetness and nuttiness to balance their strength and bitter notes.

I generally make this when Berkeley Bowl and Monterey Market have beautiful, fresh Brussels sprouts with tight heads.  The fewer stray leaves you have for this recipe the better, but nothing’s a show-stopper.

Roasted Brussels Sprouts Salad
Serves 6

2 pounds Brussels sprouts
Scant 1/4 cup canola oil
Sea salt
3 tablespoons pine nuts

For vinaigrette:
2 or 3 tablespoons roasted hazelnut or walnut oil*
1/4 cup fresh orange juice (from sweet oranges – not too tart)
1 teaspoon white vinegar
1/2 teaspoon onion powder
1/4 teaspoon ground white pepper

1).  Whisk together ingredients for vinaigrette and set aside.  Don’t worry about the lack of salt.
2).  Toast pine nuts quickly in a saute pan.  Keep them moving over a medium-low flame.  You know how to do this.  Move to a small bowl and set aside.
3).  After you clean and trim sprouts, steam them for a minute or two, depending upon size, and then plunge into cold water to stop the cooking process.  Dry thoroughly (this is important!) and cut in half, lengthwise.  You can roast them without par-cooking; try it both ways and see what you like best.
4).  Toss sprouts with canola oil and a generous number of cranks of sea salt on a sheet pan.  When coated, arrange them cut side down.
5).  Roast at 400 F. until you get some browning action on the cut side, but you don’t want them to overcook.  Sometimes this takes 10 minutes, sometimes 20, like if I’m working with Rambo-sized vegetables.  Once they are just tender, remove them to a nice, large bowl regardless of how they look.
6).  Pour vinaigrette over Brussels sprouts and toss to coat.
7).  Taste and adjust seasonings.
8).  Allow to sit on counter for a good 45 minutes, tossing every now and then.
9).  Top with pine nuts right before you serve.

*This can be expensive, like $15-for-a-small-bottle expensive.  Sometimes the people from La Tourangelle are at Costco selling an assortment pack of three 8.5 ounce bottles of oil, usually hazelnut, almond and walnut, for $20.  This is a steal.  Keep it in the fridge – this is a must!

Spanish-style Brown Rice and Chard

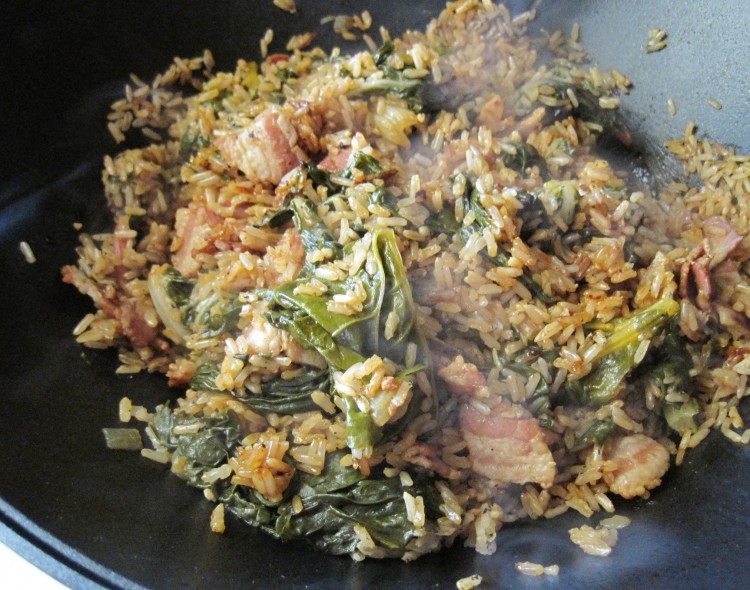
Spanish-style chard and brown rice in a wok ready to serve

I’ve been on a mission to get more brown rice into my family.

I try to hide it behind great flavor and color.  It’s not that they don’t like the texture, but Americans are so used to white rice that they often consider brown rice “not as good” and look at you like you have five heads when you present it to them.

Both my husband and son have great diets.  They eat a wide variety of things and avoid food that’s not really food – like trans fat and all that processed stuff.  The main problem I have involves rice and bread.  When left to their own defences, they choose white rice and white bread.

Myself – I love brown rice.  Especially Jasmine, which is fragrant and delicate.  It works well in dishes where it gets beaten up, like in a stir-fry, because it holds its shape, and it comes out separate and fluffy.  It’s also fairly easy to disguise, if you have to resort to this tactic.

This recipe is, loosely, a Spanish incarnation of Greek spinach rice, which I love, but which doesn’t work as well with brown rice because of the cooking time.  By the time the rice is done, the spinach is a shadow of its former self.  By replacing the delicate spinach with hale and hearty chard, that problem goes away.

Another crops up, though:  the bitterness of the chard.

By switching to a Spanish-inspired version with bacon, the bitterness issue is remedied, too.

You can buy beautiful chard in the East Bay at Berkeley Bowl (two locations) and Monterey Market (1550 Hopkins Street) – and many other stores and farmers’ markets.  High-end supermarkets often have smoked paprika, and I’ve seen it at Trader Joe’s.  If you stop by The Spanish Table in Berkeley (1814 San Pablo Avenue), they have qute a selection.

Jasmine brown rice can be found at most Asian markets.  I usually get it at 99 Ranch Market in Richmond – 3288 Pierce Street.

This is one dish where a non-stick wok works well.  I use my Wolfgang Puck electric wok for this – I kid you not.  If you have a surface that tends to stick badly and where prying off caramelization is a non-starter, take care with the last step of the recipe.

Spanish-style Brown Rice with Chard
   Serves 3 as a main dish, 6 as a side, depending upon appetites!

4 ounces bacon, cut into medium-small pieces
1/2 large yellow onion, small dice
1 teaspoon chopped garlic
1 teaspoon chopped shallot
2 cups Jasmine brown rice
1 tablespoon smoked paprika
1/2 teaspoon black pepper
Salt – dependent upon saltiness of stock used
4 cups chicken stock
1 pound of Swiss chard, leaves cut into fairly large pieces (If your store carries rainbow chard, which Berkeley Bowl does, get this; it’s a mix of colors.  To get it really clean, wash in a sink full of cold water.)

1).  Saute bacon until just under crispy.
2).  Add onion and saute until golden.
3).  Add garlic, shallot and rice and stir-fry for a minute or two.
4).  Add smoked paprika, pepper and salt and make sure all is combined well with the rice.
5).  Saute this mixture for a minute or two.
6).  Add chicken stock and stir well; bring to a boil.
7).  Add chard to the top – do not mix in – and cover.
8).  Simmer for 5 or 6 minutes or until the chard has wilted down enough for you to mix it in to the rice somewhat.
9).  Continue to simmer, covered, stirring in the chard as it continues to shrink down.
10).  When chard is evenly distributed, cook for about 20 minutes, covered, without stirring.
11).  When liquid is absorbed into the rice completely, it should be done.  If not, add a little more stock or water and continue cooking until done.
12).  Allow rice to cook, covered, for an additional few minutes on medium-high heat so that you create a little caramelization on the bottom.  Do not stir, but do not allow to burn!
13).  With a spatula, mix well, pulling up the caramelized rice (this will have stuck to the pan) and distributing it throughout.