Category Archives: Recipes

Zippy Hot Water Cornbread

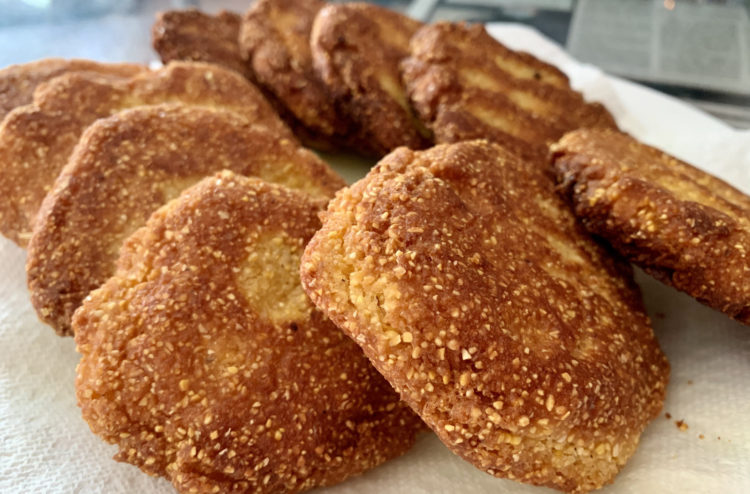
Shows a plate of hot water cornbread

Just a quick recipe today because friends have been asking for my hot water cornbread recipe.

Hot water cornbread batter is made with boiling water, which cooks the cornmeal partially. Then patties are formed and they are shallow-fried. You wet your hands in a bowl of water before you form the patties, which should not be too thick, else they won’t get done in the middle. Southern cooks swear by the need for a bit of water on the outside to get that signature crispness. I don’t question that.

I make mine somewhere in the vicinity of a half-inch thick.

They go from your hands right into the sizzling (neutral and high-smokepoint) fat of your choice. When the pan is full (though don’t overcrowd) fry them at a sizzle for a bit but then turn the flame down so they fry slowly. If the flame is high the whole time they’ll burn on the outside and won’t cook on the inside.

You can make these with nothing more than cornmeal, salt and baking powder, but read on.

Whatever else you add is up to you. Flour is common. Mine also include a few other things. Cornstarch, rice flour, melted butter and Tony Chachere’s Creole seasoning.

They come out crisp, crisp, crisp. And they remain pretty crisp as leftovers.

Mine are also a bit chewy. Because of the flour. Which is scalded by the boiling water, creating a chemical reaction known as starch gelatinization. This works very well with the coarse cornmeal I use, which would otherwise result in a grainy final product.

You can use any Creole/Cajun seasoning you like. Slap Ya Mama, Paul Prudhomme. I like Tony Chachere’s, though I get the low-salt version, which is still plenty salty. Adjust the salt based on how much seasoning you use.

When you fry them use a cast iron skillet or some other heavy-gauge frypan. It is much easier to control the cooking process.

These are great with some Crystal hot sauce. Or the Nobu-inspired dip I’ve been making for years. Mayo, chili oil and white pepper whisked together.

Great with eggs, country-style gravy. You name it.

Zippy Hot Water Cornbread
 
Prep time
Cook time
Total time
 
This is a recipe for a Creole-style hot water cornbread.
Author:
Cuisine: Southern
Serves: About 12 patties
Ingredients
  • 2 cups coarse cornmeal
  • ⅓ cup AP flour
  • 2 tablespoons rice flour
  • 2 tablespoons cornstarch
  • 2 tablespoons baking powder
  • 1-1/2 teaspoons Creole seasoning (or more, but not too much)
  • 1-1/2 - 2 teaspoons Kosher salt (more if you don't use the Creole seasoning)
  • ½ teaspoon black pepper (omit if using Creole seasoning)
  • ½ stick melted butter
  • Kettle of boiling water
  • Vegetable oil--enough to shallow-fry. About 1-1/4 cups, give or take. Sunflower, safflower, grapeseed or even the dreaded Canola, but not olive. And read the post!
Method
  1. READ THE TEXT IN THE POST BEFORE YOU DO ANYTHING!
  2. Whisk all dry ingredients together in glass bowl.
  3. Add melted butter.
  4. Add boiling water about a cup at a time, mixing well, until you have the texture of damp Play-Doh. When you think you have it let it sit for a couple of minutes to fully hydrate. Only then will you know if you have enough water.
  5. To your skillet add a good amount of vegetable oil. Add enough so that your patties are ¾ covered. Eyeball your situation. Your pan is not the same size as my pan.
  6. Bring oil to a shimmer. It's got to be hot enough but not too hot!
  7. While you wait for the oil you can set up your batter bowl and a bowl of water. You will form either round or oblong patties by dipping your hands in the water, then shaking them off, then taking a scoop of dough and taking care of business. You need about 1/12 of the dough for each patty. Make them about ½-inch thick. The patties should not be dripping wet. Just a bit of water patted onto each side.
  8. When the oil is ready start forming patties and add them directly to the skillet. Carefully. They will spatter.
  9. When you have you pan full but not too full, allow them to fry on medium flame for a minute or so, then TURN DOWN THE FLAME TO LOW.
  10. At some point gently shake the pan to make sure you have no stickage.
  11. When golden brown carefully turn over.
  12. You want a good 5 minutes on each side on low flame. When you turn them over you should jack up the flame for a minute and then turn it down again.
  13. When done transfer to a platter lined with paper towels.
  14. Devour.


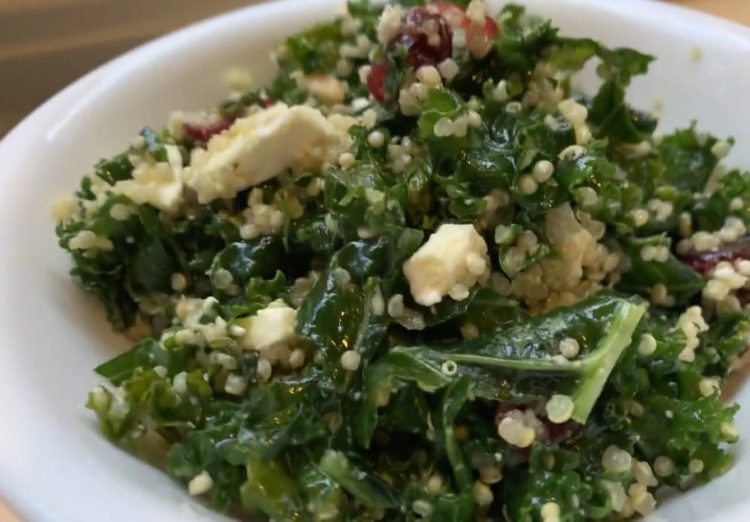
Lemon kale quinoa salad. It’s really good!

Lemon Kale Quinoa Salad

You’ll thank me for this recipe. I hope.

Even if you don’t like kale or are over it.

It’s more or less a knock-off of Whole Foods’ lemon kale soofoo salad, but made with quinoa, though feel free to sub soofoo, which is a mix of brown rice and grains. Soofoo is not easy to find, but it’s around.

The first time I had this salad from Whole Foods I fell in love with it. It’s tart from both lemon
and feta, crunchy from chopped nuts, a little bitter from the kale, and a touch sweet from dried cranberries.

The price is hard to take, though. In these parts it’s $8.99 a pound.

No. Just, no.

Here I’m giving you a very respectable copycat recipe, but this version calls for you to work
the kale over a little to make it less bitter and less overpowering. You know what I
mean. Kale isn’t known for subtlety.

This salad is about brightness and doesn’t swim in dressing, so proceed
accordingly if you alter the recipe. Don’t use too much oil. You don’t want to have to serve it with a slotted spoon, nor with an ice cream scoop. It should be a bit on the dry side.

Give it a shot and let me know what you think.

Lemon Kale Quinoa Salad
 
A bright, lemony salad with kale, quinoa and feta. It's a copycat recipe for Whole Foods' Lemon Kale Soofoo Salad. Feel free to substitute soofoo for the quinoa.
Author:
Recipe type: Salad
Cuisine: American
Ingredients
  • 1 bunch organic curly kale
  • ½ tsp Himalayan pink or fine kosher salt
  • 3 tbsp olive oil
  • 2 tsp organic sugar
  • Few shakes ground black pepper
  • ⅓ cup chopped pecans
  • ¼ cup dried cranberries
  • ⅓ cup chopped feta
  • 3 c cooked, cooled quinoa*
  • Zest of 1 lemon
  • Fresh lemon juice to taste, but at least ¼ cup

    *To make 3 c quinoa you need 1 c quinoa and 2 c water. Rinse the quinoa well and add to saucepan with the water and bring to a simmer. Allow to simmer slowly, with lid off, until all the water has been absorbed. Turn off flame, cover and allow to steam for 10 minutes. Take off lid, fluff and allow to cool.
Method
  1. Prepare your washed and dried kale by removing large stems and tearing or cutting leaves into pieces no more than a couple of inches square, or into strips about an inch wide. Place kale pieces into a large salad bowl and toss with the salt. Rub salt into the kale well and massage so as to break some of the cell walls. Next, pound the kale a bit with the end of a wooden spoon. Set aside for 45 minutes. Toss well with the oil, sugar and pepper. Set aside for another 30 mins. Kale should be somewhat softened and wilted, but still have some life left.
  2. Toss pecans, cranberries, feta and quinoa into prepared kale.
  3. Add lemon zest and juice and toss.
  4. Taste and adjust seasonings to your liking.


Make your own pickles!

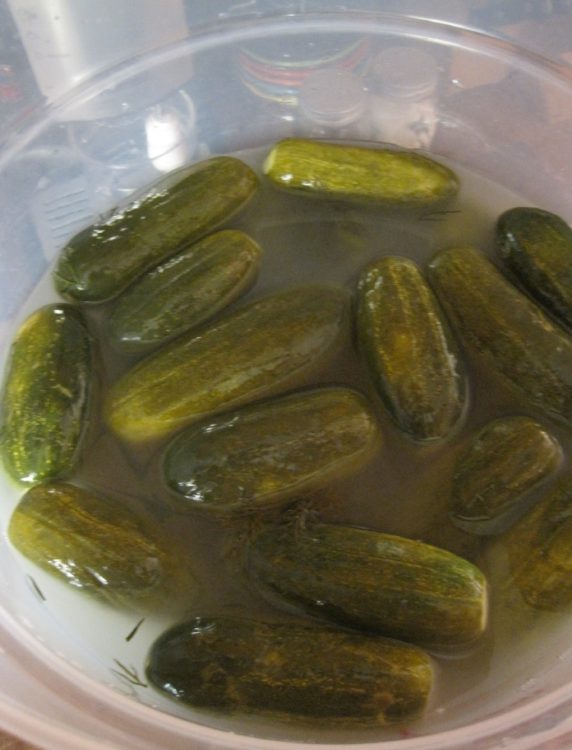
pickles in brine after 9 days of fermenting

I wrote this story about pickles for El Cerrito Patch in 2010, when it was a decent
publication. In recent years the stories I wrote for them have been turned into
“community posts” and have suffered from editorial errors that occurred after
their original publication. I have edited the story for those errors and updated it, where
necessary.


Make Your Own Pickles? Easy!

By Renate Valencia
Jun 14, 2011 (Updated Aug 3, 2019)
El Cerrito Patch

A final loop around the farmer’s market on a recent Tuesday morning had me running into a small mountain of perfectly ripe, dark green pickling cucumbers — which I snapped up.

Pickling cucumbers are squat with thin skin and lots of bumps, or “burps.”

I’ve made all kinds of pickles over the years, but particularly enjoy crafting two varieties: the naturally fermented, sour, salty, zesty and often garlicky Kosher-style dills of my New York City childhood, and tart, sweet, savory, onion-laced refrigerator bread & butter pickles. The former taps into food science through a lengthy battle between good and bad bacteria, and the latter is conventional, quick and easy.

Naturally Fermented Pickles

Lacto-fermented pickles get their sour flavor from lactic acid fermentation, not vinegar.

I make them in my garage, where temperatures during summer generally fall within the ideal range of 60°-75°F.

Freshly-harvested pickling cucumbers are added to brine — water and salt — with flavorings, like dill and garlic, and allowed to ferment at room temperature for a number of weeks. Brine is hostile to bad bacteria, allowing good lactic acid bacteria — like Lactobacillus — to thrive, digest sugars in the cucumbers and produce lactic acid. Lactic acid in turn helps fends off spoilage-causing bacteria and turns the cucumbers into pickles.

The brine has to be salty enough to give lactic acid bacteria an edge, but not so salty it doesn’t allow them to survive. Cucumbers are weighted down under the brine to keep them away from spoiler microbes that thrive on air, and the brine’s surface is monitored and skimmed of scum, mold and yeast throughout the fermentation process, though the use of a good airlock system— which does not allow air in — generally prevents much of this from forming if conditions are optimal.

Keeping air away from the brine cuts down on surface attacks, but carbon dioxide, a byproduct of fermentation (think beer) must escape, so the set-up can’t be airtight. I use a fermenting crock with a water lip that serves as an airlock, or a mason or other type of jar outfitted with an airlock system.

When the pickles are ready according to personal taste, pickles and brine are transferred to smaller containers and refrigerated.

This ancient dance involving salt content, pH, weather and air has made a comeback in recent years as part of real and raw food movements, so if you’re interested there’s a thriving natural fermentation community in the Bay Area. I suggest a hands-on workshop at a place like Happy Girl Kitchen, and some quality time with food revivalist Sandor Ellix Katz’s books, which include a wealth of information.

Mainstream home food-preservation experts generally advise adding vinegar to the brine and, after fermentation, canning to prevent food-borne illness, like listeriosis. Check out The National Center for Food Preservation, which includes the USDA guidelines, and the Ball Blue Book, often considered the bible of home food preservation, to begin to understand what drives these conservative approaches, which are at odds with traditional fermentation methods.

Home fermenters were happy to see this 2009 article in the San Francisco Chronicle, where USDA microbiologist Fred Breidt was quoted as saying, “With fermented products there is no safety concern. I can flat-out say that. The reason is the lactic acid bacteria that carry out the fermentation are the world’s best killers of other bacteria.”

Ironic, then, that canning is prescribed as a preventative to food-borne illness for fermented vegetables given the botulism risk, if not done properly. It’s important to remember that the invention of canning is what did traditional methods of preservation in in the first place, and that the persistent belief that modern science is always better has kept older methods at bay.

Still, natural fermentation has been undergoing such a tremendous resurgence that conservative guidelines have all but become irrelevant to enthusiasts.

Bread & Butter Refrigerator Pickles

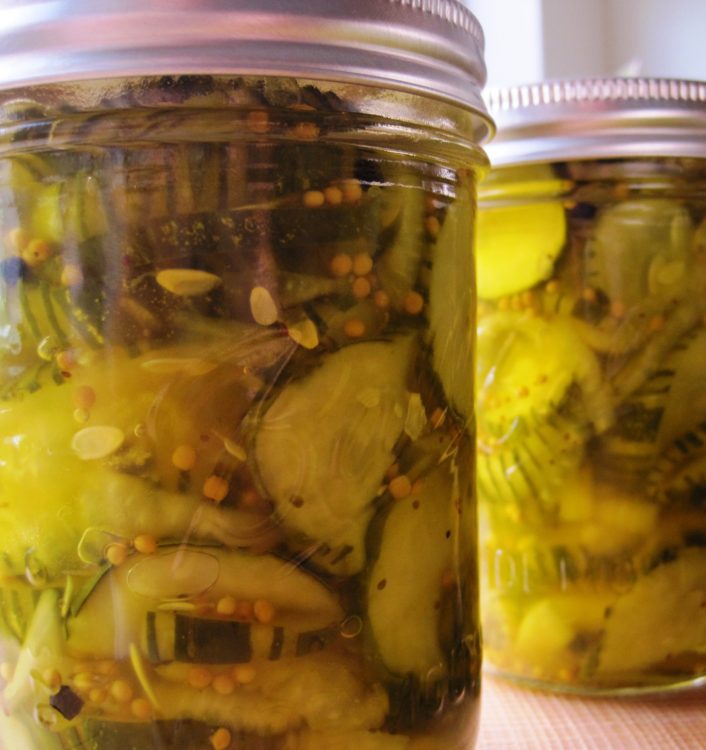
bread and butter pickles in jars

This quick-process, pickle chip-and-onion mix gets its tartness from vinegar, and is a great option if you’re looking for simplicity and near-immediate gratification. Plus, it’s delicious — I can’t keep up with demand.

Water bath canned, shelf-stable bread & butter pickles cure in their jars to a kind of mellowness, but the refrigerator version retains brightness and snap, and you can fiddle with the formula since you don’t have to worry about canning requirements.

The recipe below is a tart variation of the Ball Blue Book’s version.

For pretty chips, use a crinkle cutter — or run a citrus zester down the length of the cucumbers.

Make lots — you’ll need it.

Bread & Butter Refrigerator Pickles
 
Adapted from the Bread and Butter Pickles recipe in the Ball Blue Book Guide to Preserving
Author:
Recipe type: Condiment
Serves: 4 - 5 pints
Ingredients
  • 4 to 5 pint-sized (wide mouth) mason jars with lids and rings — prepared per the instructions below
  • 4-1/2 to 5 pounds pickling cucumbers
  • 1 Vidalia or other type of sweet onion (should yield about 3 cups of thin slices)
  • ½ cup Kosher salt
  • 2 to 3 quarts ice cubes
  • 4 cups white vinegar
  • 2 cups sugar
  • 2 tablespoons yellow mustard seeds
  • 2 teaspoons celery seeds
  • 1-1/2 teaspoons turmeric
  • 1 teaspoon whole peppercorns
Method
  1. Wash pickling cucumbers very well and trim off blossom ends
  2. Slice cucumbers into ¼ inch slices. You should wind up with about 12 or 13 cups
  3. Place cucumber slices in a large bowl
  4. Slice onion into thin rounds and mix into cucumber slices
  5. Mix salt into cucumber-onion mixture and cover evenly with ice
  6. Cover bowl loosely and leave out on counter for 2 hours
  7. Drain cucumbers and rinse very well. Allow to drain well while you make the brine
  8. Bring remaining ingredients to a rolling boil in a large saucepan and allow to simmer, covered, for about 5 minutes
  9. Add cucumber-onion mixture to hot brine and bring up to barely a simmer — not a full boil!
  10. Pack hot cucumbers into jars using a slotted spoon — leaving some headspace
  11. Fill jar with brine, leaving about ¼ inch headspace
  12. Remove large air bubbles and gaps with a bubble remover or skewer. It’s not absolutely necessary, but it helps make sure all the pickle chips are surrounded by brine
  13. Add a little more brine, if needed
  14. Wipe top of jar and threads with clean cloth and seal with lid and band
  15. Allow to cool to room temperature, label and refrigerate
Notes
To prepare jars:
Run the jars and rings through a complete dishwasher cycle or wash them in hot, sudsy water and then rinse them very well in hot water. Lids should be washed by hand and then dried carefully.

Other notes:
1). Use non-reactive kitchenware, like stainless steel, earthenware, glass or plastic
2). If you’re not using wide-mouth jars, use a funnel to fill them
3). This produces a very tart pickle; alter the recipe to your taste
4). Allow the pickles to cure for a day or so before you use them
5). If you followed the instructions, they should last, under refrigeration, for a few weeks
6). Never store refrigerator pickles anywhere but the refrigerator


Tres Leches cake & GraceAnn Walden: It’s complicated

GraceAnn Walden with Patricia Rose’s Tres Leches cake — covered with strawberries, which are optional

I met muralist Patricia Rose at a party at Bay Area food writer GraceAnn Walden’s house some years ago. She brought a tres leches, or “three milks,” cake with her, and it was a hit. When she gave me her recipe I knew I wanted to write about it, but the post has been sitting in my drafts folder for years.

The cake is tied to an event that is tied to a friendship with GraceAnn that I needed to move away from. Revisiting the cake recipe means revisiting that.

While I could write around the issue and focus on the cake, I’ve chosen to use this post to work through it and send some positive mojo GraceAnn’s way.

I met her in 2005 when I interned at the San Francisco Chronicle’s Food and Wine Department. GraceAnn had her own column, Inside Scoop, a Bay Area culinary insider’s commentary that ran weekly and reflected her sharp and irreverent wit.

She was a pioneer when it came to gossipy writing about the up- and underside of the local restaurant and bar scene. It’s a popular form now, but she went out on a limb with her confident, unapologetic, sometimes-biting, style when starting the column back in the late 1980s at a publication called BayFood.

In 1991 GraceAnn moved Inside Scoop to the San Francisco Chronicle.

I was only an intern there, but she treated me like a colleague. She noticed little things I did in the test kitchen — as I found out when she talked about them publicly at my culinary school’s 2005 fundraiser.

“Renate Valencia,” she said to the audience, “does what needs to be done without complaining, even if it means staying late to polish the stainless steel appliances.”

It’s true. I gave the stainless some extra attention.

Michael Bauer, the Food Editor, liked the stainless steel to gleam. Or so I was told my first day. Well, he was always lovely to me, so why not give a little back?

After leaving the paper in 2006, GraceAnn started a walking tour business. She took groups around North Beach, the Mission District and other areas of interest. She also published an on-line food zine, The Yummy Report, which I understand morphed from The Yummy Letter, a slightly earlier collaborative effort connected to Northside San Francisco Magazine.

By the time we reconnected in 2010, GraceAnn was working on The Yummy Report and looking for contributors. I was happy to oblige, given that I needed the experience and wanted to repay her earlier kindness. I was writing local restaurant reviews, so she began inviting me to venues she was planning to review, suggesting that I write about them for both my own food site and The Yummy Report.

When you share a couple of long meals with a person you start to get to know them, and so we became friends. GraceAnn was down to earth, very open and lots of fun. It was easy to have a good time with her.

She made it her business to get to know as many culinary folk as possible, from machers like Jeremiah Tower and Wolfgang Puck, to line cooks, servers and other staff. Knowing what was going on where — or not going on, often — had been her livelihood, and she got her information from a broad range of insiders.

GraceAnn had heart and was generous to a fault. A good person, though often confrontational. And loud. She liked attention, and had no problem getting it with her big, brassy personality. I’m sorry to say it wore on me. I found it exhausting. And, if I am to be honest, I didn’t want to be associated with her MO on a professional level, given that I was trying to find my own footing as a food writer.

So, about a year in, I distanced myself, little by little. I never told her why.

GraceAnn passed away suddenly in 2015. Although I still believe it was the right decision to remain silent, I feel guilty nevertheless. I say it was the right decision because it was a matter of who she was and who I am. To have been honest would have been cruel and to no good end. Better that she thought I was mercurial.

I will always appreciate what she did for me. Schlepping me along to events and introducing me to well-known chefs  — who were incredibly fond of her! That was easy to see.

And I will miss her fun-loving nature. There’s a saying in German about people with whom you can make mischief that translates to, “you can steal horses with them.” That was GraceAnn, neither a snob nor a sycophant in a competitive field that has perhaps more than its share of both.

Finally, here is Patricia Rose’s recipe for Tres Leches cake. It’s wonderful!

If you want to take one of Patricia’s Mission mural tours, check out Precita Eyes Art Center.

Tres Leches Cake
 
Prep time
Cook time
Total time
 
A fabulous version of "three milks cake."
Author:
Recipe type: Dessert
Cuisine: Mexican
Serves: 1 cake
Ingredients
  • 6 large eggs, separated
  • 1 cup sugar
  • 1 teaspoon almond extract
  • 1 cup all-purpose flour
  • 1 can (14 ounces) sweetened condensed milk
  • 1 can evaporated milk
  • 1 cup whole milk
  • 1½ cups heavy cream, whipped
Method
  1. Preheat oven to 325 F.
  2. Butter a 9X13 baking dish.
  3. Beat egg yolks and sugar until light.
  4. Stir almond extract into yolk mixture.
  5. Beat egg whites to soft peaks.
  6. Fold whites into yolk mixture until just combined.
  7. Fold in flour -- do not over mix!
  8. Place evenly in pan and bake 20-25 minutes.
  9. Cool 20 minutes.
  10. Scrape skin off the top of the cake.
  11. Combine all the milks.
  12. Pour milk mixture evenly over the cake.
  13. Cover with plastic wrap and refrigerate.
  14. Can keep overnight or up to one day.
  15. Serve with whipped cream.


Burmese tofu

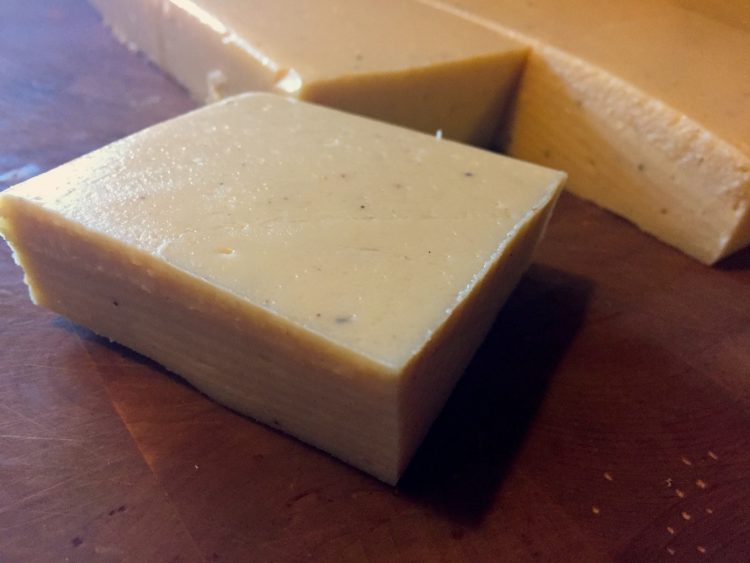
slice of burmese tofu

Burmese tofu. Yellow tofu. Chickpea tofu. Call it what you like. It’s made from chickpea flour and is a spectacular alternative to traditional (soybean) tofu.

Dear friends, this will be a quick post. But not an insignificant one if you’ve never had Burmese tofu.

Burmese tofu is made from chickpea flour, water and, traditionally, turmeric. Hence the color.

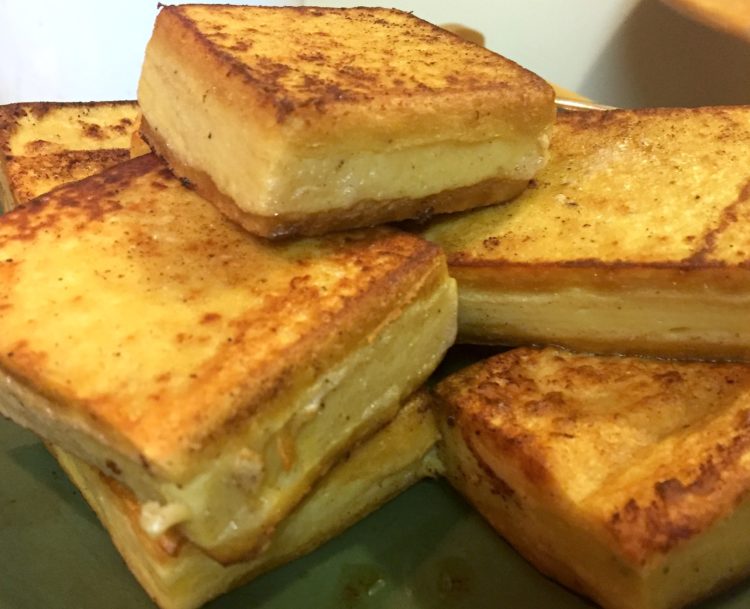
It can stand in for soybean tofu in just about any recipe because of its neutral flavor and the ability to alter its firmness by using more or less water. That means you can fry firm chunks, as in the photo below, which yields a crispy exterior and creamy interior, or make faux scrambled eggs. Everything in between works, too, like stir-frys (or stir-fries, if you prefer) and salads.

Fried squares of Burmese tofu

Fried Burmese tofu. It can stick, so use a non-stick pan. Leftovers are great on a sandwich the next day.

The basic version is seasoned only with turmeric, but you can add whatever you like by way of flavorings.

Here is the basic recipe for a firm Burmese tofu. If you want it firmer, use less water. If you want it softer, use more water. This is a very economical way to get protein and nutrients.

I’ll be posting recipes using this tofu at some point, but you can start out by frying slices in an oil-butter mix and topping with some sea salt.

Burmese Tofu
 
Prep time
Total time
 
Tofu made from chickpea flour that works in almost any recipe calling for tofu.
Author:
Recipe type: Main
Cuisine: Burmese
Serves: Large pan
Ingredients
  • 3 cups fine chickpea flour (garbanzo four; "besan" in Indian grocery stores)
  • 1 tsp turmeric
  • 9 cups water
  • 9x13 baking dish lightly wiped with vegetable oil (or use any kind of mold you like)
Method
  1. Whisk chickpea flour, turmeric and 3 cups of the water in a bowl until very smooth.
  2. Bring remaining 6 cups of water to a boil in a large, heavy saucepan.
  3. Turn down flame to medium.
  4. Whisk chickpea mixture into boiling water and continue whisking until thick. Should take between 4 and 6 minutes. Be sure to keep it from scorching.
  5. Transfer to your mold and smooth top with a spatula. Work as quickly as you can because it sets fast.
  6. Allow to remain on counter until firm and then carefully turn out onto a board.
  7. Cut as desired and use immediately or refrigerate.