Category Archives: Recipes

Better Late than Never in Making Masala Chai at Home

Containers of chai cooling down for the fridge

Containers of chai cooling down for the fridge

You can file this under lame, or lazy, or just plain wasteful.

Why I never started making masala chai (Indian spiced tea) at home I’ll never know.  I have been telling myself to look into this for years, but just never got around to it.

Enter a post I read related to Project Food Blog, a FoodBuzz competition, from The Doctor’s Kitchen.  There it was:  a simple recipe to make what you have to pay dearly for in any cafe.  I adapted the masala chai recipe slightly to serve my main purpose, which is “generic” cold chai, sans milk, to do whatever I please with.  Often I just pour it over ice and add a little sweetened condensed milk, or just skim milk, or I drink it as-is.

Easy, easy, easy, and you’ll be flush in chai.  Make plenty at a sitting, like I do.

If you want it hot, sweet and milky, as served in a cafe, just add some milk and sugar (or sweetened condensed milk) after the steeping and bring to just under a simmer.

By the by, chai just means “tea,” thought it has taken on the meaning of “masala chai” over the years among the English and the Americans.

Please don’t pour it over ice as soon as it’s made or it will be cloudy and weak.  Let it cool on the counter top and then move it to the fridge to get cold.  It’ll be worth the wait – nice and strong and clear.

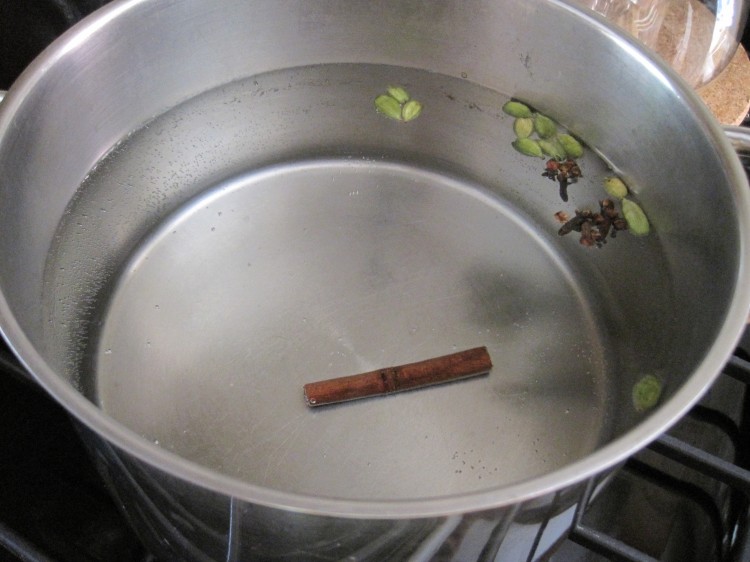
Making chai

Making chai at home

Masala Chai
   Makes 2 quarts

2 quarts water
8 whole cloves
8 green cardamom pods
1 whole cinnamon stick (which you can reuse a couple of times – I do!)
6 tea bags (use bags that produce a good, strong cuppa BLACK tea)

1).  Bring water and all spices to a boil in a saucepot.
2).  Simmer for 15 minutes.
3).  Add tea bags and simmer for no more than 2 minutes.
4).  Remove from heat and squeeze and remove tea bags.
5).  Allow to cool a bit in the pan.
6).  Remove spices with a skimmer, reserving the cinnamon for the next pot.
7).  Transfer to glass pitchers.
8).  Allow to cool almost completely on the counter and then cover and pop in fridge.
9).  When completely cold, serve as you like.

Northern German Herring Salad

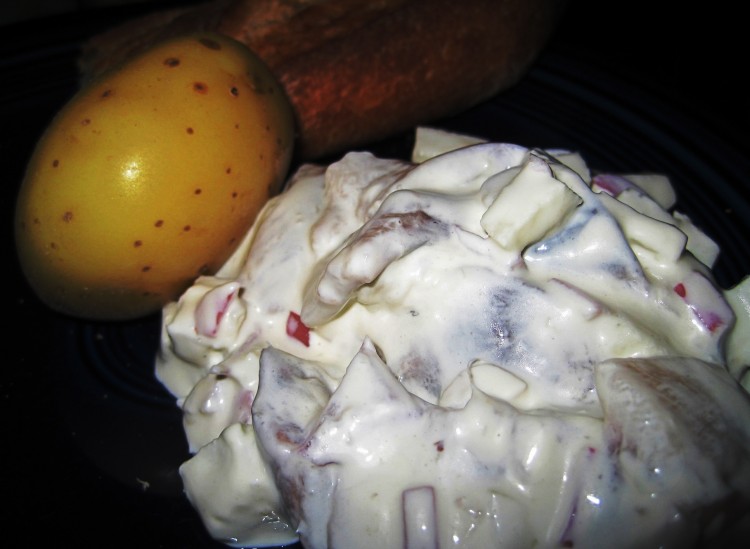
Renate's Herring Salad in Northern German Style with a yellow potato

Renate’s Herring Salad in Northern German Style

My Mom just came back from a long trip to Germany, where she’s from, and has been raving about one of her favorite dishes:  herring salad.

I miss herring salad.  To make it properly in the US borders on impossible, though.

Herring, a fairly strong, oily (and Omega-3-rich!) fish from the North Atlantic and North Pacific oceans and the Baltic Sea, is a way of life in Northern Europe.  Not so much here.  Much of the herring consumed in the US is of the appetizing variety that’s part of (Ashkenazi) Jewish cuisine.  You know what I mean:  herring in cream sauce, herring in wine sauce, chopped herring.  If you’re not connected to a hard-core herring eating community, chances are you don’t know Matjes from Buckling.

For the record, Matjes herring are young, mild herring that run once per year in early summer.  A Buckling is a hot-smoked herring.  The head and insides are removed, but not the roe.  My Oma (Grandma) loved these, and used to talk about them all the time, describing their savoriness in full glory.  Loosely like a kipper.

If you hear Germans talking about “green” herring (grüne Heringe), they mean herring straight out of the water – nothing done to them yet.  These are often fried whole in butter.  Fried herring are called Bratheringe.  The German language is famous for producing compound words from multiple nouns, verbs and adjectives.  Here, a form of the verb “to fry,” or “braten,” is simply now part of the noun.  You may not care, but I figure I’d mention it, along with Straßenreinigungsgebühr, or “street cleaning fee.”

Among the ways Europeans deal with herring, a popular one is simply curing and preserving with salt in a barrel.  The fish are then soaked in water to rid them of excess salt and used in various recipes, like herring salad.  They are not cooked – just cured.  It may rock your world to know that the jarred Vita Herring you’ve been buying at the supermarket all your life are not cooked….by heat, anyway.  If you eat this stuff, go ahead and have ceviche.  Hell, go ahead and take the next little leap to sashimi.   Many things, both good and bad, are arrived at incrementally. 

It is very difficult to find the aforementioned salt herring in the US.  The only place I know of in the SF Bay Area that carries the real deal is Nordic House, in Berkeley.  They actually dig the herring fillets out of a barrel in front of you.  Another option is an on-line outfit, like GermanDeli.com, but the shipping and handling charges are outrageous.

Most of the Euro and Euro-style herring sold in the US  is pickled and in jars or canned and in some kind of mustard or tomato sauce.  You don’t want any of that stuff for this herring salad.  Try to come as close as possible to the right thing.  Keep reading.

To further complicate matters, I like my herring salad made with young, tender, Matjes herring – which are impossible to come by here in a salted state.  When you see them at all they are in a marinade.  When looking for neutral-tasting Matjes herring for this salad, be especially careful with that sold in a marinade — such as the 1 kg containers of Swedish Matjes herring available at Nordic House — because there is often lots of dill present.  Although you may be told you can “soak” the dill flavor out, you can’t.  Plus, there is sugar that will remain after soaking.

After trial and error I found a great product that is available in many US cities and via mail order – much easier to come by than barrel-cured herring:   Richter Matjes herring fillets in canola oil.  There is no marinade.  This is just salted Matjes herring packed in oil.  All you need to do is rinse and dry, which will cut down on the salt.  It may still be too salty for you, but you’ll never know if you don’t try it.  If you live in the SF Bay Area, you can get this at Berkeley Bowl West, across from the meat counter.  UPDATE on 1/29/13:  I have not seen the Richter Matjes at Berkeley Bowl West for a few months now.

The salad I make from these herring passes muster with my Mom, so you know it’s good.  Not only has she eaten a sea of herring in her lifetime, she’s also brutally honest about what she likes and doesn’t like.  Feelings don’t always seem to factor in.
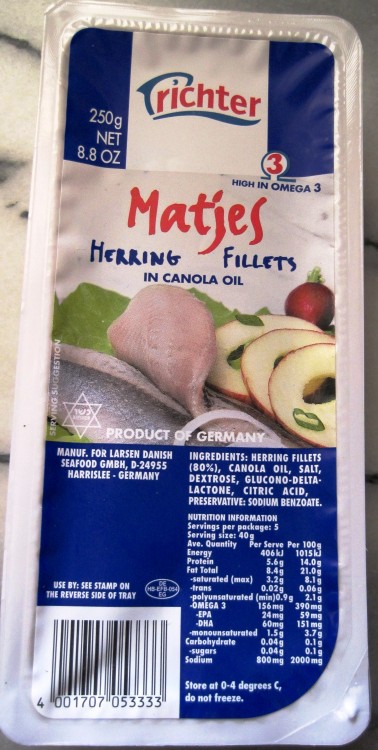
richter Matjes herring in canola oil
In Germany, your basic herring salad includes only a few ingredients, and you can even make the “salad” with whole fillets, which are then served, sauce and all, with little steamed or boiled yellow-fleshed potatoes.  Sometimes the sauce will be made a bit runny when prepared this way.

If you make the salad with chunks, you can serve it on little crusty rolls or with said potatoes.

richter matjes herring in canola oil
In Southern Germany, beets are added.  We hail from North Germany, so we don’t include them.
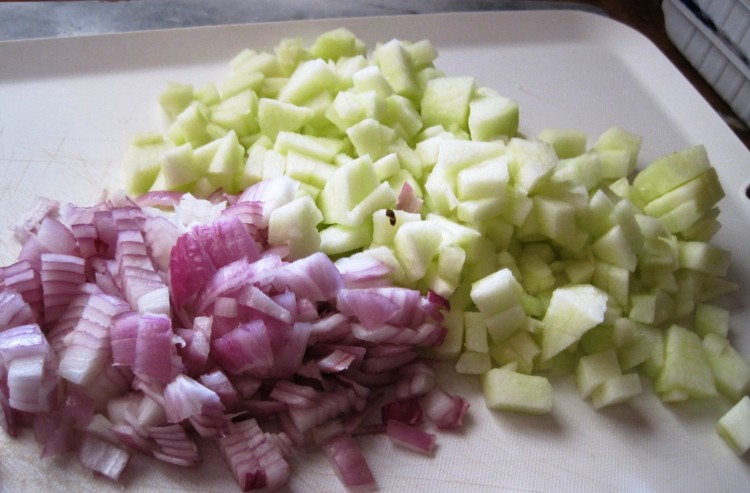
chopped apple and onion for herring salad on white cutting board
Forget the Sauerbraten, which I never saw any of my relatives eat and I’ve only had once or twice, and try this.  This is what Germans really eat at home all the time.  Believe you me, this will be interesting to you if you never had anything but Vita.

If you hate it, send me a recipe from your homeland that you think an American won’t eat and I’ll try it.  I eat everything but kidneys and custard.

Renate’s Herring Salad (Renate’s Heringssalat) 

500 grams Matjes herring (a little over a pound/2 Richter 250 gram packs)*
1/2 cup sour cream
1/4 cup good mayonnaise
1 Granny Smith apple, peeled, cored and cut into small dice
1 small red onion, chopped (not too fine)
Black pepper
Perhaps a little heavy cream or half and half

1).  Open containers of herring in sink and transfer fillets to colander.  Rinse under cold water well and dry very well before transferring to cutting board.
2).  Cut herring fillets into chunks (something like 4 – 6 pieces per fillet, depending upon size).
3).  Whisk sour cream and mayo together in a glass or earthenware bowl with a couple grinds of black pepper.
4).  Fold in apple and onion.
5).  Fold in herring.
6).  Cover and place in fridge for an hour.
7).  Check sauce situation.  If too thick, you can fold in a little heavy cream or half and half, but don’t thin too much.
8).  Serve or set back in fridge until you do.

Allow to sit to marinade a bit.

*If you use salt-cured, barrel herring, you’ll need to soak it at least a day in a goodly quantity of water, changing the water often.  Dry it well.  Action here will depend upon what you buy.  If you are lucky enough to find salted Matjes herring in bulk, it most likely won’t be as salty as mature barrel herring, but your mileage may vary.

Quick Pickles

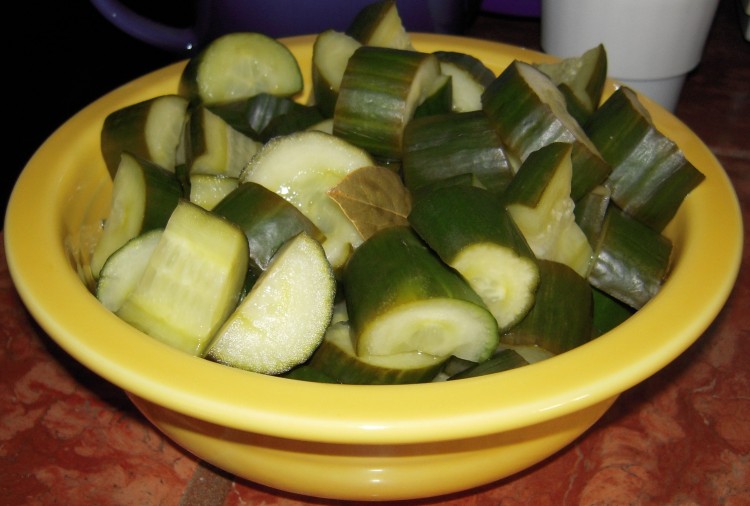
Yellow bowl of quick pickles made from English cukes

I’m sharing this simple little tip for making quick pickles because it’s been as hot as hell here in the Bay Area the last few days and I’m resorting to cool foods to help out.

This always happens.  Much of the US is cruising into fall by this time, with soups, jackets, flaming foliage and pumpkin chais running rampant.  We sit here with a string of 95 degree days.  Hate that.  I don’t care how cool the summer has been overall.  I can’t deal with extreme heat.  The resident akita-chow, Berry, has been miserable, too.

These pickle-like creatures can be made in the morning and served in the evening, and are helpful when you want something to serve with a sandwich or a curry.

Futz with the recipe as you like.  If you want them like Vietnamese cucumber salad (i.e., sweet/sour), use more sugar and only a bit of salt.

Quick Cuke Pickles

1 English cucumber, cut into large chunks – as in the photo (do not peel)
1 cup white vinegar
1 cup water
1/2 cup sugar
2 tablespoons Kosher salt
2 bay leaves
1 teaspoon crushed red pepper (optional)

1).  Place the cuke chunks in a glass or earthenware bowl.
2).  Combine remaining items in a small saucepan and bring to a rolling boil.
3).  Pour liquid over cukes.
4).  Cover with plastic wrap and allow to remain on kitchen counter for 2 hours.
5).  Transfer to fridge and allow to cool for several hours.
6).  Drain and serve.

Roasted Corn with Hazelnut Vinaigrette

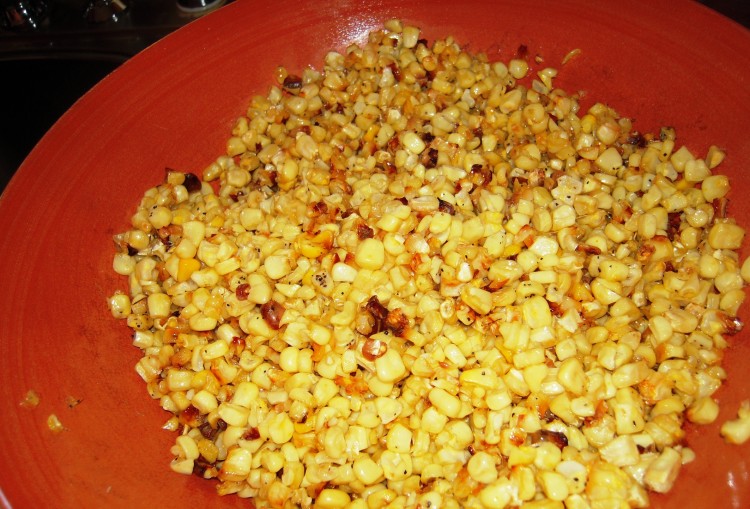
Roasted corn in an earthenware bowl

There were mountains of white corn at Berkeley Bowl West the other day, so I picked up six ears.  I love that they provide receptacles near the corn for shucking then and there.  This helps me keep my green recycling pail from being a third full after one meal.

We’re a little tired of plain old corn on the cob (though we’ll be missing it like mad in about three months), so I thought I’d shear the ears, roast the kernels, and make some kind of side dish.

There is nothing like fresh corn right off the cob.  I have friends who have never taken corn off an ear – and these are food people.  Come on!  It’s easy and really worth it.

They have gizmos now that de-corn an ear in one fell swoop, but a sharp knife works fine.  I like to use my boning knife or smaller chef’s knife, and I cut about 1/2 inch off the thinner end of the cob to create a flat base.  I stand the corn on this base and then cut from the top down, hugging the ear with the side of the knife fairly tightly so I get full kernels.

Make sure you use a sharp knife.  If you feel unsure of yourself, then do this:  Buy a small scrap of untreated plywood – something like 5″ X 5″ – sand and wash it well.  Hammer a brand new, washed and dried, nail through the center of the board.  You want a thick nail that will give you about 3″ to work with once it’s all the way through the wood.  You can then jam the thicker end of each cob down onto the nail as a means of stability.  Gluing some flat silicone “feet” onto the bottom is also a good idea.  Ask for these at your hardware store.   For this recipe, just stand the thing in a sheet pan and allow the corn to fall into the pan as you cut.

Another option is using a bundt pan.  Stick the smaller end of the cob (don’t trim it) into the hole in the middle.  When you shear the ear, the kernels will fall into the pan.  I don’t use this method because I wind up cutting the bundt pan.

Note that my recipe calls for 6 ears of corn, which will crowd your sheet pan – which should technically be a half sheet pan, or half the size of a professional sheet pan.  A full sheet pan will not fit into most home ovens, but a half sheet pan is perfect, and you should have several of these on hand as they are serious workhorses.

Anyhoo, I crowd the sheet pan because I don’t want to dry out the corn.  Some of it will brown, but some of it will just cook from the heat of the corn crowding it.  You want this.  I don’t salt the corn until it’s out of the oven to prevent toughness.

Basic Roasted Corn Kernels
  Makes plenty – a half sheet pan will be full

6 ears’ worth of corn, white or yellow
1/3 cup olive oil

Version A – plain buttered
Sea salt
Black pepper
3 Tablespoons unsalted butter (take it out of fridge when you start corn)
Plastic wrap

Version B – with hazelnut vinaigrette
Sea salt
3 tablespoons roasted hazelnut or walnut oil
1/4 cup fresh orange juice (from sweet oranges – not too tart)
1 teaspoon white vinegar
1/2 teaspoon onion powder
1/4 teaspoon ground white pepper
Plastic wrap

1).  Place corn on sheet pan.
2).  Add oil, mix with hands, and spread out evenly in pan.
3).  Roast in 400 deg. F. convection oven until you see some browning action.
4).  Turn/mix corn with spatula and spread out evenly.
5).  Allow to roast for another 10 minutes or so.
6).  Remove from pan and place in large, heavy bowl.
7).  Go to version A or B.

Version A:  Season corn with sea salt and pepper.  Bury butter in the corn.  Cover with plastic wrap and allow to sit until butter melts – a few minutes.  Remove plastic, mix in butter, and serve ASAP.

Version B:  Season corn with a little sea salt and set aside.  Make a vinaigrette out of remaining ingredients (plus a couple cranks of sea salt) by whisking.  Mix vinaigrette into corn.  Cover with plastic wrap and allow to sit out on counter for 30 mins before serving.  Note that the corn will be very lightly dressed, so if you want more of the dressing just double the vinaigrette recipe.

Indian-style Sloppy Joes

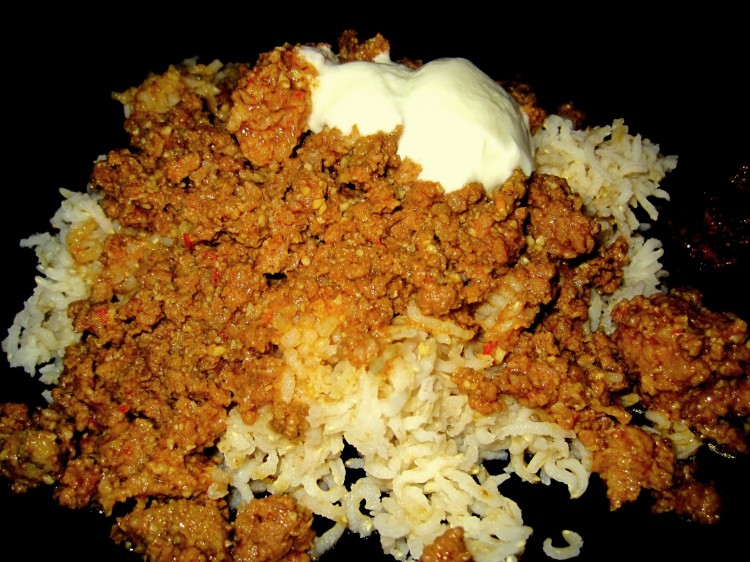
"Butter" ground meat over rice - AKA Indian sloppy joes

“Butter” ground meat over rice – AKA Indian sloppy joes

Here’s an odd recipe I concocted one afternoon when I had ground beef and pork on hand and not a whole lot else.

I thought about sloppy joes.  My Mom, who’s German, would not often make something so “American,” but she would surprise us now and then with sloppy joes, made from scratch, which I took too.

I wanted something less tomatoey and more spicy, though.

My kitchen is generally well-stocked with spices and spice mixes, so I looked around to see what could be had for the ground beast.  Enter butter chicken masala spice mix from MDH.  I like their products.  They’re imported from India and much more reasonably priced than versions produced in the US for American cooks.  Buy them in Indian markets, such as Vik’s in Berkeley.  They’re perfect when you don’t have time to mix your own blends and can’t deal with a grinder, though you’ll want to check the ingredient list to see if any doctoring is called for.  In the case of this mix, you must add a little fenugreek.  I haven’t a clue why MDH does not include fenugreek in its butter chicken spices, since it’s integral to the dish, but there you go.

Note that butter chicken and chicken tikka masala are not the same, though my guess is that the chicken tikka masala spices would be fine in this dish, too.  Take a look at whatever you have on hand and make sure it’s balanced.  For example, don’t use something really heavy on the star anise, unless you want it that way.  You want a little heat, too, so if the mix has no dried red chili powder, add a bit.  Cayenne works fine.  Sniff the spice mix for balance.

The best ground meat for this is lamb, but you can use a combo of beef and pork, which works very well.  Ground chicken and turkey are too lean and will result in a dry dish.

You can serve this over rice or on buns with a dollop of really good, plain yogurt.

If you can make this a day in advance, that would be excellent, because it’ll taste better and you can easily remove remaining fat that will have solidified in the fridge.

Make enough for two meals.

Indian-style Sloppy Joes
   Serves 8, or two meals for 4

3 pounds ground meat (lamb is great, pork and beef (90% lean) mix is good, poultry – no)
1 large onion, chopped so finely that it’s almost pureed (in food processor)
1/4 cup cashews, ground into a fine paste with 1/4 cup water (food processor)
2 – 3 tablespoons butter chicken spice mix (if spice mix is missing fenugreek add a pinch; ditto ground red chili pepper)
1 extra large tomato, coarsely pureed
1/2 – 1 cup chicken stock or water
Rice or buns
Really good, plain yogurt

1).  In heavy-gauge Dutch oven or other vessel, fry meat until it’s a bit browned.  Usually will not need oil for this because your ground meat should have sufficient fat.
2).  Remove meat with a slotted spoon to a bowl; cover with foil and set aside.
3).  Remove all but a couple tablespoons of the rendered fat from the cooking pot and place pot over low flame.
4).  Add the onion and brown slowly, stirring often.  This will take a good 15 minutes.  Keep the flame low.  You want to caramelize the onion a bit, but first the liquids have to cook off.  Be patient and don’t burn the onion!!!
5).  Add the cashew paste and fry the whole mass for a moment or two, turning the flame up to medium.
6).  Add the spices and fry this mass for a moment or two.
7).  Add the tomatoes and fry the mixture for a couple of minutes.
8).  Add the ground meat and combine well.
9).  Add stock or water so that there is barely a quarter-inch of liquid above the meat.
10).  Stir and bring to a simmer.
11).  Cover and simmer over very low flame for about 20 minutes, adding a bit of stock or water now and then, but only if needed.
12).  Remove cover, stir, and allow to simmer for another few minutes until most of the liquids have cooked off.
13).  Skim visible fat (it’ll no doubt be bright red from the spices…)
14).  Serve over rice or on a bun with a little yogurt on top.