Category Archives: Recipes

Tandoori Asparagus

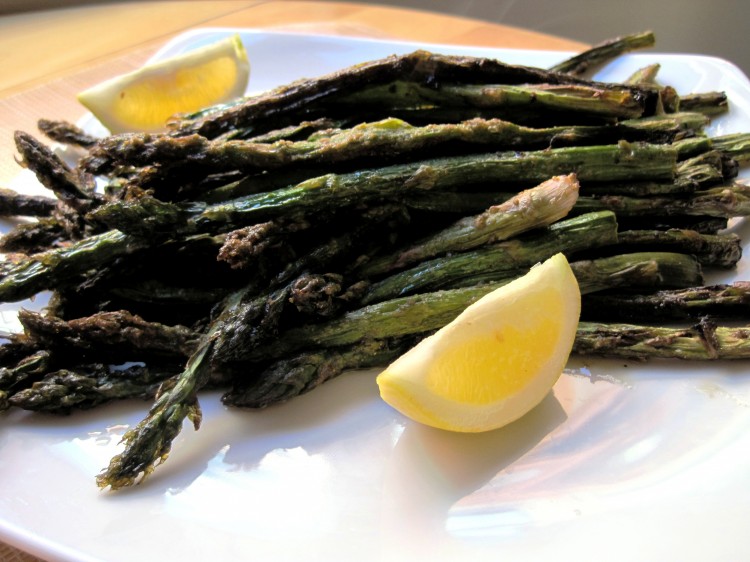
Tandoor asparagus on a white plate

Here’s something easy to do with asparagus that makes them a little different.

You’ll need some dry tandoori spice blend.  You can make your own, but there are some good ones on the market.  Having it on hand is great when you can’t figure out what kind of side to make with din-din and you’re sick and tired of bland veggies.  While I might put together my own spice blend for a main dish, I usually use packaged stuff for everything else.

I suggest going to an Indian or Pakistani grocery for your spice blends.  I wrote a post about this last year, which you can check out.  These stores carry imported products, which are much less expensive than their American-made counterparts.  For example, MDH puts out a good Tandoori blend, and you’ll pay about $1.50 for 100 grams at Vik’s Market in Berkeley.  This is a steal.

Give this a try and then alter the recipe to your taste.  It works well with green beans and potatoes, but you’ll need more oil for the latter.

Tandoori-style Asparagus
   Makes enough for dinner sides for 4 and leftovers

2 pounds fresh asparagus
1/4 cup olive oil
2 tablespoons tandoori spice blend
2 teaspoons sea salt

1).  Wash, dry and trim the asparagus, and then peel the bottom quarter or so of the stems to get rid of the woody, stringy part.
2).  Toss oil, spice blend and salt on a sheet pan and mix with your hands.
3).  Place asparagus on sheet pan and coat spears well with seasoned oil.  Hands are your best tool for this.
4).  Arrange in single layer (or you can put on a rack, if you like).
5).  Blast in preheated 425 deg. F. oven (convection, if you have it) and take out when they are to your liking.  If you use thin asparagus and leave them in longer than you really should, they will be very soft at the ends but the tips will be crunchy and salty/spicy, which I like.
6).  Remove with tongs to serving plate and present with lemon wedges.

These are good as leftovers on a sandwich.  I know I say that about everything, and it’s usually true.  This time it’s really true.

Heirloom Tomato Sandwiches Rock

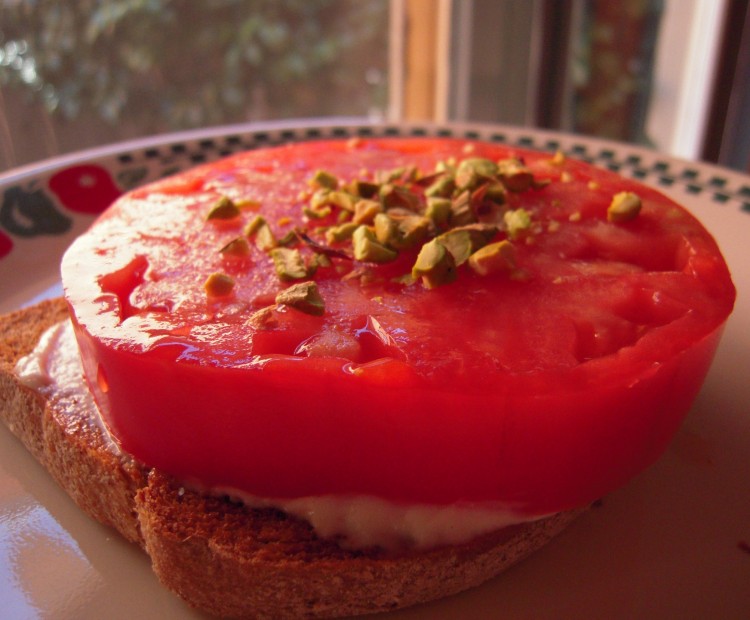
Heirloom tomato sandwich open face with crushed pistachios on top

I wait all year for that brief, shining portion of late summer that brings me luscious, flavorful heirloom tomatoes for about $2 a pound.  Big, red, Beefsteak types, like the Beefmaster you see in the photo, which weighed in at 19 ounces.

That time has come, and I was able to savor my first really spectacular tomato of the year – courtesy of Berkeley Bowl West, which is now full-up with heirlooms at a great price.

I think most of the tomatoes sold in the US are, well, crappy.  The only places to get good ones – and I mean with actual flavor – are the farmers’ markets and stores like Berkeley Bowl and Whole Foods.  Even those quality tomatoes can’t compare to these heirlooms, though, but the price is usually so high for the latter that I go for the former until this time of year.

One little hitch is my tomato allergy.  Since my problem is mostly with seeds, I’m able to eat fresh tomatoes in limited quantity, and I scout out less seedy types.  I’m glad it’s not one of those life-threatening allergies or I’d never make it through the next few weeks!

A great tomato needs very little.

When I was a kid, we’d buy huge Beefsteaks at roadside stands in Pennsylvania and New Jersey, and eat them like apples – by hand.  We always carried a little salt shaker in the car so we’d be ready, and would bring some back home to Queens, where we lived.  This is one of my strongest food memories, and eating a big red heirloom puts me right back in my parents’ car in a 1969 Sunday afternoon traffic jam on the Cross Bronx Expressway inching toward the George Washington Bridge in 90 degree heat – with the smells of melting tar and a basket of roadside tomatoes next to me on the back seat.

You need to go get a huge red heirloom and make a tomato sandwich with one big slice, like I do.

Tomato Sandwich

1 humongous red heirloom tomato with deep, sweet flavor
1 slice really good bread, like Vital Vittles Real Bread, toasted
1 nice tablespoon good mayonnaise
Sea salt
10 pistachios (I use Everybody’s Nuts Salt & Pepper version), crushed (put under plastic and rap with rolling pin)

1).  Cut a 3/4 inch (at least) center slice out of the tomato and store the rest for later.
2).  Spread mayo on toast and lay tomato slice on top.
3).  Grind a little sea salt on top of ‘mater.
4).  Sprinkle crushed nuts on top.
5).  Eat.

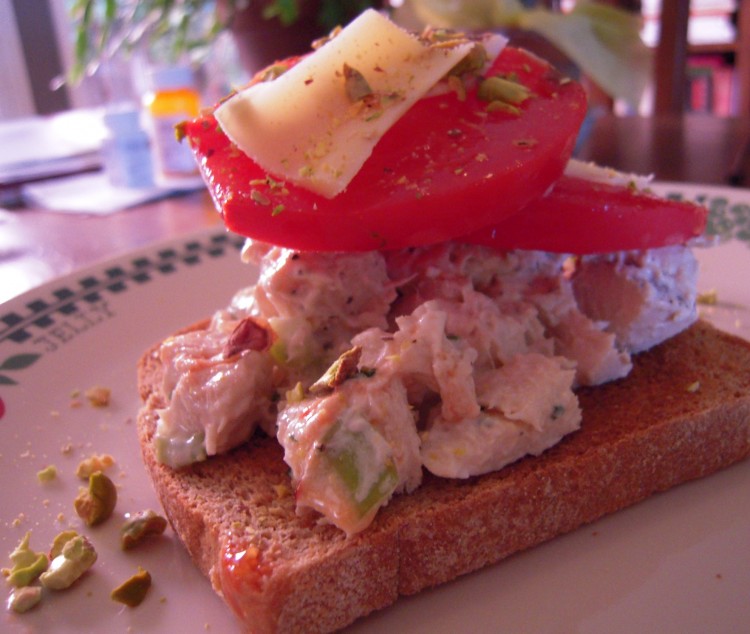
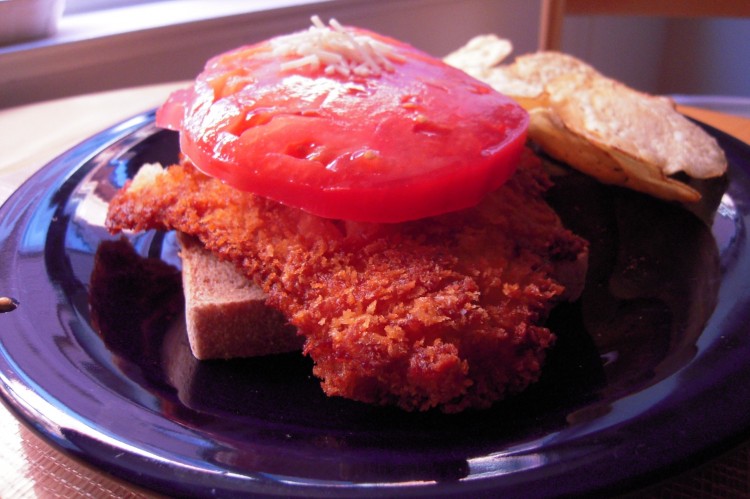
Here are other ideas for sammies with heirlooms:  chicken salad, a few curls of Emmentaler plus said ground nuts makes a good combo.  Fried fish, mayo and a little parmesan works, too.  Check this out:

Chicken salad and heirloom tomato sandwich

Fried fish and heirloom tomato sandwich

Brown Rice in Indonesian Yellow Rice Style

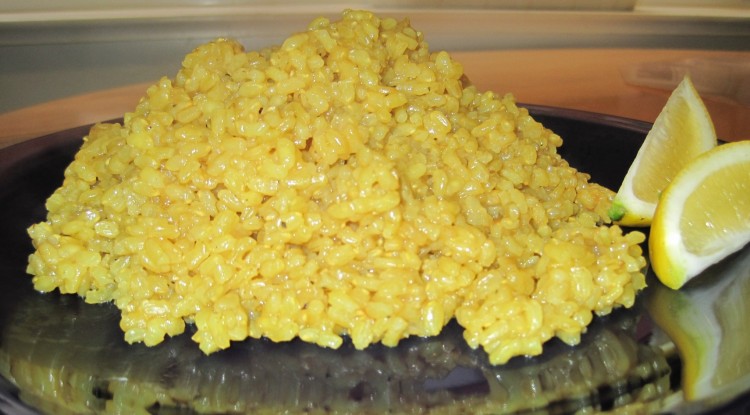
Indonesian yellow rice on a blue plate with lime wedges

Nasi kuning is an Indonesian yellow rice dish often served at parties or special occasions.  The yellow color, from turmeric, symbolizes gold, and the dish is meant to bring good things.  You know, prosperity, health – like that.

I’ve always loved flavored rice, especially when it’s on the dry side – more stained by seasonings than swimming in them.  Yellow rice is a perfect example of this.  Attaining that fluffy yet savory texture can be tricky.  It’s much easier, though, when you use brown rice, which brings me to the other point of this post:  getting more brown rice into husband, Steve, and son, Matthew.

Brown rice has been manna from heaven for me when it comes to creating rice dishes that don’t clump up or get sticky.  Yes, you have to deal with a sturdier texture, but you’ll get used to that.  Also, that firmer tooth works very well in pilafs – better than white rice, if you ask me – because it allows the rice to stand up to the nuts and raisins and whatever else you throw at it.

If you use Jasmine brown rice, you’ll find it eats closer to white than many others, though right now I’m trying to work through a 20 pound bag of plain old Cali brown I got on sale.

For me this all boils down to being able to disguise brown rice in various ways.  Myself, I like the texture, but I grew up in a European household where we ate things that required teeth.

One day I thought I would try to make a form of Indonesian yellow rice with some of that 20 pound bag – that it would be a big hit with the boys.  For my first go I figured I’d just develop an easy wok recipe – which is what I’m presenting here.

Indonesian-style Yellow Rice (Nasi Kuning)
   Makes a big batch for dinner or lots of sides

3 tablespoons Canola oil
1 small yellow onion, diced
1 batch nasi kuning paste (below)
3 cups Jasmine brown rice
1 can coconut milk (14 oz)
Up to 1 quart stock
Salt, if needed
Lime wedges, to serve

1).  In a wok or other heavy-gauge, slope-sided cooking vessel, heat oil over medium heat.
2).  Add onion and stir-fry/sweat for 1 minute.
3).  Add nasi kuning paste and stir-fry for 1 minute.
4).  Add rice and stir-fry for 2 minutes.
5).  Add coconut milk and gently stir fry over medium-low flame until it is almost all absorbed by the rice.
6).  Add 3 cups of the stock and a little salt, if need be, stir, cover and allow to simmer for 30 – 40 minutes, checking often, adding more stock as needed.  Alternate covering and uncovering rice during the cooking process, as needed, depending upon progress and quantity of liquid.
7).  Allow to sit – uncovered – for 5 minutes before serving.
8).  Serve with lime wedges.

Nasi Kuning Paste*
1 tablespoon chopped shallot
The bottom 1/3 or so of 1 cleaned (tough outer leaves removed) stalk of lemongrass, chopped
2 1/2 teaspoons turmeric
2 tablespoons coconut milk
1/2 teaspoon Kosher salt

1).  Grind everything together.  A bullet blender or prep food processor work well for this.

*May use a lesser quantity of jarred paste, but it’s not as good and tends to be salty and oddly strong

Chicken Primitivo

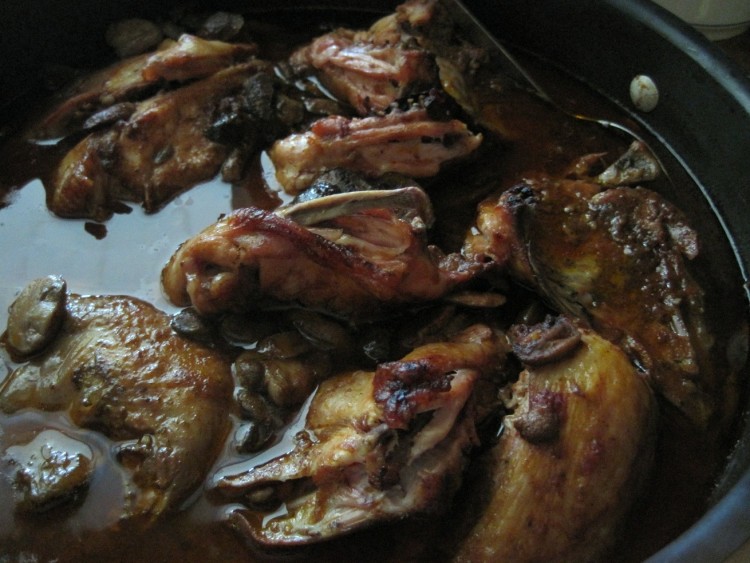
chicken primitivo in dutch oven

Here’s a really easy braise to toss together for a group – or for two meals for a family of 4 or 5.  Although it works well with pasta, I often serve it with crusty Italian bread, which you can dip into the sauce.

I get tired of plain old roasted chicken breasts, and a braise with wine provides richness and complexity.

Braising is often my cooking method of choice.  As long as you have a protein that lends itself to braising, like a tougher cut of beef or stewing chicken, you can put it together and let it go until the meat is fork-tender – usually a couple of hours or more.  If you use split chicken breasts (with the bones and back meat included) from a fryer or roaster, they don’t have to cook as long, but they are sufficiently large so they’ll usually need an hour or more and will develop nice flavor.

Along with your protein you’ll need some braising liquid, like stock; an acid, such as wine or tomatoes; and aromatics, like carrots and onions.  With nothing but these things and a little oil, salt and pepper, you can produce a decent braise.  The trick is to barely cover the protein and to let it just simmer in the oven or on a stove top, and to adjust the cover, which, for me, is usually some foil, so you wind up with a complex sauce at the end that is sufficiently concentrated but not devoid of liquid.

Chicken breasts give off liquid, so if you cover them the whole time, your braise will really be a boil, and the chicken will be swimming in liquid.  Conversely, if you braise some short ribs and don’t cover them at all, you may wind up frying them in rendered fat when all the liquid evaporates.

So, with split chix breasts, I keep them uncovered, and then cover them about 30 mins in – or when the top has some color and the liquid has reduced a bit.

Now, if you want to use fresh spices, feel free, but this is a great dish for dried versions, because they open up nicely.  For God’s sake, though, use fresh ground spices!

Chicken Primitivo
   Serves 9
9 large, split chicken breasts, on the bone/with back meat
3 tablespoons olive oil
1 large white onion, sliced
1 tablespoon chopped garlic
1/2 teaspoon black pepper
1/2 teaspoon ground marjoram
1/2 teaspoon ground sage
3/4 teaspoon ground thyme
3/4  teaspoon ground oregano
1 teaspoon sea salt
2 bay leaves
20 ounces sliced brown or baby portabello mushrooms
1 large (28 oz) can crushed tomatoes
1/3 bottle primitivo or zinfandel (or another decent red wine with acidity and spice)
Chicken stock, as needed (should need about 2 cups)

1).  In a heavy-gauge, oven-safe, dutch oven, heat the olive oil and add the onion.  Saute for about 5 minutes.
2).  Add the garlic and saute for another minute.
3).  Add the spices and salt and pepper and saute for 30 seconds.
4).  Toss in ‘shrooms and saute for a couple of minutes.
5).  Add canned tomatoes, stir, and allow to simmer for a few minutes.
6).  Add wine, stir, and allow to simmer for a few minutes.
7).  Add chicken by standing pieces on their sides, larger side down.  I use a huge dutch oven and have to do this so they all fit.  They will displace liquid, which is what you want.  They should be about 3/4 or more covered.
8).  Add enough chicken stock so chicken is barely covered.
9).  Stir in the stock a bit, using a spatula, getting between the pieces so the sauce surrounds each one.
10).  Bring to a simmer.
11).  Transfer to preheated 350 deg. F. oven, uncovered.
12).  When liquid has evaporated such that chicken is jutting out slightly, baste top of chicken with sauce and cover loosely (with foil or with lid slightly ajar).  Should be about 30 mins.
13).  Place back in oven until chicken is cooked through -but not overcooked.  Check now and again and add a little more stock if you need to, and/or cover more tightly.
14).  Allow to rest for 10 minutes, uncovered.
15).  Skim fat with flat spoon and serve chicken with plenty of sauce.

Tri-color Peppers Stuffed with Quinoa

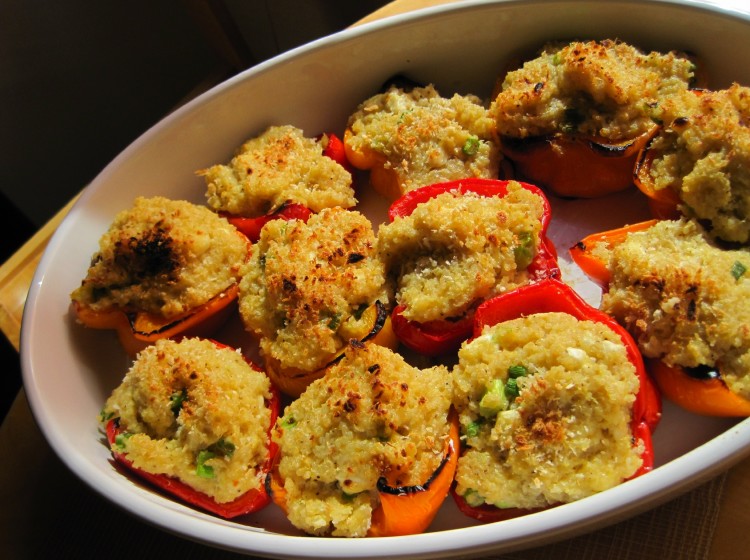
Peppers stuffed with quinoa stuffing in a white serving dish

Unless you’re six feet under, you’ll know quinoa is The New Big Thing – though this South American pseudograin is actually thousands of years old.

It’s fairly neutral and can stand in for white rice, for the most part, taking on the flavors of whatever it’s combined with.

Not only does quinoa have a goodly amount of protein, it contains essential amino acids, making its protein complete – which is quite something for a plant product.  Our bodies need a regular supply of essential amino acids, and usually get them from meat and dairy products or combinations of plant products.  If they are lacking, the body suffers from protein degradation, resulting in serious health problems.  Another little hitch is that the body cannot store EAAs.  If you eat meat and dairy on a daily basis, no problem.  If you don’t, you have to make sure you combine cereal grain and legumes (i.e., rice and beans) to get them into your system.  Having a food like quinoa available makes this much easier to accomplish.

There are also vitamins, minerals and fiber there, bumping quinoa to superfood status.

It looks kind of odd – like tiny grains of rice with tails.

Untreated, natural quinoa is coated with saponins, which not only taste bad, but are mildly toxic.  Most of the quinoa sold in the US has been pre-rinsed to rid it of of these saponins, but you should check to make sure that this is the case with whatever you buy.  I choose to subject any quinoa I purchase to a soak-and-rinse cycle, simply to avoid residual soapiness.

Now, what I don’t like about quinoa is that it loses its fluffy texture and gets somewhat mushy and sticky when you mix it with dressing, which is not the case with, say, cooked brown rice.  So, what I do is make the texture work for me by making stuffing.  The stuffing is then subjected to oven cooking, which dries it a bit.

The boys love this recipe, even though they’re not huge fans of plain quinoa.  Matthew most likely does not like it because he can’t stand couscous.  Steven, who knows?  When I mix in a bunch of other stuff, including feta – which is one of Matt’s faves – they may not realize that it’s quinoa in them thar sweet peppers with the crunchy crust.

Tricolor Peppers with Quinoa-Feta Stuffing
   Makes dinner for 3 or apps for 6

1 cup quinoa
2 cups water
1/2 teaspoon Kosher salt
1/8 cup walnut oil
1/8 cup olive oil
1/4 cup orange juice
1/8 cup fresh lemon juice
1/2 teaspoon onion powder
1/2 teaspoon white pepper
4 cloves roasted garlic, flesh squeezed out (you can press raw garlic and microwave – a few seconds at a time – to get faux roasted garlic)
1/4 cup toasted pine nuts
1 scallion, chopped
3/4 cup crumbled feta cheese
Sea salt (if needed)
3 large bell peppers (1 red, 1 orange, 1 yellow), cleaned, deveined and halved
3 tablespoons olive oil
1/2 cup panko (coarse bread crumbs)
2 tablespoons olive oil (or more – for drizzling on peppers before they bake)

1).  Follow instructions on your package of quinoa, or do this:  Soak quinoa in 3 cups cold water for 30 minutes and then drain through cheesecloth or a fine-meshed sieve.  Run plenty more cold water over it to rinse it well.  Move to saucepan with the 2 cups of water and 1/2 teaspoon salt and bring to a boil.  Cover and cook for about 15 minutes.  Remove cover and allow to sit for 5 minutes.  Grains should be translucent and the germ (tail) on each grain should have separated.  Move to a bowl and fluff with a fork.  Allow to cool about 30 minutes.
2).  While quinoa is cooling, whisk together oils, citrus juices, onion powder, white pepper and garlic.
3).  Fold dressing into quinoa.
4).  Rinse your chopped scallions (this will make them milder) and dry well.
5).  Fold scallions, pine nuts and feta into dressed quinoa.
6).  Check seasoning and add a little sea salt, if needed.
7).  Pour the 3 tablespoons of olive oil into a sheet pan and brush to distribute.
8).  Stuff each pepper half, distributing stuffing evenly.
9).  Brush a little of the oil from the bottom of the pan on the outside of the peppers (not the topping).
10).  Make sure peppers are evenly distributed on pan, and sprinkle each with panko.
11).  Drizzle a little olive oil on each pepper.
12).  Bake at 400 deg. F. until peppers have a little browning action.  Takes 30 – 40 minutes, but check to make sure they don’t burn!
13).  Broil for a few minutes if you want more browning on the top, but be careful!

Serve hot or cooled off on counter for an hour.  Very, very good the next day sliced on good bread with heirloom ‘maters and a little mayo.  Seriously.  This is why I make them.