I wrote this story about pickles for El Cerrito Patch in 2010, when it was a decent
publication. In recent years the stories I wrote for them have been turned into
“community posts” and have suffered from editorial errors that occurred after
their original publication. I have edited the story for those errors and updated it, where
necessary.
Make Your Own Pickles? Easy!
By Renate Valencia
Jun 14, 2011 (Updated Aug 3, 2019)
El Cerrito Patch
A final loop around the farmer’s market on a recent Tuesday morning had me running into a small mountain of perfectly ripe, dark green pickling cucumbers — which I snapped up.
Pickling cucumbers are squat with thin skin and lots of bumps, or “burps.”
I’ve made all kinds of pickles over the years, but particularly enjoy crafting two varieties: the naturally fermented, sour, salty, zesty and often garlicky Kosher-style dills of my New York City childhood, and tart, sweet, savory, onion-laced refrigerator bread & butter pickles. The former taps into food science through a lengthy battle between good and bad bacteria, and the latter is conventional, quick and easy.
Naturally Fermented Pickles
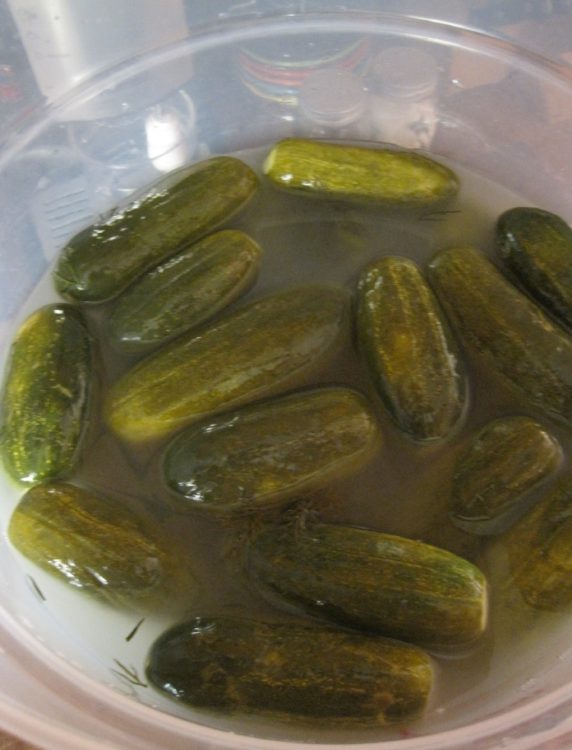
Lacto-fermented pickles get their sour flavor from lactic acid fermentation, not vinegar.
I make them in my garage, where temperatures during summer generally fall within the ideal range of 60°-75°F.
Freshly-harvested pickling cucumbers are added to brine — water and salt — with flavorings, like dill and garlic, and allowed to ferment at room temperature for a number of weeks. Brine is hostile to bad bacteria, allowing good lactic acid bacteria — like Lactobacillus — to thrive, digest sugars in the cucumbers and produce lactic acid. Lactic acid in turn helps fends off spoilage-causing bacteria and turns the cucumbers into pickles.
The brine has to be salty enough to give lactic acid bacteria an edge, but not so salty it doesn’t allow them to survive. Cucumbers are weighted down under the brine to keep them away from spoiler microbes that thrive on air, and the brine’s surface is monitored and skimmed of scum, mold and yeast throughout the fermentation process, though the use of a good airlock system— which does not allow air in — generally prevents much of this from forming if conditions are optimal.
Keeping air away from the brine cuts down on surface attacks, but carbon dioxide, a byproduct of fermentation (think beer) must escape, so the set-up can’t be airtight. I use a fermenting crock with a water lip that serves as an airlock, or a mason or other type of jar outfitted with an airlock system.
When the pickles are ready according to personal taste, pickles and brine are transferred to smaller containers and refrigerated.
This ancient dance involving salt content, pH, weather and air has made a comeback in recent years as part of real and raw food movements, so if you’re interested there’s a thriving natural fermentation community in the Bay Area. I suggest a hands-on workshop at a place like Happy Girl Kitchen, and some quality time with food revivalist Sandor Ellix Katz’s books, which include a wealth of information.
Mainstream home food-preservation experts generally advise adding vinegar to the brine and, after fermentation, canning to prevent food-borne illness, like listeriosis. Check out The National Center for Food Preservation, which includes the USDA guidelines, and the Ball Blue Book, often considered the bible of home food preservation, to begin to understand what drives these conservative approaches, which are at odds with traditional fermentation methods.
Home fermenters were happy to see this 2009 article in the San Francisco Chronicle, where USDA microbiologist Fred Breidt was quoted as saying, “With fermented products there is no safety concern. I can flat-out say that. The reason is the lactic acid bacteria that carry out the fermentation are the world’s best killers of other bacteria.”
Ironic, then, that canning is prescribed as a preventative to food-borne illness for fermented vegetables given the botulism risk, if not done properly. It’s important to remember that the invention of canning is what did traditional methods of preservation in in the first place, and that the persistent belief that modern science is always better has kept older methods at bay.
Still, natural fermentation has been undergoing such a tremendous resurgence that conservative guidelines have all but become irrelevant to enthusiasts.
Bread & Butter Refrigerator Pickles

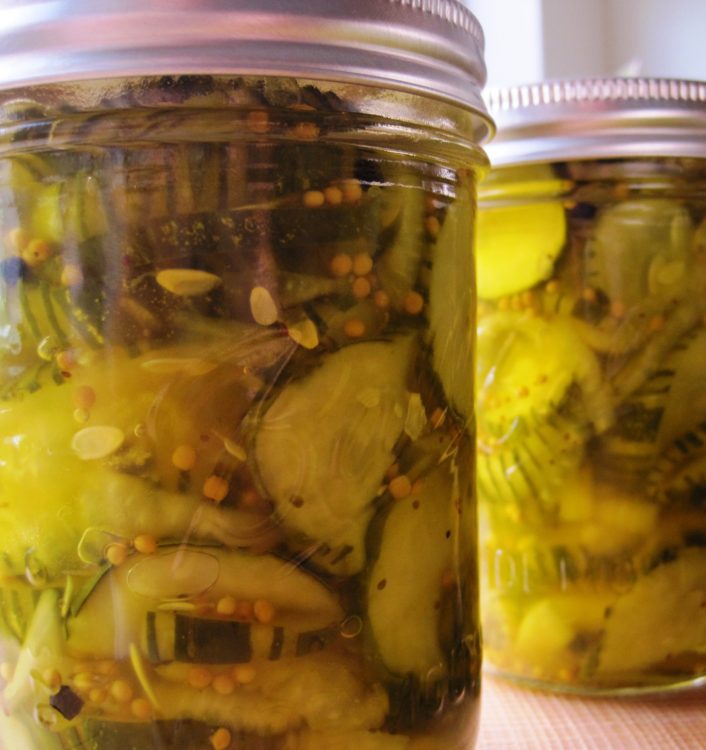
This quick-process, pickle chip-and-onion mix gets its tartness from vinegar, and is a great option if you’re looking for simplicity and near-immediate gratification. Plus, it’s delicious — I can’t keep up with demand.
Water bath canned, shelf-stable bread & butter pickles cure in their jars to a kind of mellowness, but the refrigerator version retains brightness and snap, and you can fiddle with the formula since you don’t have to worry about canning requirements.
The recipe below is a tart variation of the Ball Blue Book’s version.
For pretty chips, use a crinkle cutter — or run a citrus zester down the length of the cucumbers.
Make lots — you’ll need it.
- 4 to 5 pint-sized (wide mouth) mason jars with lids and rings — prepared per the instructions below
- 4-1/2 to 5 pounds pickling cucumbers
- 1 Vidalia or other type of sweet onion (should yield about 3 cups of thin slices)
- ½ cup Kosher salt
- 2 to 3 quarts ice cubes
- 4 cups white vinegar
- 2 cups sugar
- 2 tablespoons yellow mustard seeds
- 2 teaspoons celery seeds
- 1-1/2 teaspoons turmeric
- 1 teaspoon whole peppercorns
- Wash pickling cucumbers very well and trim off blossom ends
- Slice cucumbers into ¼ inch slices. You should wind up with about 12 or 13 cups
- Place cucumber slices in a large bowl
- Slice onion into thin rounds and mix into cucumber slices
- Mix salt into cucumber-onion mixture and cover evenly with ice
- Cover bowl loosely and leave out on counter for 2 hours
- Drain cucumbers and rinse very well. Allow to drain well while you make the brine
- Bring remaining ingredients to a rolling boil in a large saucepan and allow to simmer, covered, for about 5 minutes
- Add cucumber-onion mixture to hot brine and bring up to barely a simmer — not a full boil!
- Pack hot cucumbers into jars using a slotted spoon — leaving some headspace
- Fill jar with brine, leaving about ¼ inch headspace
- Remove large air bubbles and gaps with a bubble remover or skewer. It’s not absolutely necessary, but it helps make sure all the pickle chips are surrounded by brine
- Add a little more brine, if needed
- Wipe top of jar and threads with clean cloth and seal with lid and band
- Allow to cool to room temperature, label and refrigerate
Run the jars and rings through a complete dishwasher cycle or wash them in hot, sudsy water and then rinse them very well in hot water. Lids should be washed by hand and then dried carefully.
Other notes:
1). Use non-reactive kitchenware, like stainless steel, earthenware, glass or plastic
2). If you’re not using wide-mouth jars, use a funnel to fill them
3). This produces a very tart pickle; alter the recipe to your taste
4). Allow the pickles to cure for a day or so before you use them
5). If you followed the instructions, they should last, under refrigeration, for a few weeks
6). Never store refrigerator pickles anywhere but the refrigerator
