Tag Archives: fruit

Easy Chocolate-covered Strawberries for Valentine’s Day

Chocolate-covered strawberries ready to be served

Chocolate-covered strawberries ready to be served

I always make chocolate-covered strawberries for my family on Valentine’s Day.  My husband loves them, and they make my son feel better if he’s between girlfriends.

You can temper chocolate the traditional way, AKA the long way, but try the method described below.  It’s much easier.

If you want to be a little fancy, get your hands on some long-stemmed strawberries. Trader Joe’s has them for $6.99 per pound.  A little high, I know, but think of the occasion — it’s love, man!

You’ll need:

1# long-stemmed strawberries, gently washed and absolutely dry.  Trim the very end of each stem at an angle, and trim off brown leaves, too.

Silicone baking mat laid out on a cutting board or flat counter.

Glass, heat-resistant, 2-cup measuring cup, like Pyrex, with 1 cup good dark chocolate fèves (like coins) or pearls.

I use Valrhona Manjari (64% cacao), which I buy in a large bag at Spun Sugar in Berkeley. If you don’t want to buy fèves or pearls, get block chocolate and cut it yourself.

Another 1/4 cup chocolate.  You are looking for 1/4 the quantity of your original 1 cup to seed, or add to, your melted chocolate to bring the temperature down.

For this method, whatever quantity you start with, you’ll need another 1/4 of that to seed.

White nonpareils.  If you bake for the holidays, those shaker decoration sets often have them, especially Hanukkah versions.

A microwave.

A small wooden spoon.

A candy thermometer would be nice so you can check the temperature of the tempered chocolate, but you should be OK as long as you do not overheat your chocolate at the start.

The process:

1).  Melt chocolate at 20 second intervals at full power, stirring after each interval, until it is melted and shiny.  Do not, whatever you do, overcook it!!!

2).  Mix in your seeding chocolate little by little, stirring fairly vigorously.  This pulls down the temperature of your melted chocolate and allows the final product to set firmly and have a nice, shiny look.  Your tempered chocolate should be at a working temperature of about 89 deg. F.

3).  Dip each strawberry into the chocolate, largest first, and coat to about the 2/3 point and transfer to the silicone mat.  You should realize now why I told you to use a measuring cup.  It gives you height and you need less chocolate to do the job.  The thick glass also holds the heat nicely.  You may need to swirl the last few to coat, but that’s OK.  Work quickly so your chocolate does not set before you’re done.

4).  Sprinkle the top of the chocolate coating with a few nonpareils.  Just a few, and be careful, ‘cuz they travel and your wife/husband/partner won’t want to be picking them up for the next week.

5).  Allow to set about 45 minutes and then carefully peel the silicone away from under each strawberry (slowly — and don’t pull them up by their stems!) and move them to a nice serving dish.

6).  Eat soon, and do not put in fridge unless you must.  Chocolate does not like the fridge — you have been warned.
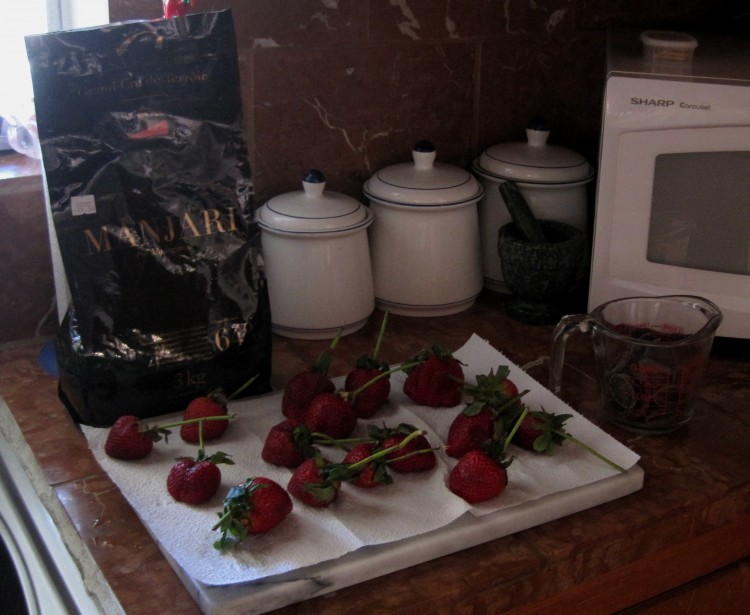
Terrible photo of set-up for chocolate-covered strawberries

Terrible photo of set-up for chocolate-covered strawberries

Strawberries coated with chocolate and nonpareils on silicone mat

Strawberries coated with chocolate and nonpareils on silicone mat
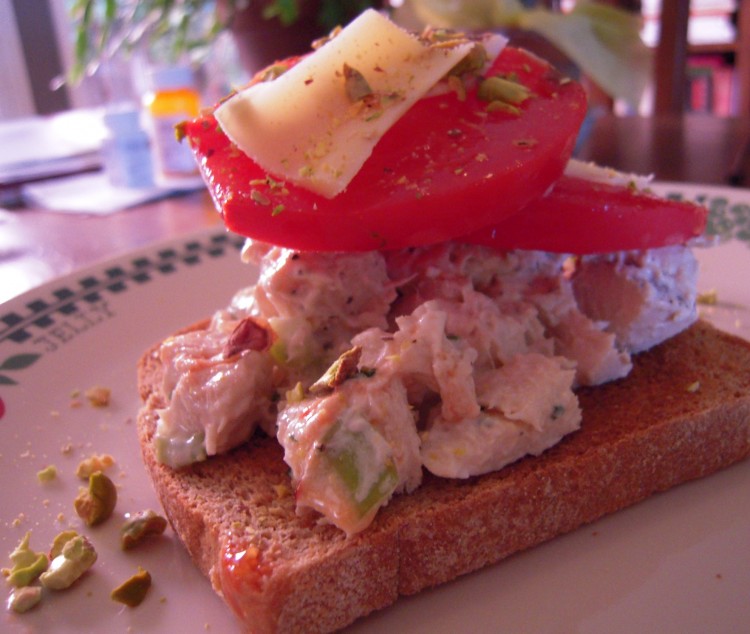
Heirloom Tomato Sandwiches Rock

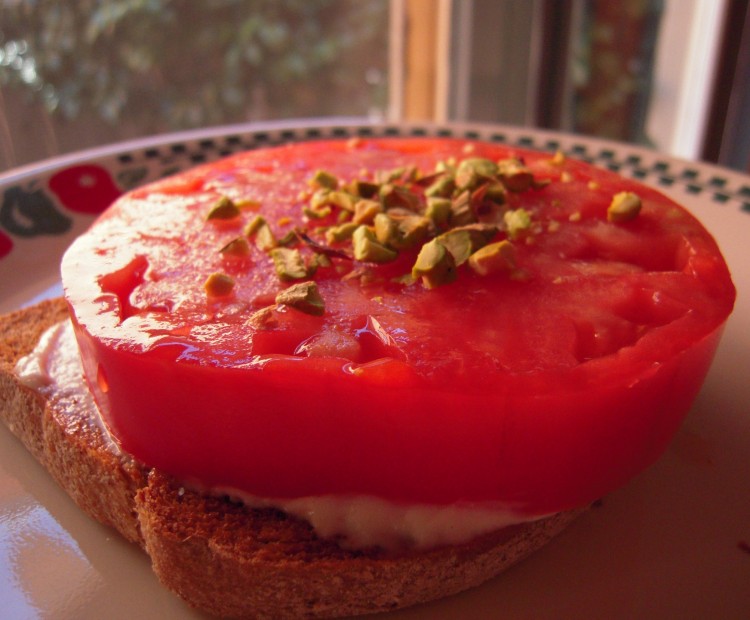
Heirloom tomato sandwich open face with crushed pistachios on top

I wait all year for that brief, shining portion of late summer that brings me luscious, flavorful heirloom tomatoes for about $2 a pound.  Big, red, Beefsteak types, like the Beefmaster you see in the photo, which weighed in at 19 ounces.

That time has come, and I was able to savor my first really spectacular tomato of the year – courtesy of Berkeley Bowl West, which is now full-up with heirlooms at a great price.

I think most of the tomatoes sold in the US are, well, crappy.  The only places to get good ones – and I mean with actual flavor – are the farmers’ markets and stores like Berkeley Bowl and Whole Foods.  Even those quality tomatoes can’t compare to these heirlooms, though, but the price is usually so high for the latter that I go for the former until this time of year.

One little hitch is my tomato allergy.  Since my problem is mostly with seeds, I’m able to eat fresh tomatoes in limited quantity, and I scout out less seedy types.  I’m glad it’s not one of those life-threatening allergies or I’d never make it through the next few weeks!

A great tomato needs very little.

When I was a kid, we’d buy huge Beefsteaks at roadside stands in Pennsylvania and New Jersey, and eat them like apples – by hand.  We always carried a little salt shaker in the car so we’d be ready, and would bring some back home to Queens, where we lived.  This is one of my strongest food memories, and eating a big red heirloom puts me right back in my parents’ car in a 1969 Sunday afternoon traffic jam on the Cross Bronx Expressway inching toward the George Washington Bridge in 90 degree heat – with the smells of melting tar and a basket of roadside tomatoes next to me on the back seat.

You need to go get a huge red heirloom and make a tomato sandwich with one big slice, like I do.

Tomato Sandwich

1 humongous red heirloom tomato with deep, sweet flavor
1 slice really good bread, like Vital Vittles Real Bread, toasted
1 nice tablespoon good mayonnaise
Sea salt
10 pistachios (I use Everybody’s Nuts Salt & Pepper version), crushed (put under plastic and rap with rolling pin)

1).  Cut a 3/4 inch (at least) center slice out of the tomato and store the rest for later.
2).  Spread mayo on toast and lay tomato slice on top.
3).  Grind a little sea salt on top of ‘mater.
4).  Sprinkle crushed nuts on top.
5).  Eat.

Here are other ideas for sammies with heirlooms:  chicken salad, a few curls of Emmentaler plus said ground nuts makes a good combo.  Fried fish, mayo and a little parmesan works, too.  Check this out:

Chicken salad and heirloom tomato sandwich

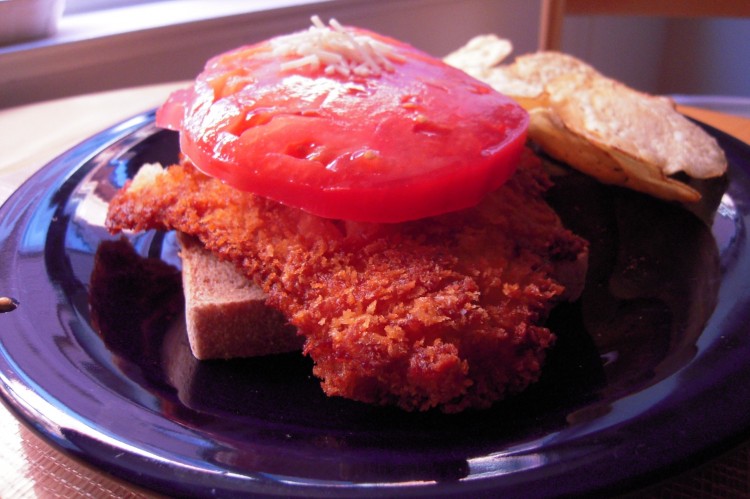
Fried fish and heirloom tomato sandwich

Savory Oatmeal for Dinner!

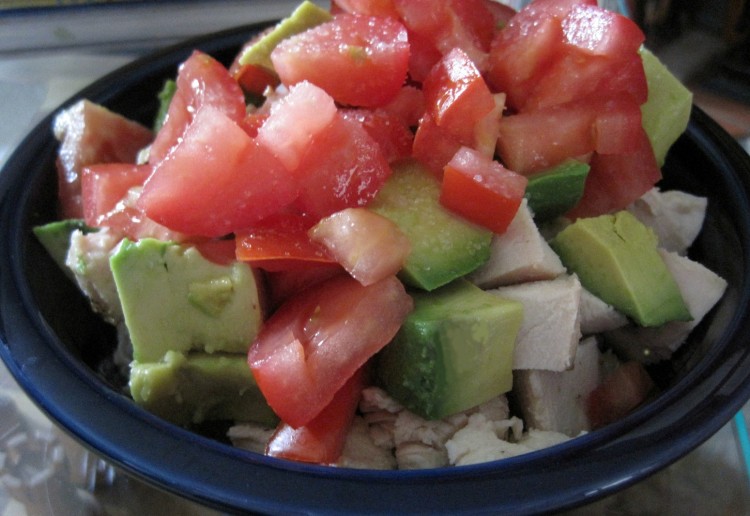
Does this look like a bowl of oatmeal? Well, it is!

Does this look like a bowl of oatmeal? Well, it is!

When I first came out with my savory oatmeal recipes, friends thought I was crazy.  Yeah – crazy like a fox.

The only reason people look at you like you have 35 heads when you serve oatmeal with ham and cheese is because it’s customary in the US to have it for breakfast – and to have it sweet.  Well, I don’t like it sweet.  And I don’t like it much plain.  Enter my plan to treat it like any other grain – which it is.

The one problem, if you can call it that, is the mushy texture.  No getting around that, but you can minimize it by using slow-cooking oats, and employing other ingredients that add some contrast.

The two recipes I came up with may be modified to your liking (and I encourage that!), but the oatmeal served with assorted toppings is best cooked only with chicken stock, and the version that includes cheese needs some milk and butter.  Makes sense, since the latter should turn out creamy.  You can use water in place of stock, of course, but it’ll be less savory.  Use a good, organic, low-salt stock if you don’t make your own.  A cheap, salty stock will taste terrible in this dish, so just…don’t.

Avocados are looking beautiful now at Berkeley Bowl, Whole Foods, Monterey Market and Raley’s, and I’ve even been able to get some decent tomatoes, so it’s a good time to try this frugal, healthy dish.  Just make sure to use high-quality, ripe fruit.  Don’t forget that avocados and tomatoes are both fruit!  Organic is best, if you can swing it.

I’ll give you the ham and cheese recipe, too, which you should try one rainy day.  It looks like you won’t have to wait until next winter for that, given the weather here in the Bay Area!

Don’t be put off.  My family loves this stuff.  My Mother-in-Law won’t eat it any other way, in fact.  You have to at least try it.

Oatmeal with Avocado, Tomato and Sea Salt
  
Serves at least 6 as a full meal

4 cups thick-cut oatmeal (not instant – the slowest cooking kind you can get)
2 quarts organic, low-salt, chicken stock
Pinch of salt
2 large, ripe, Hass avocados, cubed
2 large, ripe, good tomatoes, cubed
1/2 tsp. black pepper
Coarse sea salt

1)  Add oatmeal, pinch of salt, pepper and chicken stock to heavy guage dutch oven or similar vessel and stir to combine
2)  Bring to boil and then reduce to a simmer
3)  Cover and cook to desired consistency, stirring often, especially when the mass starts to thicken (I cook for 20 minutes when using the really thick oats)
4)  Spoon into deep serving bowls
5)  Top with avocado, tomato and a couple cranks of sea salt

Note that I sometimes add cubed, leftover chicken breast before the avo and tomato, as in the photo, but this is optional.

Ham & Cheese Oatmeal
   Serves at least 6

4 cups thick-cut oatmeal (not instant – the slowest cooking kind you can get)
1 quart organic, low-salt, chicken stock
2 cups milk
2 cups water
2 cups finely cubed cooked ham
3 tablespoons butter
1/2 tsp. white pepper
1 1/2 – 2 cups aged (or extra sharp, at least) white Cheddar cheese in small cubes.  Use good, natural cheese!

1)  Add oatmeal and all liquids to heavy guage dutch oven or similar vessel and stir to combine
2)  Bring to boil and then reduce to a simmer
3)  Cover and cook to desired consistency, stirring often, especially when the mass starts to thicken (I cook for 20 minutes when using the really thick oats)
4)  Stir in pepper, butter and ham and allow to cook for another 30 seconds
5)  Remove from heat and stir in cheese, but do not mix it in too much because you want to wind up with pockets of melted cheese
6)  Cover and allow to sit for a couple of minutes
7)  Serve in deep bowls under a couple of over-easy eggs, if you want to be fancy about it

Fried Sweet Plantains

fried plantains 5-10

reviewed Yardie Jerk in Oakland for GraceAnn Walden’s Yummy Report recently, which has me on a fried sweet plantain kick.

Sweet, soft and sticky fried sweet plantains taste almost like a dessert, and go very well with spicy grilled chicken or fish.  They’re good with pretty much anything or with nothing, when you get right down to it.

Plantains, or cooking bananas, are a staple in tropical countries and served multiple ways – kind of like how we use potatoes.  I love them – especially fried.  My Puerto Rican friends in New York used to make tostones for me when I was a kid.  Tostones are twice-fried plantain slices made from green (not ripe or minimally ripe) fruit.  The level of sweetness is dependent upon ripeness.

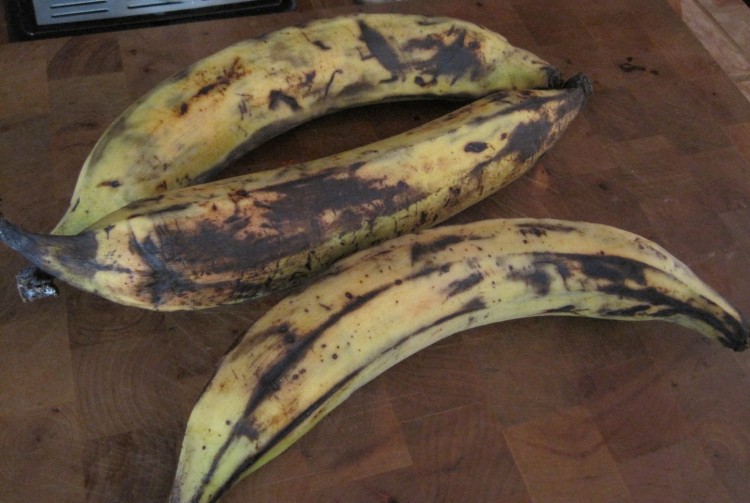
plantains 5-10

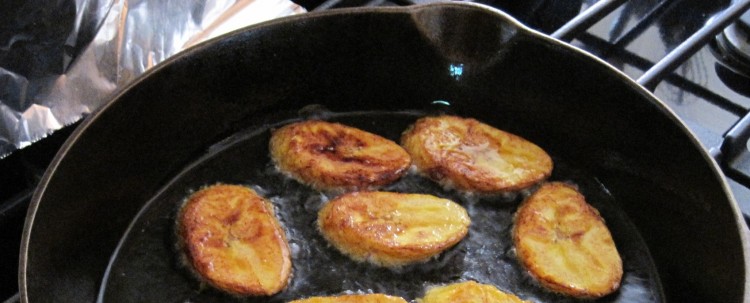
The plantains in the photo are getting nice and ripe, and, if fried slowly in oil that’s not too hot, will get you an exterior with a little texture, as in the photo at the top of this post.  Overripe fruit will turn out very soft and sticky, as in the photo of Yardie Jerk’s version, below.

Fried plantains from Yardie Jerk in Oakland, CA

Remember to fry slowly so the sugar caramelizes and you don’t wind up with something like chips, though they’re good, too.  It takes a little practice to deal with the oil.  If it’s way too low, though, you’ll wind up with greasy plantains, and you don’t want that.

Use a cast iron frying pan, if you have one.  The one in the photo at the top is an Erie skillet that’s over 100 years old.  Nothing, but nothing, sticks to that baby.  I like that people were frying things in there before my Grandparents were born, and here I am, with my plantains, in 2010.

Fried Sweet Plantains
   Makes a large plate

3 plantains, very, very ripe (they will have quite a bit of black)
1/2 cup olive or canola oil (you may need more, but this is a good start in a 9 or 10 inch skillet)
Sea or Kosher salt, for finishing, if desired

1).  Wash and dry plantains.
2).  Cut off ends and make a slit through the skin along the entire length, but try not to cut into the flesh.
3).  Roll skin off plantains.
4).  Slice (at a 45 degree angle) into approx. 1/2 inch lengths.
5).  Heat oil in your heavy skillet, but don’t get it too hot.  Test with one slice of plantain.  You want a little bubbling action but not a real sizzle.
6).  Add plantains to pan, but don’t overcrowd.
7).  Fry on one side until you have the color you are looking for, then turn over with tongs.  With overripe fruit you can get a nice, dark color.
8).  When done remove to paper towels and sprinkle a little salt on them, if you want.
9).  Fry remaining slices in batches in similar manner.

Costco’s chocolate-covered caramel apple

Costco's new chocolate-covered caramel apple

Costco’s new chocolate-covered caramel apple

I like plain sweets and have a fondness for soft caramel, so when I saw this choco-covered Granny Smith caramel apple at Costco last week I almost swooned.

There is no way I was not going to buy this thing at least once, in the hope it would be everything Mrs. Prindable’s could be if they made their apple products with higher-quality coatings:  pleasantly sweet and bitter from the chocolate, soft and creamy from the caramel, and crunchy and tart from the green apple.  When this combination is done right it’s the perfect grown-up caramel apple.

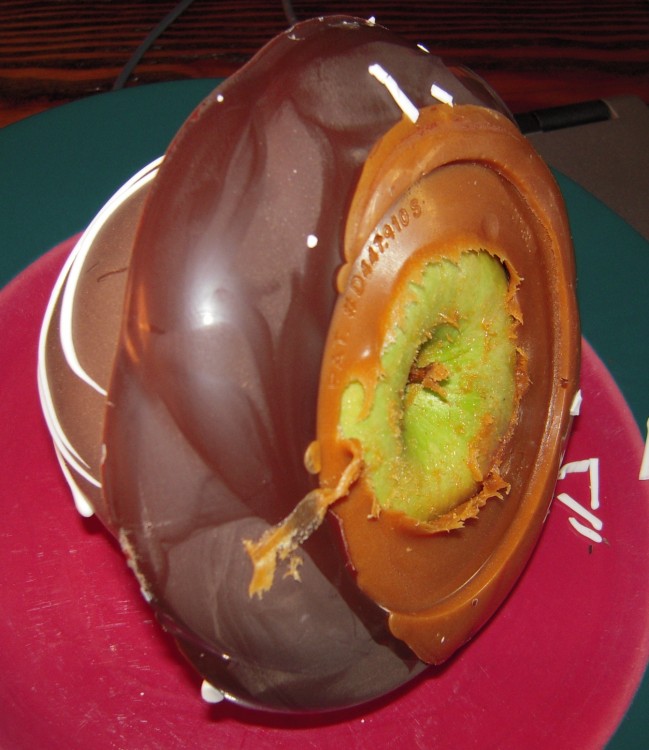
The bottom of Costco's chocolate-covered caramel apple

The bottom of Costco’s chocolate-covered caramel apple

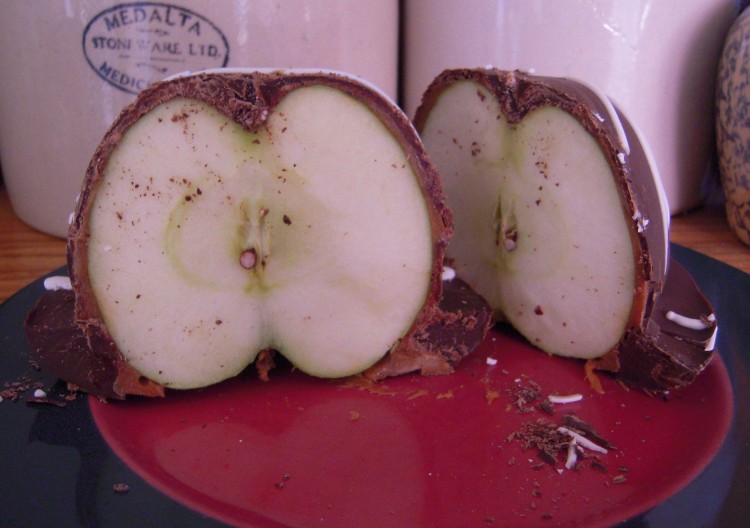
This is a large enrobed apple presented in a domed container; mine weighed in at 14 ounces.  The chocolate and caramel pooled during production, providing a thick ring of goodness – as the photo above shows.   Upon further inspection I found that the caramel was, indeed, quite soft, putting any fears about fillings and crowns to rest.  It sliced easily while retaining integrity.

Costco's chocolate-covered caramel apple cut in half

Costco’s chocolate-covered caramel apple cut in half

In terms of flavor, texture and overall impact, this is a winner.  The apple was fresh, crisp and tart.  The chocolate of a decent quality and not overly sweet.  The caramel creamy.

While there was some caramel around the entire apple, I wished that layer was a bit thicker, but I have no real complaints.  This is a very, very good product and I will purchase it again when the craving strikes.

Well worth it at $5.99.