Tag Archives: vegetables

Comfort food for Jon

biscuits in a sheet pan ready to eat

Jon is moving to Santa Barbara tomorrow, so I thought I’d make a fancy breakfast for him this weekend.  I had gotten a hold of a small organic ham last week, which I roasted next to some oven home fries, made by dicing taters, tossing on a sheet pan with plenty of olive oil and some S&P, rubbing them all around, and then roasting in a very hot convection oven. 

Oven hash browns in blue dish

Oven hash browns/home fries

 I perpetrated buttermilk biscuits and sausage gravy, too.  Making sausage gravy is easy and provides great comfort.  You need:  some kind of sausage – any kind without anise, so don’t use Italian.  Cooked is OK, raw is OK.  I use about a pound.  If raw and with fat, i.e., breakfast sausage, brown in a heavy gauge saucepan and, when done, add butter so you have about a half a cup of fat.  If you use raw sausage meat with no fat, like that horrible turkey sausage, brown in a 1/2 cup of canola oil or butter — but butter is better.  If you have cooked sausage, cut into little cubes and fry in said quantity of butter.  Add 1 tablespoon of some combination of ground thyme, rosemary and sage.  Continue to fry for a moment to open up the dried spices.  Toss in a bay leaf or two.  Add some Kosher salt and pepper – quantities depending upon  how salty the sausage is.  Add 1/2 cup or so of AP flour – stirring it in so you have a soft roux, adding more fat if the mixture is too dry.  Don’t brown the roux – keep the flame very low but be sure to cook out the raw flour.  Warm 5 – 6 cups of milk (fat free is fine, but if you use fat free everything you will strangle all the comfort out of the dish) in the microwave.  Add the milk to the roux slowly while stirring with a wooden spoon.  I find that adding it in increments that are blended in completely cuts down on lumps.  Cook to just bubbling over lowest flame, stirring frequently.  Note that this will keep getting thicker, so if you plan on heating it up again to serve later, make sure you under-thicken it ever so slightly the first time around.  Serve this hot mass over toast or split biscuits.  At the last minute I made eggs to order for the group in my new GreenPan.  Yes, it does not stick at all when you use a little oil, but it does stick a bit if you don’t.  Eggs are the ultimate test of a pan in this regard. 

Jon and Matthew diving into a comforting breakfast at the dining table

4th of July 2008

grilled ribeye steaks on a plate

HAPPY INDEPENDENCE DAY!  We grilled ribeyes today.  Ribeyes be fatty and flavorful and good.  Since it’s a holiday, we went for the gusto.  I purchased a prime rib and cut the steaks myself.  Stupidly, I waited too long and was not able to find a bone-in cut, which I prefer for steaks.  Coarse salt and pepper and the Weber. 

roast caulifower in a blue speckled dish

We wanted something kind of light for the side dish, so I consulted The Best of America’s Test Kitchen 2008, which arrived the other day, and latched onto the roasted cauliflower recipe (p. 12).  One piece of advice:  if you have convection, use if for the last two legs of the roasting process.  The cauliflower turned out great – nice and brown and not bitter.  The yogurt sauce accompaniment was a hit, and would work for many other things – even scrambled eggs, I think.  Just so you know, Cook’s Illustrated is a great bimonthly publication.  It’s part of the America’s Test Kitchen megalopoly, and focuses on perfecting and reinventing classics and popular current dishes.  This is the one food magazine I pay for. 

dip for roast cauliflower

At the end of the year they send you said “best of,” which keeps you from having to clip so many recipes.  I have never been steered wrong by these people.  Matter of fact, yesterday I made the fudge (p. 59) for a party Matt was going to today, since I had on hand several cans of sweetened condensed milk, a couple of pounds of chocolate from my 2007 Christmas candy making, as well as many, many walnuts.  I never much liked fudge, finding it grainy and unpleasant, but I trusted ATK enough to give it a go.  Honestly, this was the best fudge I ever ate.  It was like a lighter ganache – and not so sweet.  The fact that I used a fancy Valrhona varietal helped.  I will be making this again.

the best of america's test kitchen 2008 cover

Roasted tri-color peppers

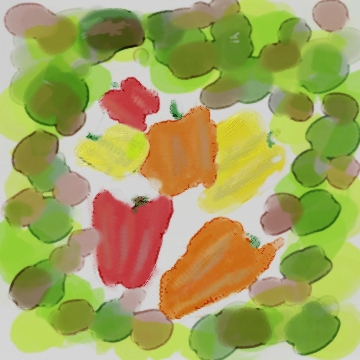
Digital watercolor of red, yellow and orange peppers

I’m still in a roasted pepper state of mind.  I want to be sure to have my fill while the yellow, red and orange are available in those megabags at Costco.  Remember to roast the hell out of them on a grill or in a convection oven or over an open flame, plop into a Ziploc bag for an hour, skin and seed ’em (the skin will have steamed loose rendering the peppers easy to peel.  Wipe the seeds off with a paper towel if they’re stubborn.  Tear into large strips and arrange nicely.  Use the juices in the plastic bag to make a dressing with olive oil, salt and pepper and a small quantity of fresh lemon juice.  Pour over peppers and shower on some shaved Parmigiano Reggiano.  (Remember one of the cardinal rules of cooking:  when there are few ingredients they need to be of quality).  Serve at room temperature and then store the rest in the fridge for later use on sandwiches.  Man, so good.

Roasted peppers

roasted tricolor peppers 5-18-08

I promised to provide a good recipe for roasted peppers, so here you go.  I use the pack of 2 red, 2 yellow and 2 orange from Costco, since they provide a pretty result with different flavors.  Jack up your oven to 400 F. convection, if you have it.  Place your peppers on a sheet pan and slide into oven.  Using long tongs, turn them over now and again (like every few minutes) so they darken and cook evenly.  When they are nice and brown — and they don’t need to be a solid brown, rather they should have lots of brown spots that are evenly distributed — take them out and pop into a couple of large Ziploc bags that are completely sealed.  You are harnessing moist heat here to cause the skins to pull away from the flesh.  Put the bags in bowls in case the heat causes them to open a bit, which happens often, so that you catch the natural juices, which you want to reserve for the final preparation.  After about an hour, take out the peppers, one by one, and slip the skins (which should be loose) off.  Pull the stems off and gently tear the pepper to open it and push out the seeds with your fingers.  Don’t rinse them, rather use your fingers to get all the “bad” things off.  If you rinse them, you’ll ruin the flavor and texture.  I never cut these peppers, just tear them into large strips and arrange them on a plate right then and there.  When all arranged on a serving plate go ahead and pour the pepper juices over the top.  Sprinkle some sea salt and black pepper over the top.  Finish with a drizzle of excellent olive oil.  What you don’t eat just save in a plastic container for sandwiches.

Salmon in parchment

Salmon fillets in parchment packs ready for the oven

Salmon fillets in parchment packs ready for the oven

Salmon fishing on the West Coast will be drastically reduced soon, so I made some tonight as sort of a “last hurrah,” since I won’t be buying it much if it goes significantly up in price.  As a nod to lighter fare I cut a side into smaller fillets and then baked them en papillote — in parchment paper.  You can, too.  Cut folded parchment sheets into hearts which, when opened, exceed the area of the salmon – which should be placed flat on one side of the heart – by about two inches.  Be sure to salt and pepper the fish first, and then add to the top some fresh herbs or a slice of orange.  Whatever you like.  Then fold the salmon-less side of your parchment heart over the top of the salmon and start sealing the packet, tucking the two layers of parchment under, beginning at the top.  When you reach the point at the bottom of the heart you need to do a “tuck under” with your last “fold ‘n crimp.”  Bake them on a sheet pan at a preheated 350 F. for no more than 15 minutes or so for 5-ounce fillets.  It depends on your oven, but if you dry them out you’ll be really sorry.  Make an x-shaped cut in the parchment with a sharp paring knife without getting a steam burn and serve in the paper with sides.

tomato feta salad

The really fabulous thing about this meal was my famous tomato-feta salad – always a hit here.  This is so easy to make, but relies on one expensive ingredient:  hazelnut, almond or walnut oil.  In my opinion you should have one of these on hand at all times to add a little special zip now and again.  A few rich ingredients like this allow you to pull off some classy last-minute meals.  Costco sometimes sells these oils in trio packs for about $17, and you can keep them for about two years.  I don’t care what anyone says, when I store mine in the back of the fridge I have seen no rancidity for 24 months; my fridge is at a steady 37 F.  What you need to have on hand is:  good tomatoes cut into eights.  Feta cheese – the real thing – in small cubes.  Use about 1/3 of the volume of your tomatoes.  Orange juice.  Lemon juice.  Onion powder.  Sliced red onion – as much as you like, but not too much.  Whole Calamata olives, which you can buy without pits in a jar, if you don’t want to deal with pits.  Use the same volume of olives as you do cheese.  If you buy a huge jar at Costco (where else?) it’ll keep for ages.  One of the oils I mention above.  Salt and pepper.  Make a vinaigrette out of the oil and orange juice by simply whisking them together, using proportions you like but heavier on the oil, something like 1/2 cup oil for every 1/4 cup OJ.  Add a splash of lemon juice and a shake of onion powder.  Whisk again.  Salt and pepper to taste.  Whisk.  Correct seasoning and oil/acid ratio.  Whisk – whisk – whisk.  Set aside.  Mix the rest of the stuff gently in a large bowl.  Add as much dressing as you like, reserving the rest for future use.  Toss gently and allow to sit at room temperature for a half hour before serving, but pop in the fridge if it’ll be longer.  You will not believe how good this salad tastes.

I also roasted some French string beans (yes, this is a no-no and you should only roast big, bad string beans, but I was dealing with leftovers and had to do something different).

roasted green beans